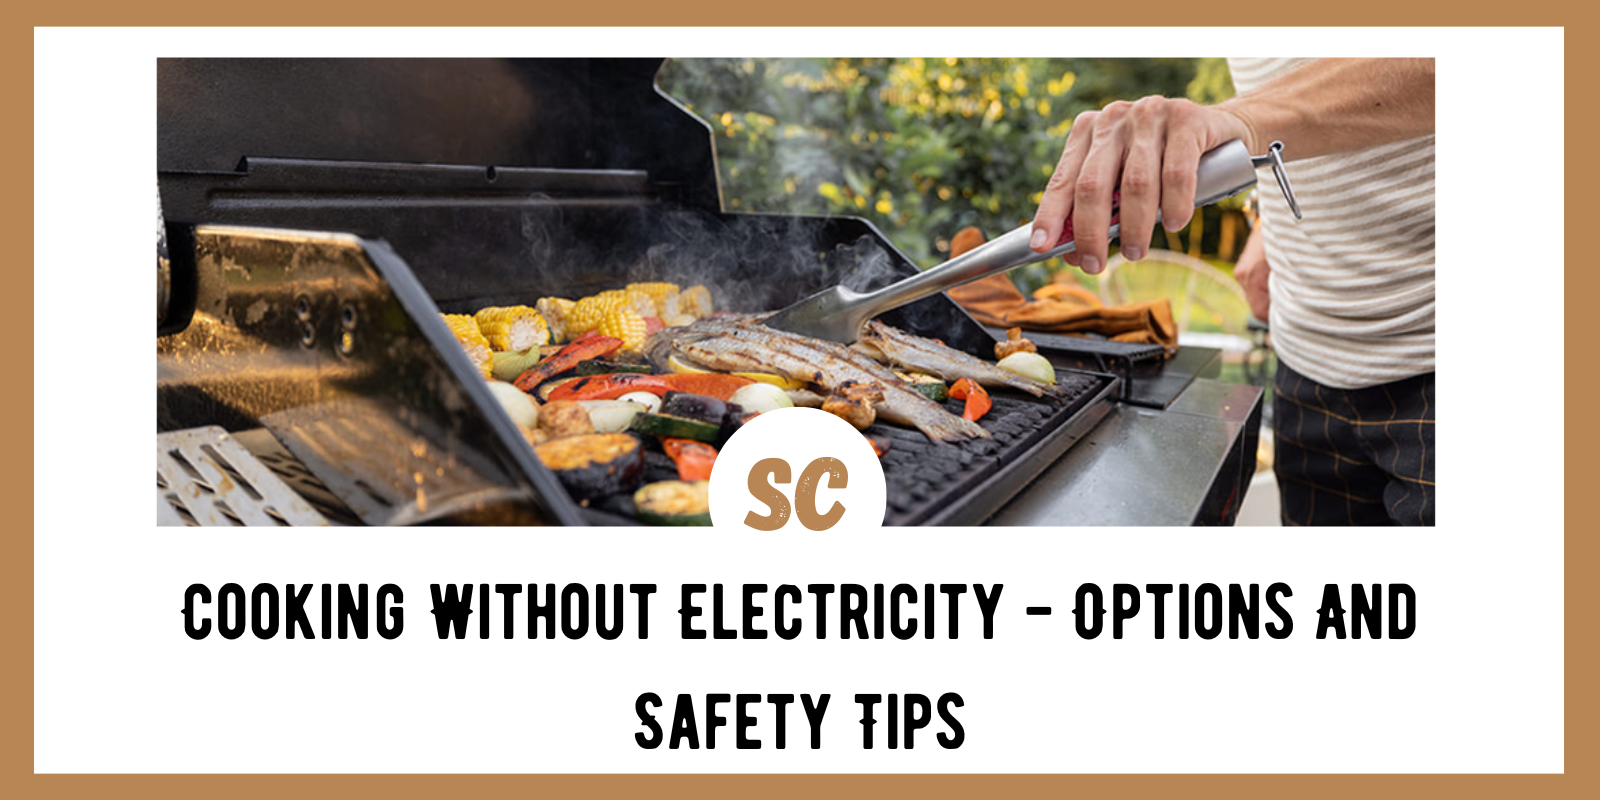
With all of our modern conveniences in the kitchen, such as electric stoves, microwaves, air fryers, and toasters, it can be difficult to imagine cooking food without electricity. However, for much of our history, humans have gotten by just fine without it.
You may be asking yourself, “Why would I want to give up those conveniences?”
Well, you don’t have to, but it would be a great idea to know several different alternative cooking methods and practice using them. You may need the knowledge and supplies for these methods due to a power outage, an appliance breaking, a survival situation, or if the grid goes down for an undetermined amount of time.
For these reasons, I’ve put together a list of 20 ways to cook without electricity. Many of these methods are “old school” in nature but incorporate modern materials to make the process easier and more efficient.
In this article, I’ll break down:
- Different types of heating
- 20 options to cook food without electricity
- Which materials you need for off grid cooking
Before jumping into all the ways of how to cook without electricity, I think it’s important that we first go over some safety tips and different forms of heat.
SKIP AHEAD
Safety Tips
Avoid Carbon Monoxide Poisoning
Carbon monoxide is produced when burning biomass like leaves and wood, and fuels like gasoline, natural gas, coal, deiseal and kerosene. Without a proper source of ventilation, carbon monoxide can build up, causing serious health issues and death.
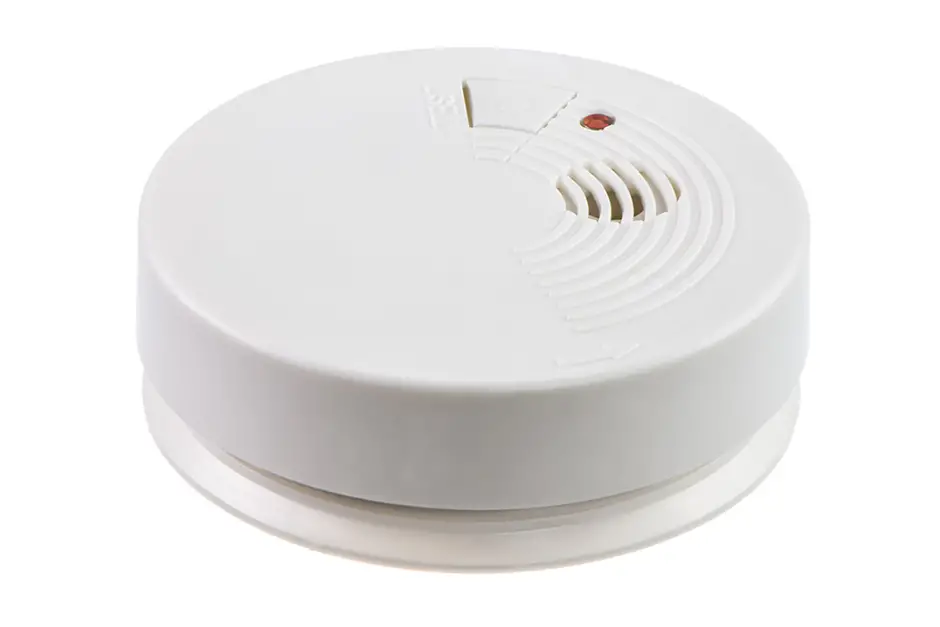
Carbon monoxide poisoning is so dangerous because you cannot see it or smell it. This is why a smoke and a carbon monoxide detector are a must if you cook indoors. These detectors should be battery operated and not tied into your electrical system, just in case your home loses power.
Some of the cooking methods in this article can be done indoors if a proper ventilation system is installed, but the safest course of action is to only use them outdoors.
Secure The Heat Source
This is primarily directed towards using an outdoor cooking stove. It’s easy to set a stove down on an uneven surface such as the ground, a rock, or a log. But if a heavy or unbalanced pot is placed on top, the whole thing can tip over.
Not only is this a hazard for starting an out-of-control fire, but many campers have burned themselves this way from the heat source or by the spilled hot liquid or food being cooked.
When setting up a heat source, make sure it is secure and on a level surface. The same goes for the cookware being used on the heat source.
Fire Safety
Always keep fire safety in mind before starting a fire or any type of heat source:
- Choose a safe area to have a fire. This means no flammable material hanging overhead or close to the heat source. Clear any and all flammable material away before lighting up.
- Don’t have a fire in excessively dry areas or on windy days. It’s absolutely amazing how much destruction can be caused by one ember that gets away. Millions of acres have been burned by wildfires that have started this way.
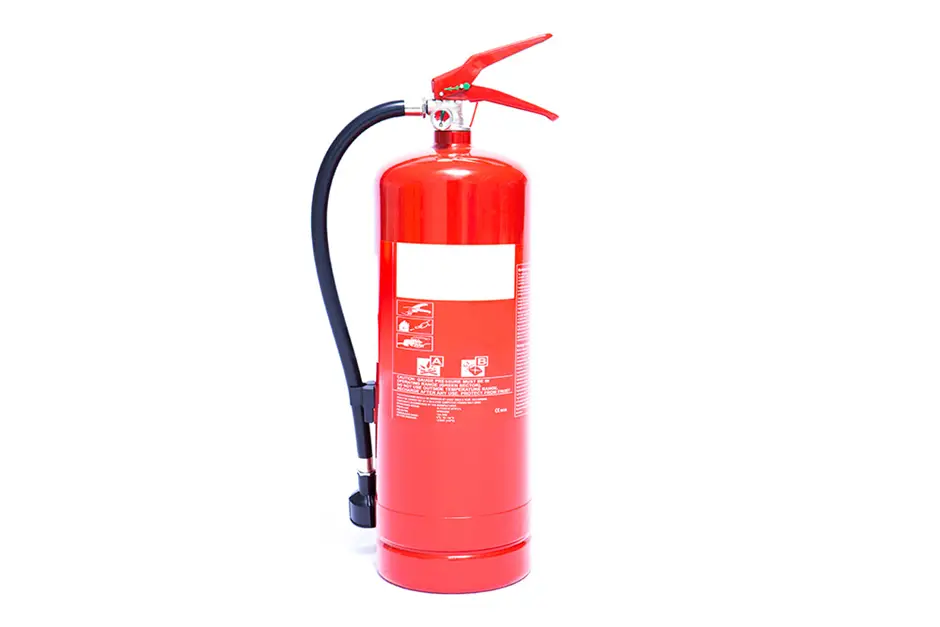
- When possible, always have a fire extinguisher nearby. If you don’t have access to a fire extinguisher, then have several containers of water or soil that can be thrown onto a fire. Fire retardant blankets also work well for putting out small fires.
- When you are done cooking or with the heat source, always be sure that the heat source is fully cooled, or the fire is completely out before packing up and leaving the area. Many people throw some water onto a campfire and leave without checking it.
There are two things you can do to check if a fire still burning or if it is out:
The first is to check for smoke. There is an old saying, “Where there is smoke, there is fire.” Even if there are no visible flames, if there is smoke then embers are still burning, and they need to be extinguished.
Secondly, if you don’t see any smoke, you should kneel down next to the fire and hover your hands above the coals. If you feel residual heat, then there is a chance the fire could flare back up. Turn any unburned fuel over and pour additional water onto it.
Additionally, pour water into the fire area and use a stick to stir the watery ash and coals around. Stirring this mucky paste around will help to further extinguish any hot areas.
Don’t Burn Treated Wood
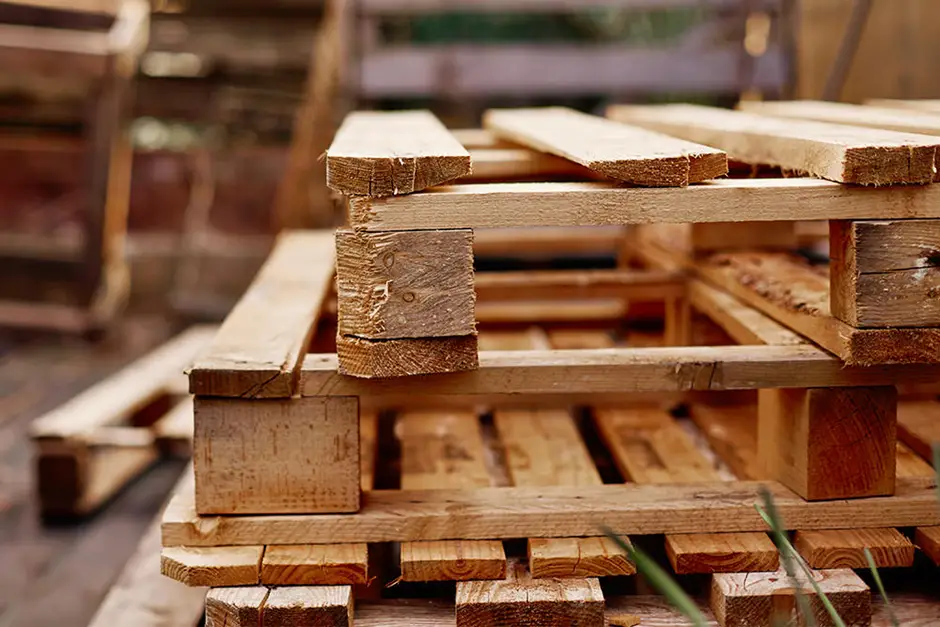
I have known a few people that have had access to scrape treated wood, and they use it in their backyard fire pits.
Examples of this would include but not limited to pallets and wood used in home construction. This type of wood is often treated with various chemicals to make them stronger or less susceptible to moisture and insects.
Burning this type of wood is not a good idea because the fumes are toxic to breathe in or to consume when it is absorbed into food that is being cooked over it. This principle also applies to some natural materials that people might burn, such as poison ivy. Know as much about your fuel source and its effects before you start burning!
Different Forms of Heat
By knowing the different forms of heat, you will have a better understanding of the alternative cooking methods listed in the next section, and you may be able to come up with your own methods.
Below are three different ways heat is transferred and a brief definition of each:
Conduction

This is the transfer of heat by direct contact, such as placing a pot on a kitchen stove burner.
For example, during a power outage some people use outdoor butane stoves for emergency cooking or a gas stove.
Convection

This transfer method of heat uses a fluid such as water or air. A good example of this is using a hair dryer to dry your hair or a convection oven that uses hot air to heat food.
Note: A convection oven won’t work during a power outage.
Radiation

This transfer method of heat uses electromatic waves, like a microwave or the heat you feel from the sun or a lightbulb.
Note: Radiation from the sun can be used for solar oven cooking.
19 Ways To Cook Without Electricity
I know that I went on a little bit about the safety tips, but they are super important to keep in mind – especially for those that may not have much practice in using alternative heat sources outside of their kitchen.
Now that we have some safety tips in mind and know a little more about how heat is transferred, we can get into the meat and potatoes (I’m never sorry about puns) of ways to cook food without electricity.
1. Barbecue Grills

Using barbecue grills is going to be one of the easiest solutions for you, simply because you probably have one and are familiar with them.
There are two basic types: charcoal grills and gas grills, and they both have their pros and cons.
Charcoal grills are basically a metal tub that holds charcoal so that food can be cooked on a grill over it. However, if you don’t have any charcoal, other biomass can be used as the fuel.
Personally, I like charcoal grills better because they make the food taste great, they come in different sizes (even the large ones are lightweight and portable), and they are super affordable.
However, charcoal grills are dirtier, they take some time to warm up, and temperature regulation can be tricky.
Instead of using charcoal, a gas grill uses – you guessed it – gas like propane.
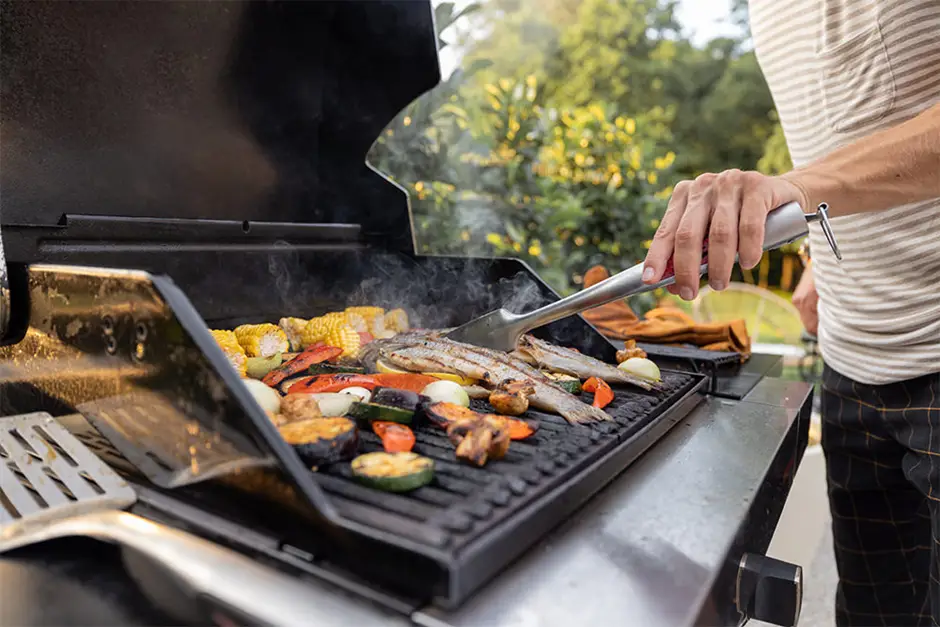
A gas grill may be more comfortable for you to use because it’s very easy to operate and works very similar to the stove in your home.
Gas grills heat up quickly, are cleaner, easier to use, cool down quicker, and you have more control with regulating the temperature.
However, gas grills are more expensive, dependent on a fuel tank, and they are not as portable.
2. Fire Pit

In my opinion, nothing beats cooking food over a campfire with an open flame. It is one of the oldest and probably most-used methods for cooking food in our history because it is so simple.
Once you have chosen the shape and size of your fire, food can be cooked on sticks, racks, in cookware, and even directly on the coals themselves.
Popular cookware to use for outdoor cooking are cast iron Dutch ovens, which is a heavy-duty pot with a lid, as well as other cast iron cookware for open fire cooking.
There are a ton of different options when it comes to the kind of fire you make and the cooking methods or cookware that is used over the fire. Seriously, I could easily write a whole other article on the topic (I think I just made more work for myself!).
3. Multi-Burner Camp Stove
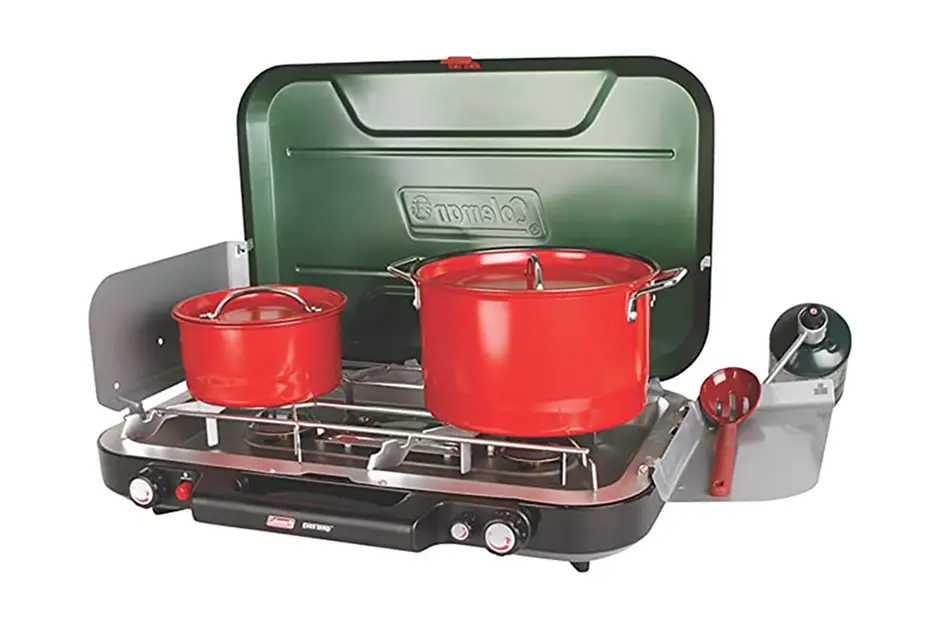
You can think of a camp stove like miniature version of the stove in your kitchen. They have at least two burners and can either be butane stoves or propane stoves, depending on what kind of fuel canister you get.
These types of stoves are highly portable because they are lightweight. And since most of them fold up, they are also compact which makes it easier to store them when not in use. To make transporting them easier, get yourself portable cooking bags that can hold all of your supplies.
As long as the stove is put on a level surface, their flat bottoms make them very stable, so you don’t have to worry about cookware tipping over.
Like propane barbecue grills, most people would be very comfortable using this option because they are so similar to a kitchen stove. Also, since they have their own self-contained fuel source, you won’t have to worry about constantly feeding it biomass for fuel.
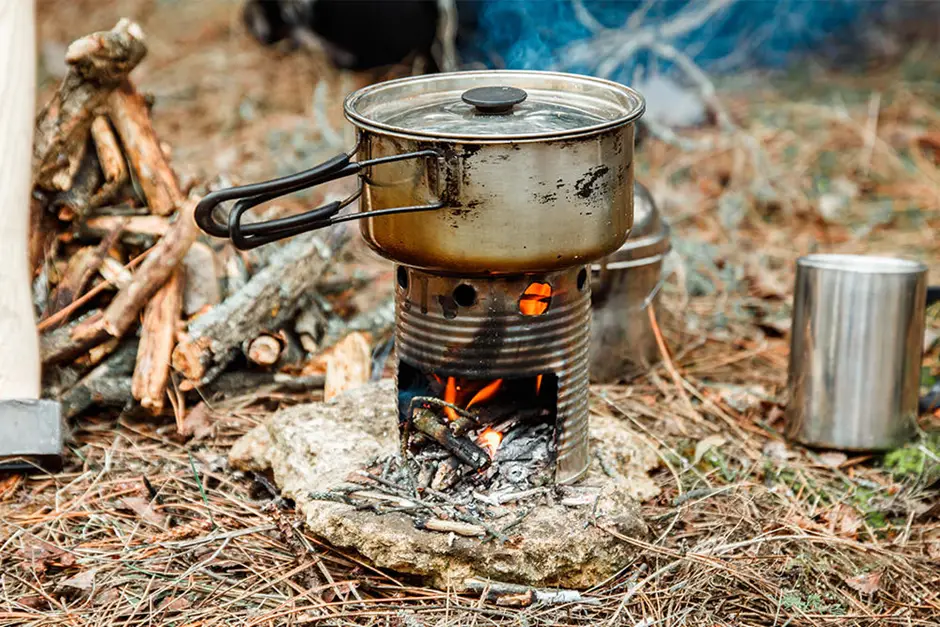
4. Rocket Stove
This type of stove has a very simple design, but is highly efficient which makes it burn hotter than a regular campfire. This means you can heat food much quicker and produce less smoke.
It really only has two parts to it, an elbow towards the base and a chimney. Biomass is fed in through the elbow and the fire rises up through the chimney. As the heat rises it pulls in extra oxygen from the elbow which allows the fire to burn hotter.
These come in all different shapes and sizes, some of which you can buy. Or you can learn how to easily and cheaply make your own by clicking this easy to follow 16-Step Walk Through Guide
5. Kelly Kettle
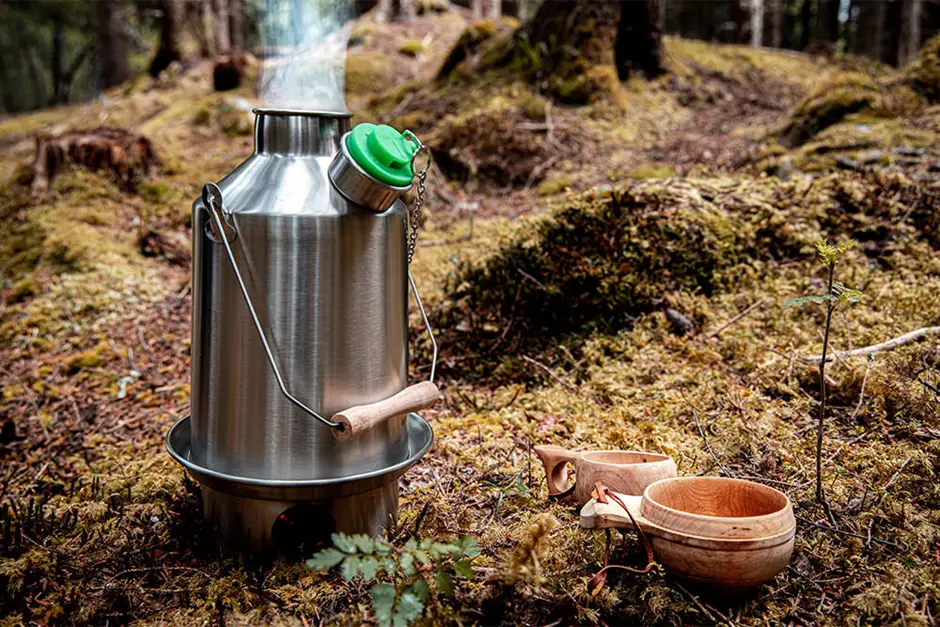
A Kelly Kettle is another type of rocket stove, but it is more versatile. This is because the chimney – which is more than just a chimney – can be removed from the base.
The chimney is actually a kettle, and when it is placed on top of the base, it can boil water very quickly.
After boiling your water, the chimney can be removed, and an assortment of accessories can be used to cook over the base.
This has been one of my favorite stoves to use for years, and you can find out a little more detail about it by checking out the Best Survival Stoves Review: 4-Hands On Reviews
6. Solo Stove
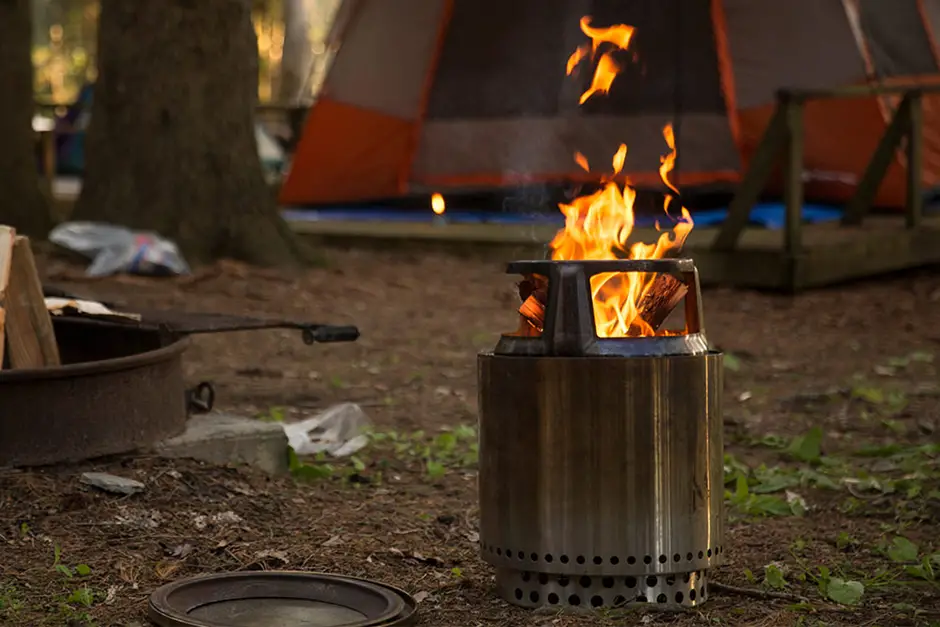
The Solo Stove is another one of my favorites, and while it doesn’t look like a rocket stove, it uses a similar process.
Biomass is placed into the center of the stove and ignited. The holes at the bottom help to circulate air which is then super-heated towards the top. This produces a much hotter fire and very little smoke.
As you can see from the picture, the stove isn’t all that big, but don’t let that fool you. It’s sturdy enough and puts out enough heat that I have used this stove with a cast iron pan sitting on top of it.
For a more in-depth review on the Solo Stove, check out Solo Stove Lite Review (2021): Is this A Good Survival Stove?
7. BioLite Camp Stove

BioLite has been around since 2006, but I am a fairly new user seeing that I first tried one of their camp stoves just two years ago.
The round silver section is the stove, and at first glance it kind of looks like a lot of outdoor stoves. But what sets the BioLite apart from others is that it uses a thermo generator to store energy in an on-board battery.
This energy is used to power a small fan which keeps a constant flow of air circulating through the stove, which produces a very hot fire. The stored energy can also be tapped into via a USB port or charge small devices.
Once you get some biomass collected and ignited, it doesn’t take long for the fan to kick on, and you can start cooking food or boil water and create your own power at the same time.
For a more in depth look at this stove, check out our article, BioLite CampStove 2 Review
8. Alcohol Stove
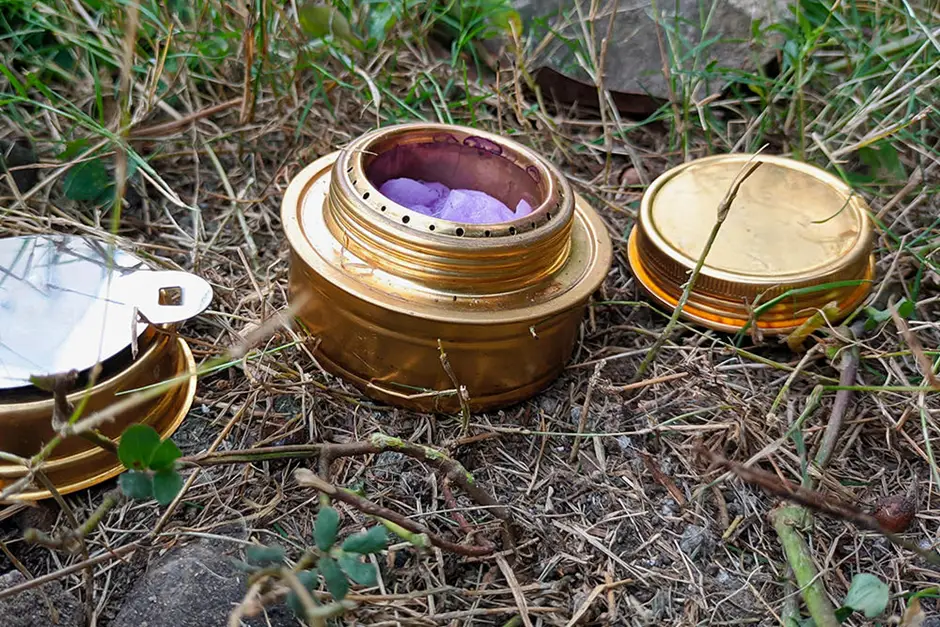
Alcohol stoves are a pretty simple device that can be improvised from a lot of different materials. They are basically nothing more than a canister filled with high proof alcohol. A support system is then setup above it where food or liquids can be cooked.
These stoves are very lightweight, compact, usually burn clean, a variety of fuels can be used, and to extinguish them simply place a cover over the stove to snuff it out.
For a more in depth look on how to make your own alcohol stove, check out DIY: Beer Can Alcohol Stove
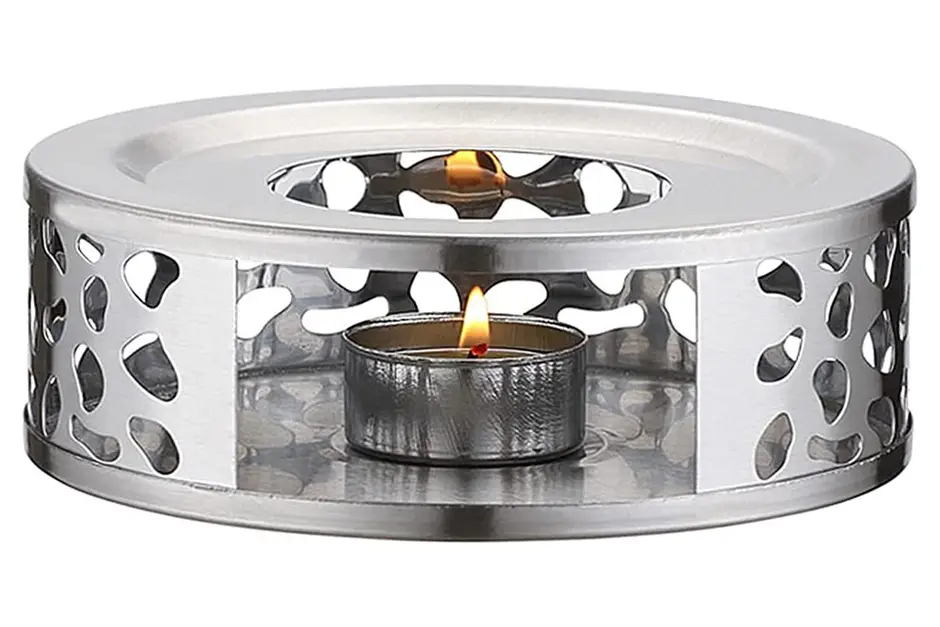
9. Sterno Cans
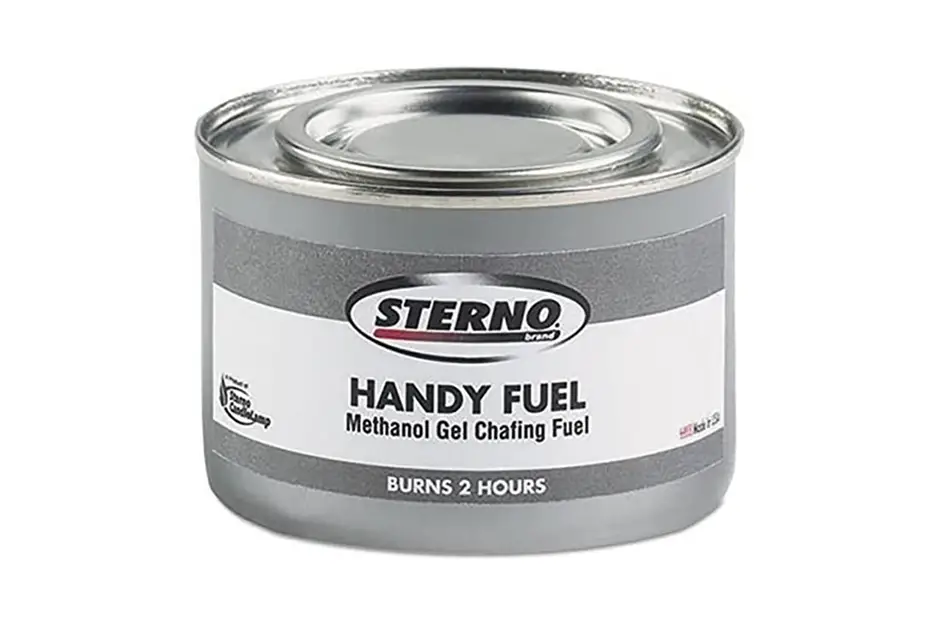
Have you ever been to a wedding reception or other large group event where they were serving food? At these events, they will often serve food buffet-style in large metal pans. To help keep the food warm, they often put Sterno cans underneath them.
Sterno cans or “canned heat,” are containers filled with a gel fuel (methanol or ethanol), and they are about the size of two or three tuna cans stacked on top of one another.
When the lid is removed, simply light the gel, and it will produce a soft flame that will last for a few hours. Canned heat is affordable, lightweight, compact, burns clean, and is easy to extinguish.
The flame produced from canned heat isn’t intense, so it will take a bit to bring your cookware up to temperature. You will also need a support system above it for the cookware.
10. Single Burner Camp Stoves
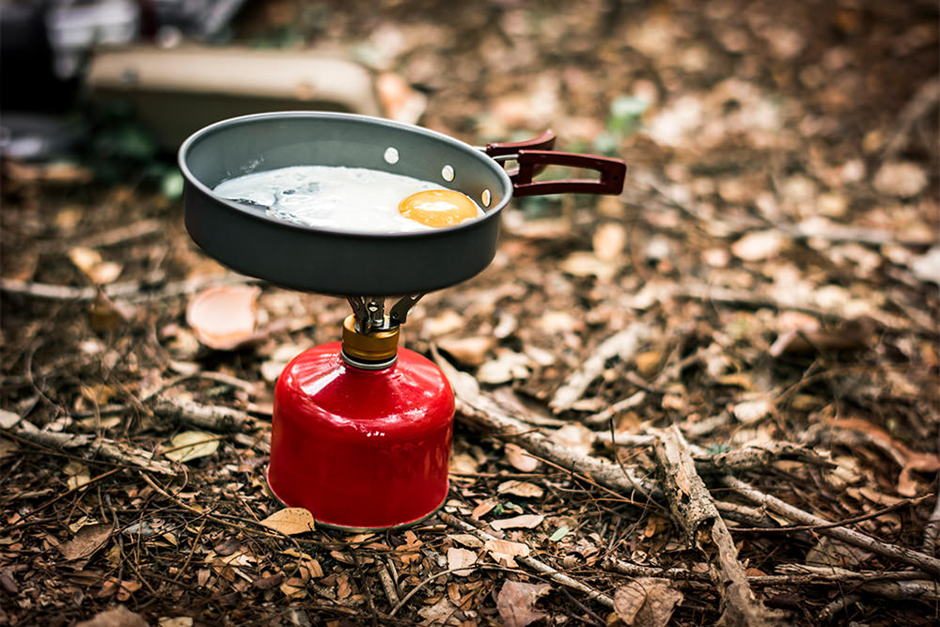
Single burner camp stoves are highly popular for outdoor cooking and with outdoorsmen because they are so lightweight and compact. There are several different designs available, but they all consist of a single burner and fuel canister.
Most of them provide a high intensity flame, which can be adjusted, and is great for boiling water or cooking quickly. Depending on their size and design, some are better suited for handling small cookware but some can handle larger pots or pans.
When using this type of stove, you will definitely want to make sure you have a flat, level surface to set the stove on.
11. Wood Burning Stove

The wood stove has been around for a long time and is extremely popular with rural homes, in cabins, and among people looking to unhook from the grid.
You can think of a wood stove much like the stove you have in your kitchen, except it is not an electric stove and it does not burn gas.
As the name implies, a wood stove burns wood, so one of the requirements of using one is that you will need a good supply of chopped wood, which will help to keep you in shape.
Wood stoves come in many different shapes and sizes, and some have flat tops, which provides an area for cooking to be done.
This stove is one of the indoor cooking methods mentioned earlier that will require ventilation to be set up. Otherwise, you will smoke yourself out of the home.
The added benefit of a wood stove is that they give off a lot of heat so other than cooking food, it will keep the room and your home very warm.
The downside to wood burning stoves is they can be expensive, are heavy (not a portable option), and require a ventilation system unless it is being used outdoors.
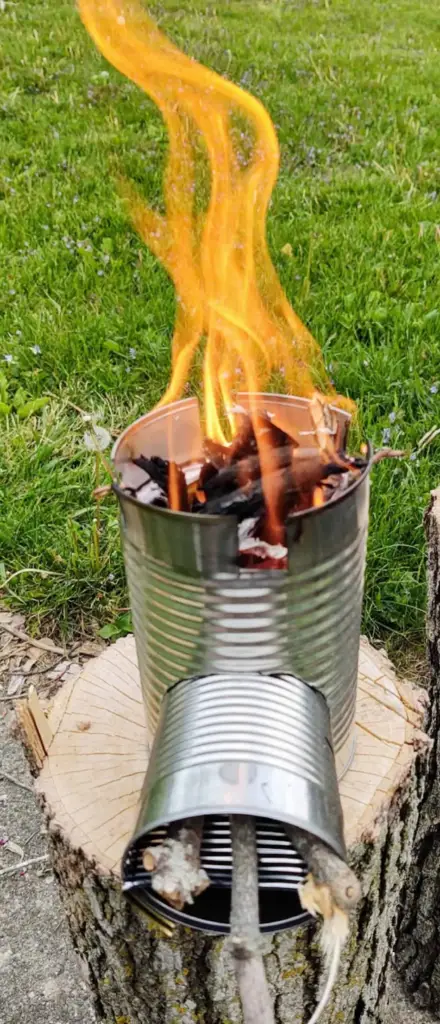
12. Hobo Stove
If you are looking for the cheapest stove possible that is also lightweight and can be made from trash, then look no further than a hobo stove.
While you can get a bit fancy with the design, a hobo stove is nothing more than a can with some holes in it. It’s so easy to make that I can tell you right now how to do it.
- Get an empty soup can.
- Use a pointed bottle opener or another sharp tool to poke some holes around the base and around the top rim.
- Cut a door like opening towards the bottom where you can feed fuel through.
That’s it, you’re done!
Knowing how to make a hobo stove is a must because it is so easy and quick to make. Plus, empty aluminum cans can be found in a lot of places.
A small soup can provides just enough support that a container can be placed on top to boil water. But since aluminum cans come in different sizes, you can make a small, medium, or large stove.
13. Tea Light Oven (Candles)
Maybe you are like me and keep a few tea candles around in case the power goes out, or if you just want to set the mood.
A single tea candle isn’t really going to provide enough heat to cook food in a timely manner. But if you have several of them and create a support system to hold cookware above the candles, then this will help to speed the process along.
You can also create a tea candle oven by situating something like a terracotta pot above the candles. The pot will absorb a lot of the heat and the inside of it will get surprisingly hot.
In this article, DIY Candle And Clay Pot Heater, I found out that the temperature inside of this clay heater got to almost 300 degrees by using only four tea candles.
14. Smoking
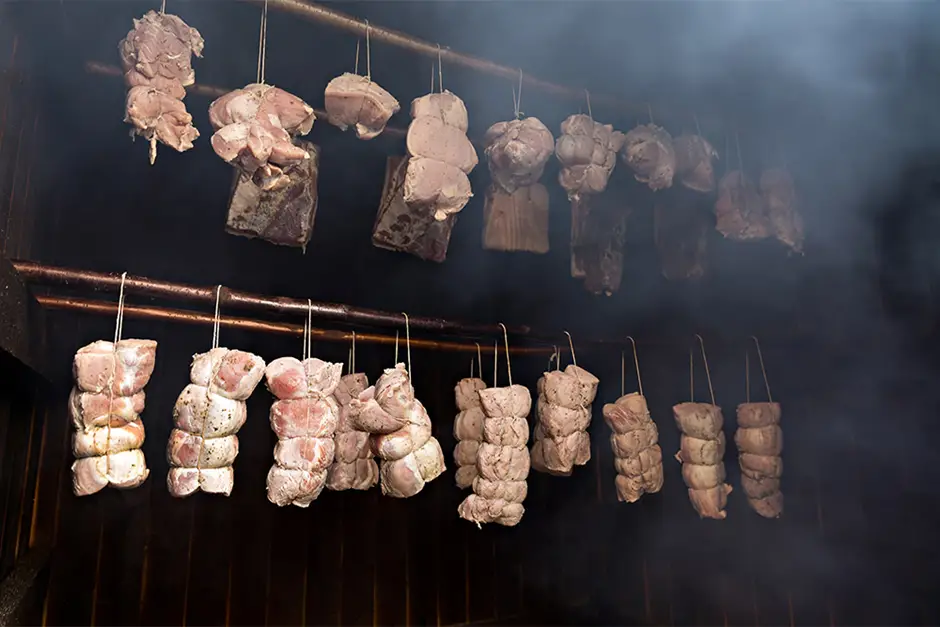
So smoking isn’t really cooking food per say, but it is a way to preserve and prepare food for consumption.
Instead of cooking the food at high temperatures, it is instead subjected to low temperatures and smoke for a long time. This dries the food out and gives it a protective coating which helps to prohibit bacterial growth.
There are different kinds of foods that can be smoked, but one of the most popular options is meat. The meat is usually prepared for smoking by cutting it into thin strips and hanging it over a heat source. Oftentimes enclosures are built around the fire to help hold in the smoke.
The biggest benefit of smoking is that it preserves the food in a way that it doesn’t need to be refrigerated (remember you don’t have electricity, so how are you going to keep cooked food good if you don’t eat it all?)
The downside is that there is a learning curve involved in this method, and it takes many hours to properly smoke food.
15. Sun Dehydration
Similar to smoking, the sun can be used to dehydrate and “cook” food in the absence of another cooking source.
Food should be sliced thinly and hung up in direct sunlight for as long as possible. On particularly hot days, stones that are in direct sunlight can get quite warm and can be used to create a hot meal.
Using the sun in this manner is super easy, but conditions have to be just right. Even when they are, this from of solar cooking can take quite some time.
16. Solar Cooker
A solar cooker uses modern materials to harness the power of the sun in order to cook food.
While there are several different designs of solar cookers or solar ovens, they all use the same principle of focusing sunlight into a small area that will cook the desired food.

Some manufactured versions look like metal tubes with reflectors around them and others DIY versions look like cardboard boxes lined with aluminum foil or boxes with glass lids.
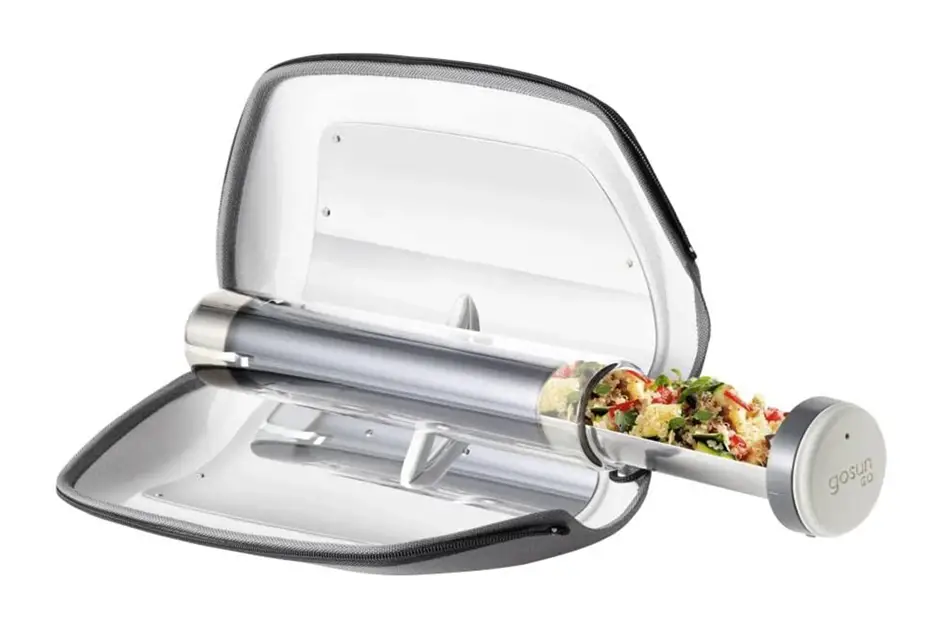
These are certainly more effective than simply laying the food out in the sun, but some people have mixed results when using them.
17. Fresnel Lens

This is another method of using solar power to cook your food, but I had to give it its own little section because of how cool it is.
A Fresnel lens is basically a magnifying glass and it can be made out of glass or plastic but nowadays most DIYer’s use flexible ones made out of plastic.
The plastic ones come in different shapes and sizes, from wallet size up to ones that would cover a coffee table. As you can imagine, the larger they are, the more sunlight they can focus, and the hotter the focal point will be.
When conditions are just right, I have personally seen these lenses almost instantly ignite a piece of wood and boil water!
Here’s an interesting video of a guy using one to quickly heat up water in a glass tube.
The biggest downfall of using this method is, of course, that the sun has to be shining!
18. Earth Oven
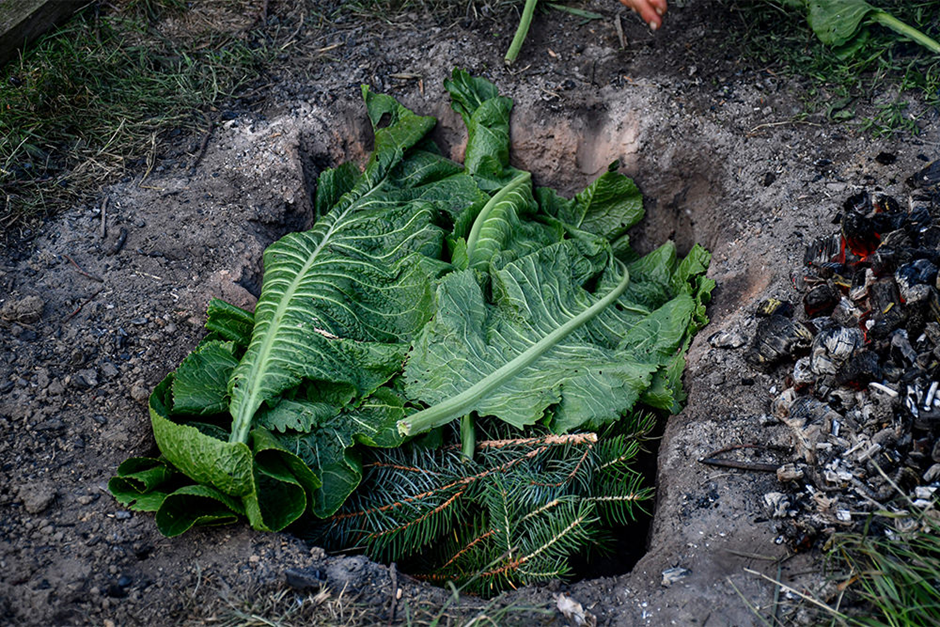
An earth oven is a great method when you want to cook something large or slowly over a period of time. They have been used by different cultures throughout time.
An earth oven consists of a hole in the ground with hot coals or stones (or both), lining the bottom. A layer of green vegetation is then placed on top of the heat source followed by the food and more green vegetation. All of this is then covered with soil or sand.
The food inside is heated by both the hot stones/coals and the steam that is created from the green vegetation, which is all trapped inside of the makeshift oven.
Earth ovens are a great way to cook food because they keep all of the heat trapped inside and the size of the oven can be custom fitted to your needs.
The downfalls of this method is that they do require a bit of preparation and it is a slow process.
19. Hot Springs
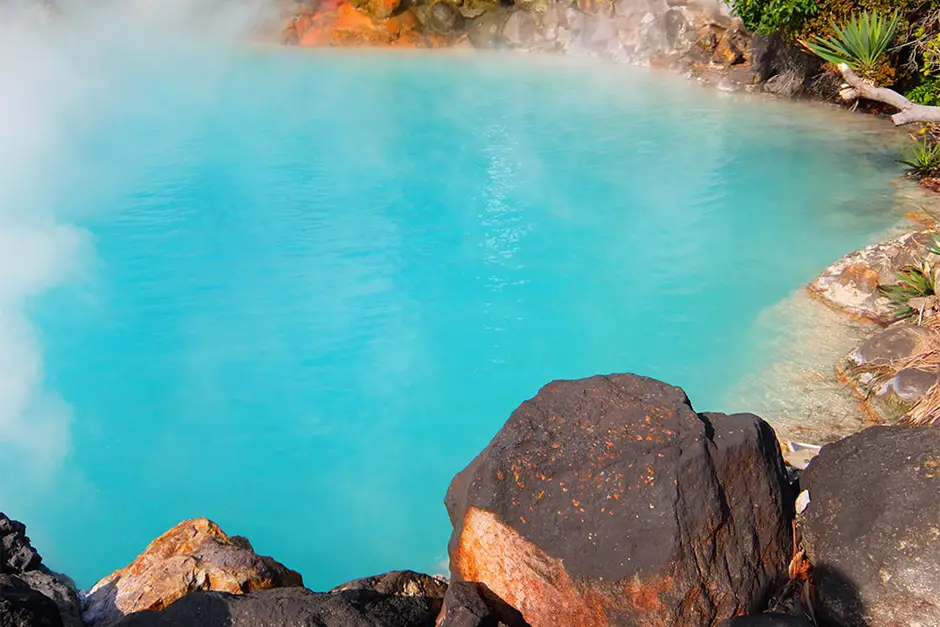
I’ll admit that this may seem like an odd option to the list, but sometimes you got to use what’s around you.
Hot springs are pools of water that are located around “hot” spots or geologically active areas. They can get dangerously hot because super-heated water is fed into them through fissures in the ground.
Hot springs can routinely reach temperatures of 120 degrees and above. If a particularly hot, hot spring is in your area, cookware could be placed in a shallow section of it to cook food.
I went back and forth about adding this option to the list simply because hot springs can be incredibly dangerous to be around, and people have died from falling into them after only a short period of time.
They can also be deceptive as their temperatures can fluctuate quickly. In a moment they can go from feeling like a warm relaxing bath to scalding hot.
Out of all the options on the list, this is the one that probably requires the most caution and probably shouldn’t even be used.
FAQs
What’s one of the best ways to cook without electricity?
There really isn’t one best method. What method you choose depends on what you are cooking, how quickly you need it cooked, and the resources that are available.
Can you use camp stoves indoors?
Many people do and will say that it is okay, but like I stated at the beginning of the article, the safest option is to not burn anything indoors, especially if you do not have proper ventilation.
What’s the best cookware to use when cooking without electricity?
The cookware you use is a personal preference that will be based on a lot of factors.
Having said that, I think cast iron is among the best. A lot of people don’t like it because it is heavy, which it is, and they think it’s hard to take care of, which it isn’t.
Cast iron provides a unique flavor to food, it heats evenly, and it has excellent heat retention, not to mention it will outlast you, your kids, and your grandkids.
For more information about cast iron cookware, check out this article: Why You Should Use Cast Iron For Campfire Cooking
Final Thoughts
I forgot to mention at the beginning of the article that the method used to cook food can drastically alter the way it tastes. One of my favorite methods is to cook food over a campfire because it makes the food taste phenomenal! This is another reason I highly encourage you to try out alternative cooking sources.
Now, you don’t need to have all the materials for every single one of the options listed in the above article. However, I would recommend planning for and practicing with at least two of them so that you will be as ready as possible for those just-in-case situations.
Thanks for reading and stay prepared.
