A while back my washing machine broke down over a holiday weekend. Instead of hauling the dirty laundry to a laundry mat, I decided that this would be a great opportunity to finally try out using a 5-gallon bucket to wash clothes. Sometimes a little adversity is what you need to really be prepared for.
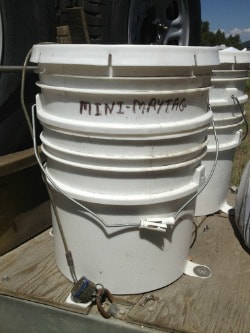
Clothes washing was an item that had been missing from my preps for some time now and this seemed like the perfect opportunity to test it out before the real SHTF. This DIY washing machine is a homemade method you can use to wash clothes if you temporarily lose power or if the grid goes down.
SKIP AHEAD
Here’s What You Need
Here are the materials you will need:
- One five gallon bucket (lid is optional, in my opinion)
- One toilet plunger
- Power drill or a utility knife
All of the above materials can be purchased for less than ten dollars, excluding the power drill. If you are going to be using a lid the first step is to drill a hole in the top.
Tip the toilet plunger upside down so that the top of the handle is touching dead center of the lid. Trace a circle around the handle onto the lid. If you have a power drill, find a large bit, I used a half-inch bit, and drill out the circle that you traced.
After the hole is cut out use a utility knife to clean up the edges where you cut. If you do not have a power drill you can use a utility knife to cut out the hole, BE EXTREMELY CAREFUL AND TAKE YOUR TIME!
Also Read: DIY Water Filter
The plastic bucket is very durable so it can be difficult to cut by hand. Next, I drilled eight holes into the rubber portion of the toilet plunger. Ta-da! You are done!
If you want to make the deluxe model I have seen some where people install a spigot or ball valve on the bottom of the bucket for draining the water. This feature is unnecessary for operating the washing machine but it makes lifting the bucket much easier if you can drain the water first.
My Experience
Here is my experience with the bucket washer. I found the bucket lid to be unnecessary. The only purpose of the lid is to help contain water from splashing out.
If you are using this to clean your clothes than most likely you are completing this task either in your bathtub or outdoors, so some splashing water is not that big of an issue. Also, when I wash clothes in this there is very little splashing because I am not going “all out” with the plunger, nice and steady is the key.
Related: DIY Family Water Purification System
The second reason I do not like using the lid is because it restricts the agitating motion of the plunger to up and down. If the bucket is full of clothes the plunger can’t get all the way to the bottom of the bucket or get around all the clothes in order to agitate them.
I found pushing the plunger down from the side and diagonally helps to rotate all the clothes from top to bottom so that every piece gets properly washed.
On some reviews I have read, it states that powder or homemade detergent works best. I have not tried either of these but I have used liquid detergent with no observable issues.
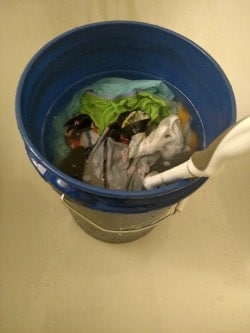
The amount of soap I use is approximately one tablespoon. After adding the clothes and soap, it is time for the water. Warm water seems to work best and I fill the bucket to around four inches from the top.
Now, it’s time to work out your arms. For the wash cycle, I plunge the clothes for ten minutes, then I tip the bucket over and dump everything out into the bathtub. I wring out the excess water from the clothes and then place them back into the bucket.
The Rinse
For the rinse cycle, I fill the bucket back up with clean water and plunge for another five to ten minutes. I dump the water and clothes out, wring the excess water from the clothes and hang them up to air dry.
I have found that smaller loads of clothes are easier to plunge and tend to get cleaner. For best results, I only fill the bucket halfway to three-quarters of the way full with clothes. I have washed about twenty loads of clothes using this process and thus far I am very happy with how clean the clothes come out.
Pros
- Super cheap to make
- Requires minimal tools
- Great for a backup if the power is out or your washing machine breaks down
- It is efficient and uses no electricity
- It can be used at home or it is lightweight enough to pack into a vehicle for trips
- All ages can use it
- Provides some good exercise!
Cons
- The biggest downfall is that you cannot wash a lot of clothes at once. A full laundry basket is going to equate to several loads in the bucket
- It is tiring to use
- This won’t be an ideal method for someone who has physical limitations
FAQs
What is the benefit of having a spigot on the bottom of the bucket?
Having a spigot allows the water to be easily drained versus tipping the bucket over or having to carry the bucket with water in it.
The water doesn’t agitate much, what should I do?
There are a couple of things you can do to fix this. You can drill larger holes or more holes in the plunger. You can reduce the number of clothes in the bucket. And lastly, try changing up the plunging motion from straight up and down to moving the plunger to the side as you push it down and pull it up.
Wrap Up
I think this is something that everybody should have as it is very cheap to make, it is mobile, and it takes almost no time at all to construct. Not only can you use this at home during an emergency put you can pack it in car for road trips or for whenever you will be away from cleaning facilities.
This is one of those projects that you can make in about ten minutes and set it on a shelf until you need it. I have completed numerous loads of clothes in this system and I have to tell you, it sure does give me an appreciation that I have access to a regular washing machine. Thanks for reading and I hope you give this a try!
Photos By: Tinderwolf, Conserventures
