According to the Rules of 3, a person can only go three days without water. Of course, this is not an absolute timeframe as there are many variables it depends on. Suffice to say, water is one of our most critical resources.

Considering that most of the planet is covered in it, you would not think finding it would be all that difficult. And sometimes it is not, but other times it can be difficult enough that it makes one wonder where all the water went.
In our modern lifestyles of being able to turn on a tap, it has become easy for us to forget how to find this precious and critical resource in the wild. If you find yourself in a survival situation or stuck somewhere away from civilization, here are 9 ways to find water in the wild.
SKIP AHEAD
Top 9 Ways to Find Water in the Wild
Water Vines
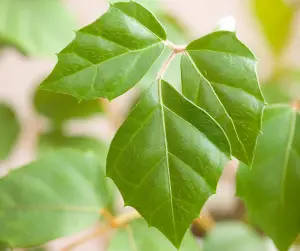
The water vine is a type of plant that is a part of the grape family. It contains a lot of water that can be obtained from cutting the vine.
To produce a faster flow, it helps to cut the vine at two separate ends. After the vine is cut you can drink the water directly or collect it in a container to be consumed later.
Properly identifying this plant is important as there are many different types of vines in the world. A vine with a milky sap is usually a good indication to stay away from it.
Solar Still
With minimum materials, a solar still can easily be constructed to collect water in a natural environment. The materials needed will be a tool for digging a hole, a collection container, a piece of clear plastic, green vegetation, and several rocks or pieces of wood.
The design of a solar still is quite simple. It consists of digging a hole in the ground and placing green vegetation and a collection container inside. The hole is then covered with clear plastic that has a small weight in the center.
As the hole heats up from solar radiation the water will begin to evaporate from the green vegetation. Because of the plastic covering, the water cannot escape and condenses on the underside of the plastic.
The small weight in the center of the plastic directs the condensation over the container where it drips in and is collected. here is a step by step guide for creating a solar still.
Step 1
Dig a hole. The size of the hole is going to be dependent on the size of the plastic sheeting and the collection container. For the still to function properly, the hole cannot be too shallow or too deep.
Generally speaking, the hole will be several feet in width and length and possibly one to two feet deep.
Step 2
Collect a pile of green vegetation and place it in the bottom of the hole.
Step 3
Take the collection container and place it at the bottom and in the middle of the hole. Be sure that the spot it is sitting on is level.
Step 4
Cover the top of the hole with a clear sheet of plastic. Weigh the edges of the plastic down with rocks, pieces of wood, or any other material that can be found. At this point, make sure that the plastic covering the hole is taught.
Step 5
Find a small rock and place it in the center of the plastic sheet so that it is directly over the collection container in the hole.
Gradually adjust the sides of the plastic sheet so that the center of the plastic begins to slightly dip downward. The solar still is now complete.
Capturing Transpiration
I thought I would follow up the solar still with this little trick because it is somewhat similar. Plants and trees gradually lose water through their leaves by a process called transpiration.
If you have a plastic bag, then this water is easily collected. Simply take the bag and place it around a tree limb that has a lot of green leaves and tie the end of the bag shut.
As transpiration takes place, the evaporated water cannot escape the bag and will collect in the bottom. This method can take quite a while and the results will not have you swimming in water. Set up as many bags as possible to increase your water totals.
Water from Trees
The first way to obtain water from a tree is by tapping it. This process entails drilling a hole into the side of a tree trunk and inserting a tap. This allows the water-rich sap to flow from inside of the tree to outside where it can be collected.
Maple trees are among the most common types of trees that are tapped for their sap. When to tap a tree will depend on the region you are in what time of the year it is. Some of the best times to do so are when nighttime temperatures fall below freezing and daytime temperatures rise above freezing.
The second way to obtain water from a tree is a bit easier than the tapping method but the water may not be nearly as clean. Some large trees can develop “pockets” or depressions where the branch meets the trunk. When these areas are heavily shaded from the sun, they will retain moisture and develop puddles of water.
The same idea applies to trees that are dead or have fallen over and have developed hollow spots in them. These areas will act as water collectors and should be checked, especially after a fresh rainfall.
Dry River Bed
When looking for water, some people may completely ignore a dry river or creek bed. But that can be a mistake.
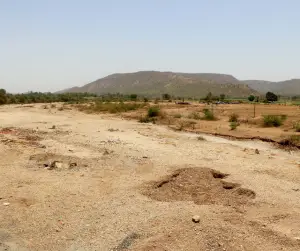
Some creek beds are “seasonal.” During times of rainfall, the beds will flow with water but may not retain it year-round. However, that does not mean there is no water below the surface.
It may be worth the effort to follow the dry bed and look for low areas or areas that are shaded from the sun. In some of these depressions or shaded areas, there could be water just below the surface.
Start digging a hole and if the soil starts to become cool and moist, that is a good indication there may be water further down. Dig a little deeper and then stop.
If there is surrounding groundwater it will seep into the hole and begin puddling at the bottom.
Sea Water
Saltwater should not be consumed under any survival circumstances as it only serves to speed up dehydration.
However, if the materials and knowledge are available to desalinate the water, then it can be collected and consumed.
Collecting Morning Dew
When I was younger and learned of this method I was blown away at its simplicity. If you are much of an outdoors person then you know taking a walk in the early hours of the morning can be a wet endeavor.
Plants can be extremely wet early in the morning before the sun fully comes out and it all evaporates. If you need water then this opportunity can be taken advantage of and it is easy to do.
An absorbent material is going to be needed for collecting the dew. An item made from cotton, like a t-shirt, sock, or a bandanna works great.
Depending on the height of the vegetation, the cotton material can be tied to the ankles or another part of the body and will collect the water as a person walks through it.
Once the article of clothing has become saturated simply squeeze the water out into a collection container and repeat the above process as much as possible.
Collect Rainwater
This is probably one of the easiest ways to fill a water container when other sources of water are unavailable. The benefit of collecting rainwater is that it is fresh, clean water. The downfall is it must be raining for you to be able to collect it.
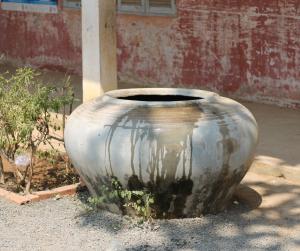
If rain is on the horizon, set out any containers that would work for collecting water. This can include water bottles, pots, cups, rocks with depressions, shells, even a hat turned upside down can work well.
If you have a large plastic liner, tarp, or poncho that can be spared, spread it out and tie the corners to appropriate anchor points. Make sure that the corners are tightly secured because the weight of water adds up quickly.
Also, make sure that the tarp is not taut but has a bit of slack in it. This way when the water hits the tarp it should collect in the center rather than running off onto the ground.
Dig a Hole
This is like the dry riverbed method but can be done anywhere. The best areas to dig are going to be where there is green vegetation or the lowest point you can find in the area.
Start digging a hole. If the soil or sand starts becoming wet, then you know you are in a good area. Allow the water to seep into the hole and fill up so that it can be collected. If after several feet the soil is bone dry, it is probably better to move to a new spot and try again.
Snow and Ice
Snow and ice can be collected for drinking purposes but there are a few things to keep in mind. First and foremost, snow and ice need to be melted before consuming. If it is not, then you run the risk of lowering body temperature and causing further dehydration.
Also, the best snow to collect is fresh white snow and ice that is clear or white from frost and air bubbles. Discoloration of the ice or snow can be an indication that it is tainted and should be avoided.
Wrap Up
It can be easy to succumb to a negative outlook about water when it is not readily available. But I hope that this article has presented a few ideas to aid you in your search for water should you ever need to find it in the wild.
Thanks for reading and stay prepared!
Do you have any other great ideas for finding water in the wild? Sound off in the comment section below and let us know!
