As a little kid, running around outdoors as much as I did, getting hurt was inevitable. And when I got a “boo boo”, who did I go to? My mom, of course.
She would grab whatever was needed to take care of my “super serious” injury, and I would be on my way in no time.
As time went on, that experience turned into: “You know where the band aids are.” This was fine with me because the first-aid kit always fascinated me.
It had all sizes of bandages; some were circular while others were square. Some were clear while others were tan, red, white, orange, green, blue, or purple.
Left to my own devices, I would rummage through the first aid kit and play around with all the contents. But there was one bandage that didn’t really make sense to me because of the shape. I never used it, at least not as a kid.
Those bandages were butterfly bandages…and as an adult, I have used them plenty.
Before diving into the guts of this article, please be aware that the information presented should not be considered professional medical advice, but is purely informational based on my own experiences.
SKIP AHEAD
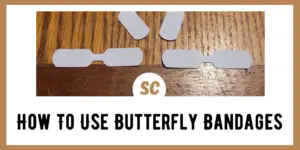
What Are Butterfly Bandages?
You may have heard of butterfly bandages by another name, such as a butterfly closure, butterfly stitches, or steri-strips.
No matter the name, butterfly bandages come standard in almost every first-aid kit, although most people don’t seem to use them.
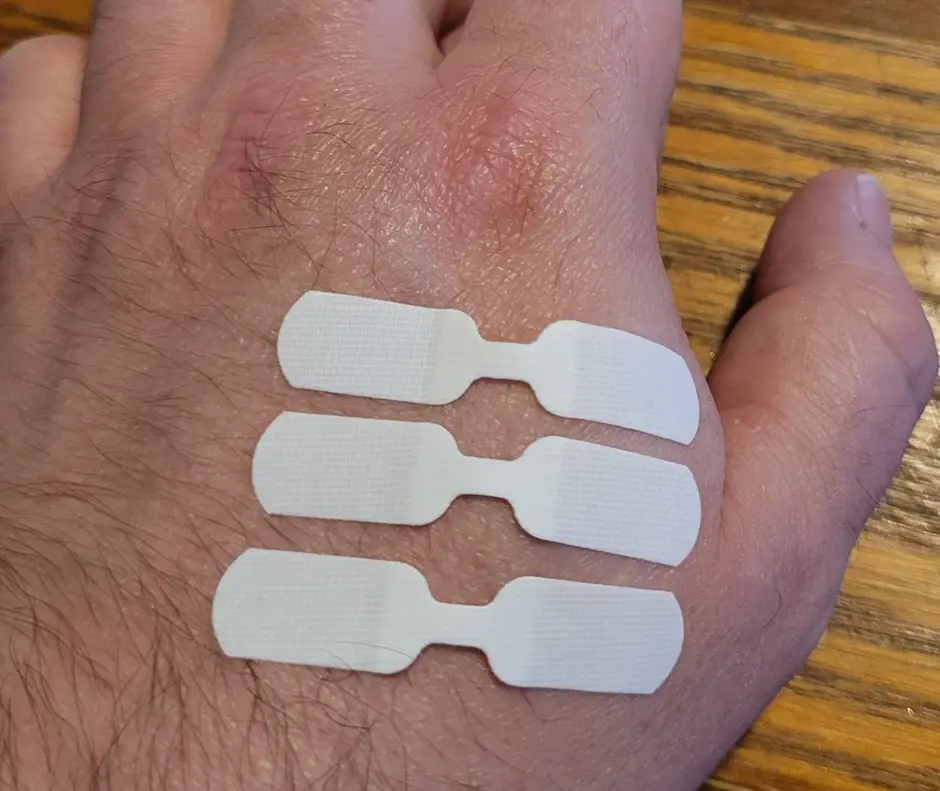
I guess I turned into a bit of a klutz as an adult, because I have used these bandages a lot – especially when emergency medicine wasn’t available. A butterfly bandage basically looks like two large rectangles connected by a small bridge.
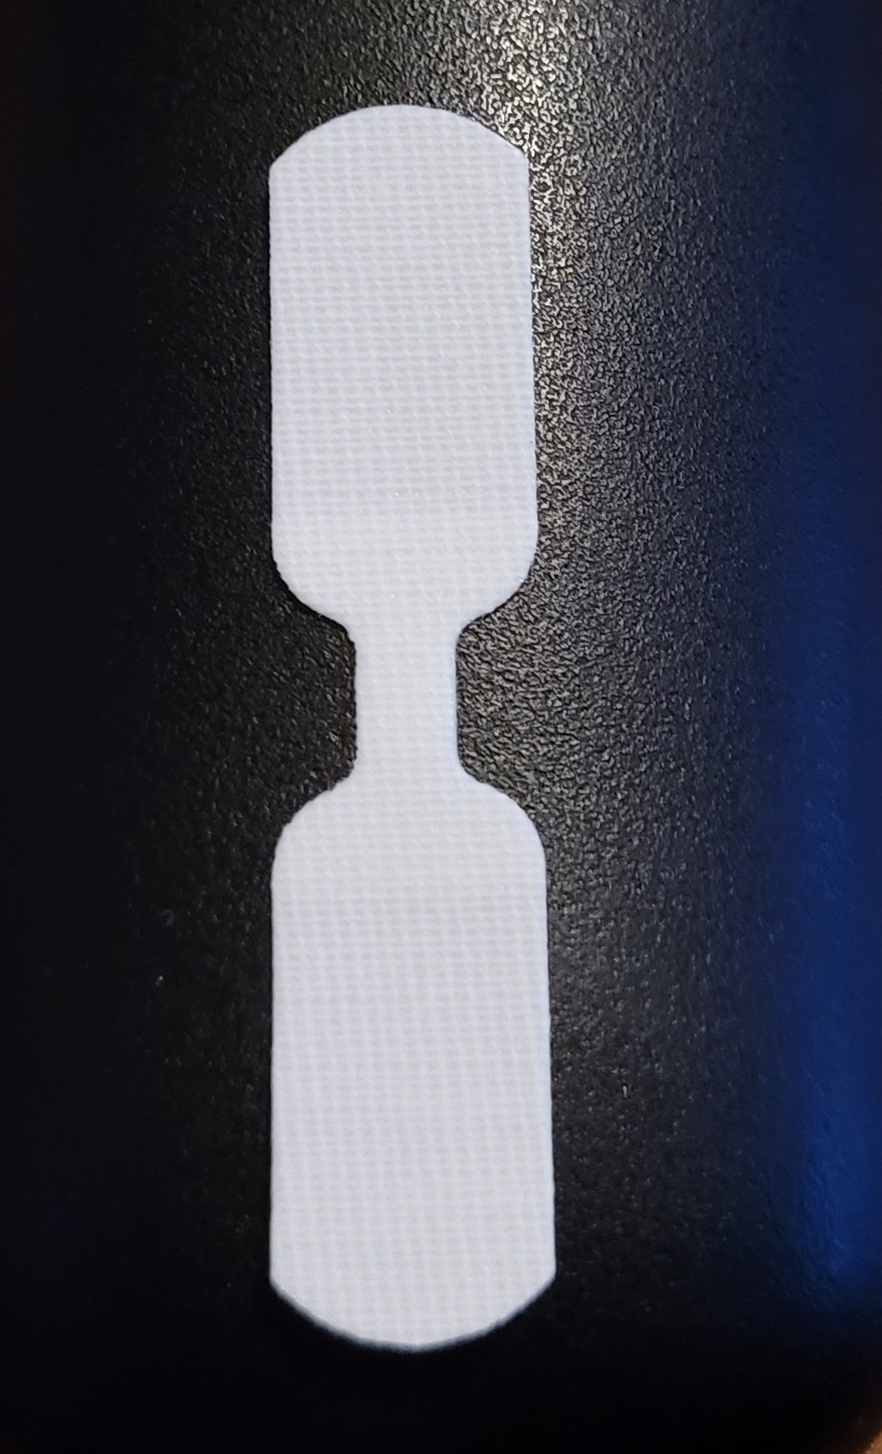
They are used to help close relatively small wounds that are shallow cuts with clean edges that would otherwise stay open on their own.
How To Use Butterfly Bandage
Using one of these bandages is pretty easy, but first things first: when addressing a wound, the first thing you want to do is stop the bleeding and clean it.
Generally, I will put a cut under some running water for a minute or so to help flush out any unwanted debris and to wash the area clean. Use soapy water if you have it. Then, I will use a clean cloth to pat the area dry.
However, if the wound is bleeding a lot, I will use the cleanest cloth I have to apply direct pressure until the bleeding has stopped, then I will clean it.
Next, I will take a sterile bandage, or a clean cloth, and apply pressure directly to the wound. Once the bleeding has stopped or significantly slowed down, I will apply a butterfly bandage.
You want to position the bandage so that the small midsection of it is centered over the wound.
Then, I take one side of the bandage and adhere it to an area next to the wound so that the bandage is perpendicular to the cut. If the wound edges are ragged and not “clean,” as is sometimes the case in animal bites, it’s not a good idea to use a butterfly bandage.
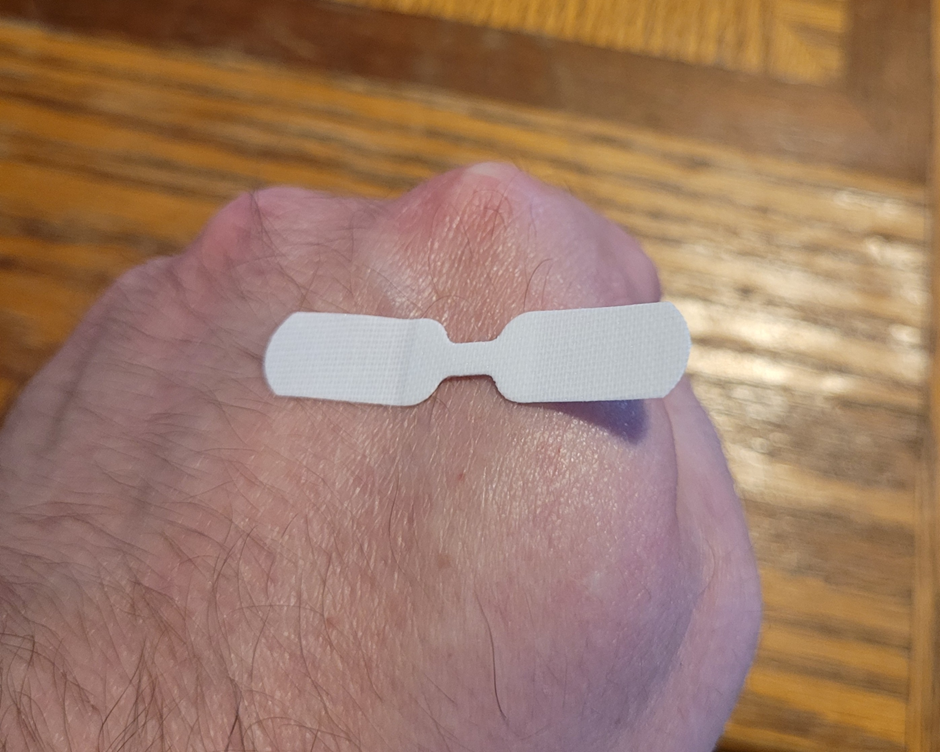
Next, gently lift the rest of the bandage and pull it across the cut to keep the wound closed. As you do this, keep tension on the butterfly bandage so that the cut stays closed as you adhere the bandage to the other side of the cut.
If the cut isn’t bleeding too bad, I will apply a small amount of antibiotic ointment before I fully apply the butterfly bandage, this will help to prevent infection.
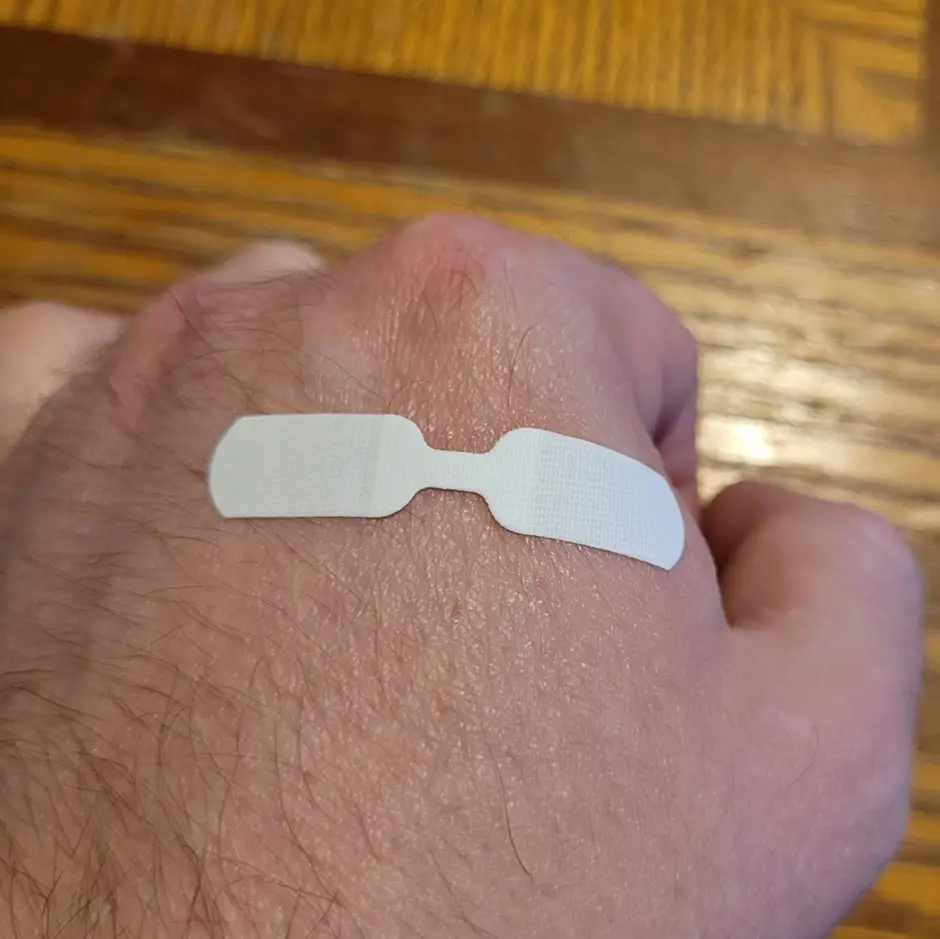
Repeat this process as many times as needed until the entire length of the wound is closed, so you may need more than one bandage. Sometimes I will cover this with a larger bandage that is sterile to help keep the area clean.
How To Improvise Butterfly Bandages
If you need to close a wound, but don’t have any butterfly bandages, a liquid bandage, or access to emergency medicine, you can easily improvise butterfly stitches from some common materials.
1. Tape
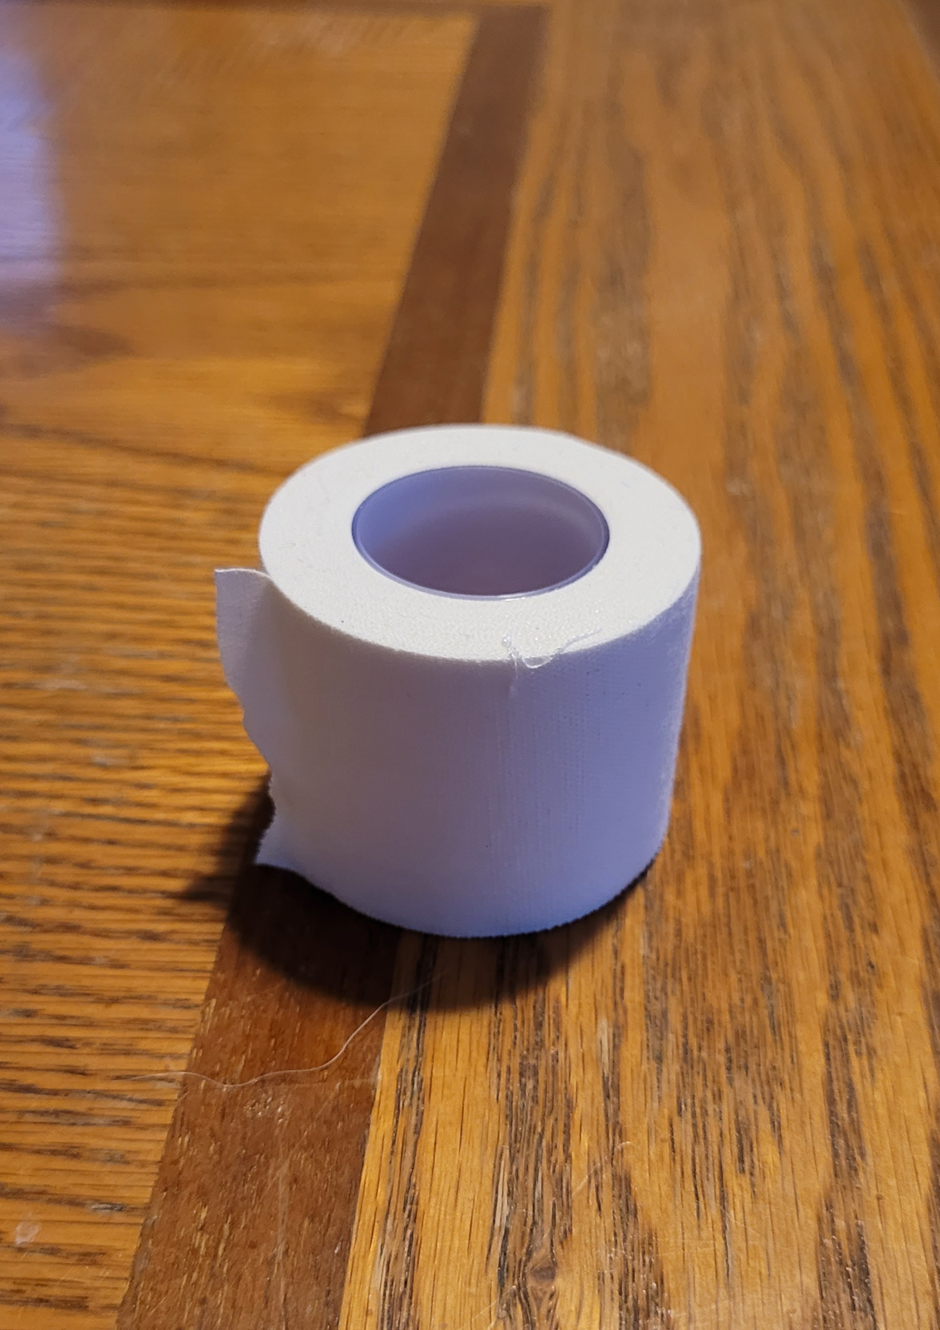
Tape is a good material to use to make adhesive bandages because it already has an adhesive side. There are many different types of tapes available but the ones I have used are medical tape, duct tape, and athletic tape.
Medical tape is probably the best kind to use because it holds well without being overly sticky. Other tapes, like duct tape are pretty strong and can be difficult to remove down the road.
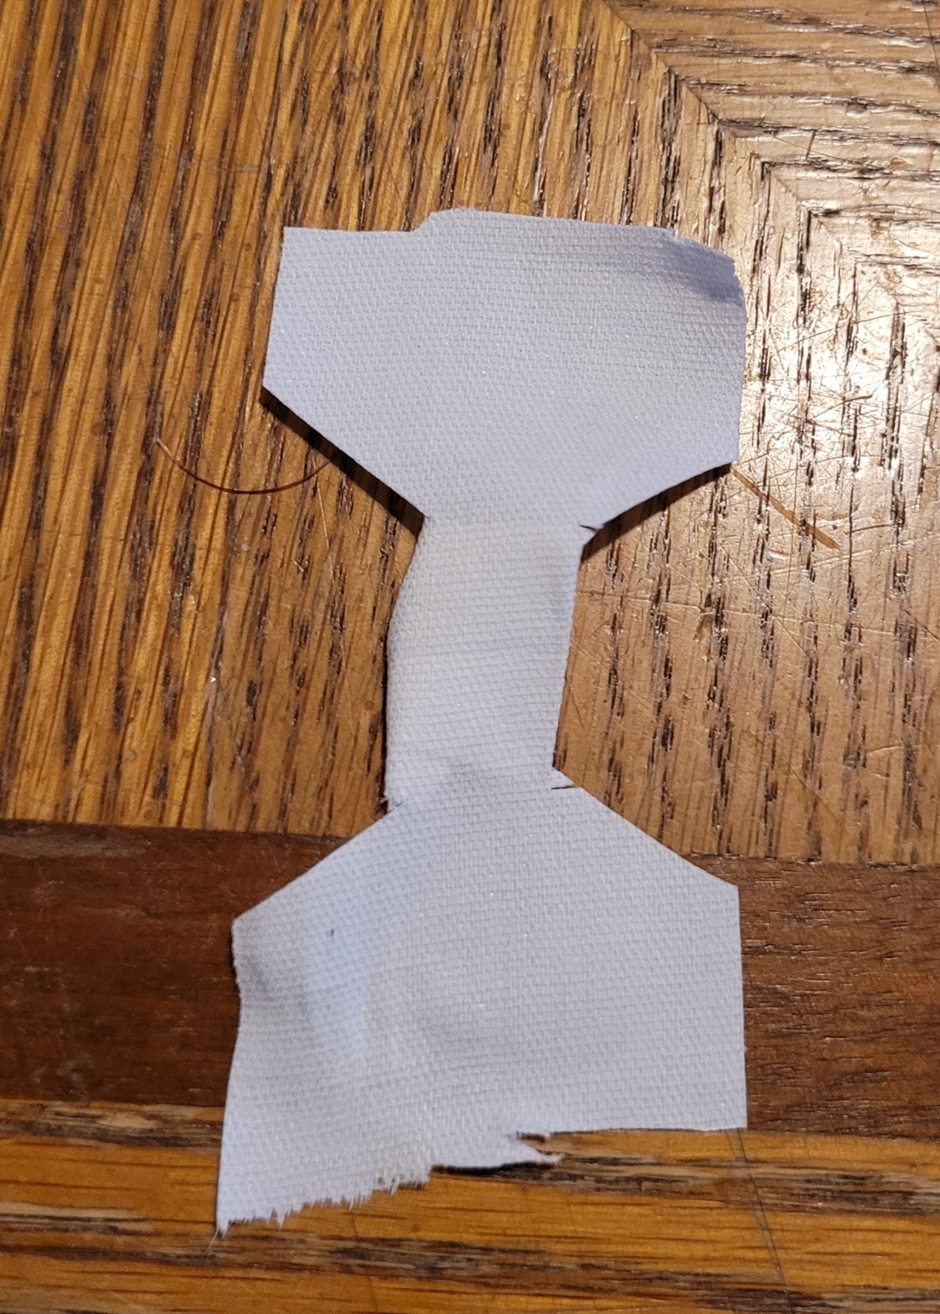
In this section, I took pictures using athletic tape. For demonstration purposes, I made the butterfly bandage much, much larger than it needed to be…try to keep your laughing to a minimum.
The first step is to cut a piece of tape about one inch long, although the size of the butterfly bandage is going to be determined by the size of the cut.
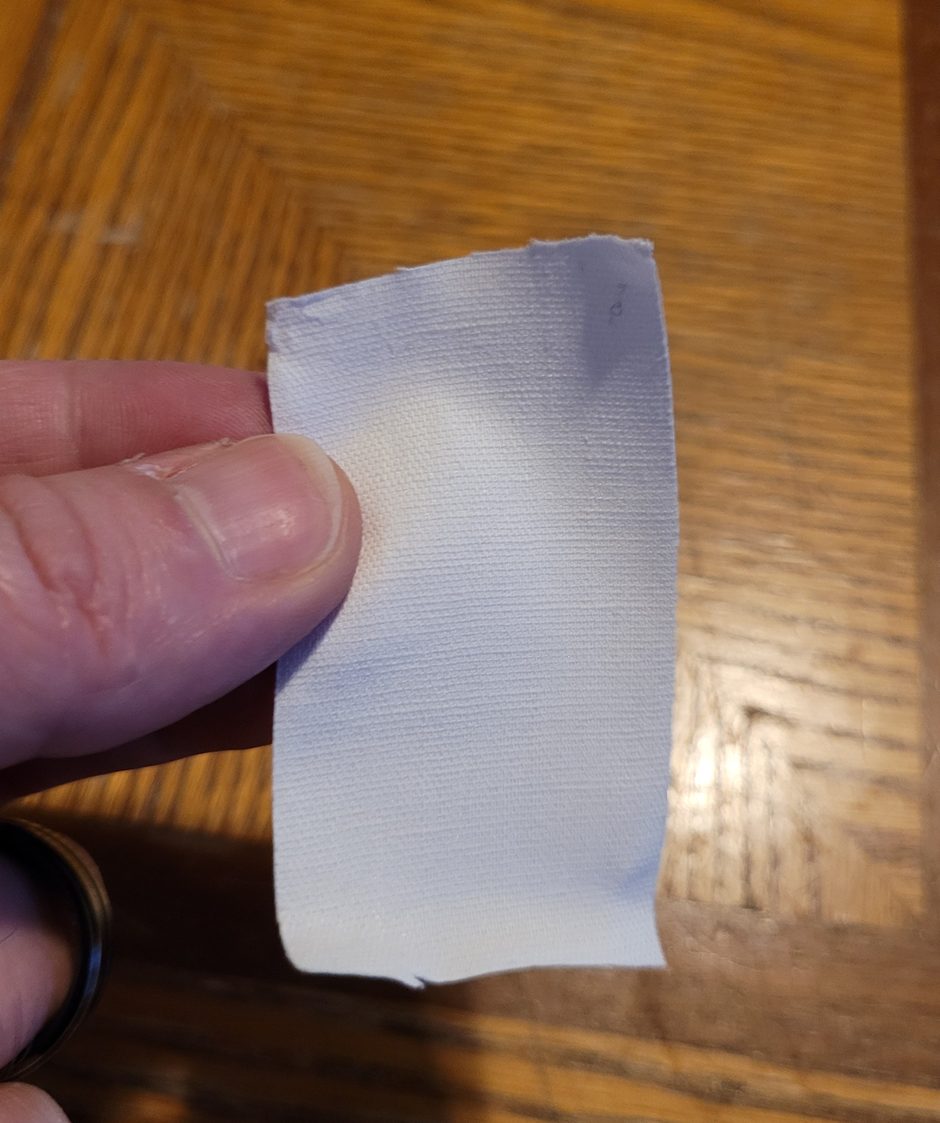
Next, fold the tape in half so that the adhesive side is on the outside. If you do this in reverse the tape will stick to itself and you will make a mess trying to unstick it.

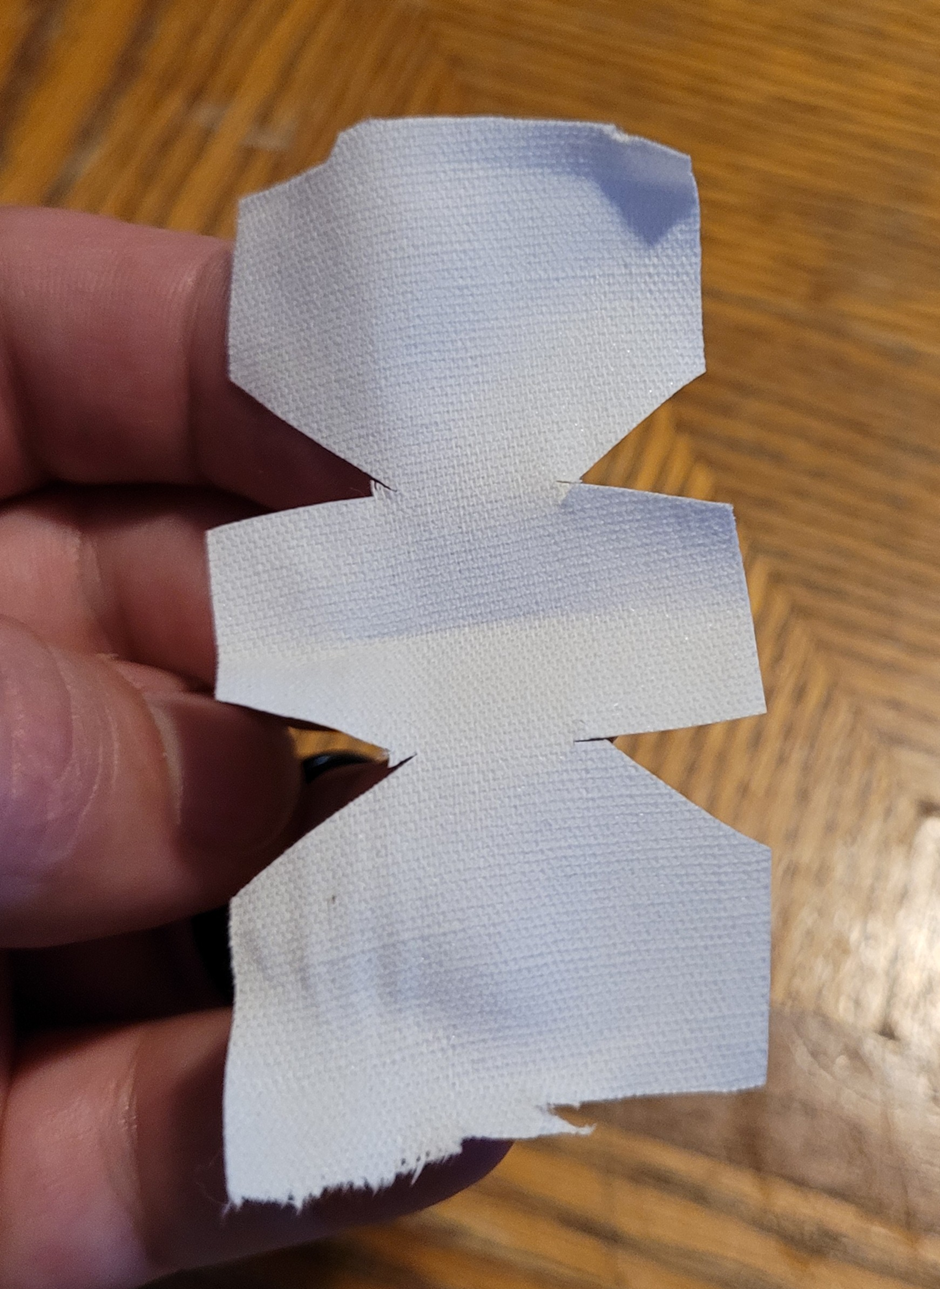
Now, take a pair of scissors and cut a small triangle out of each side of the tape

When you unfold the tape, it should look like the picture below. I have heard some people say that it reminds them of a bowtie.
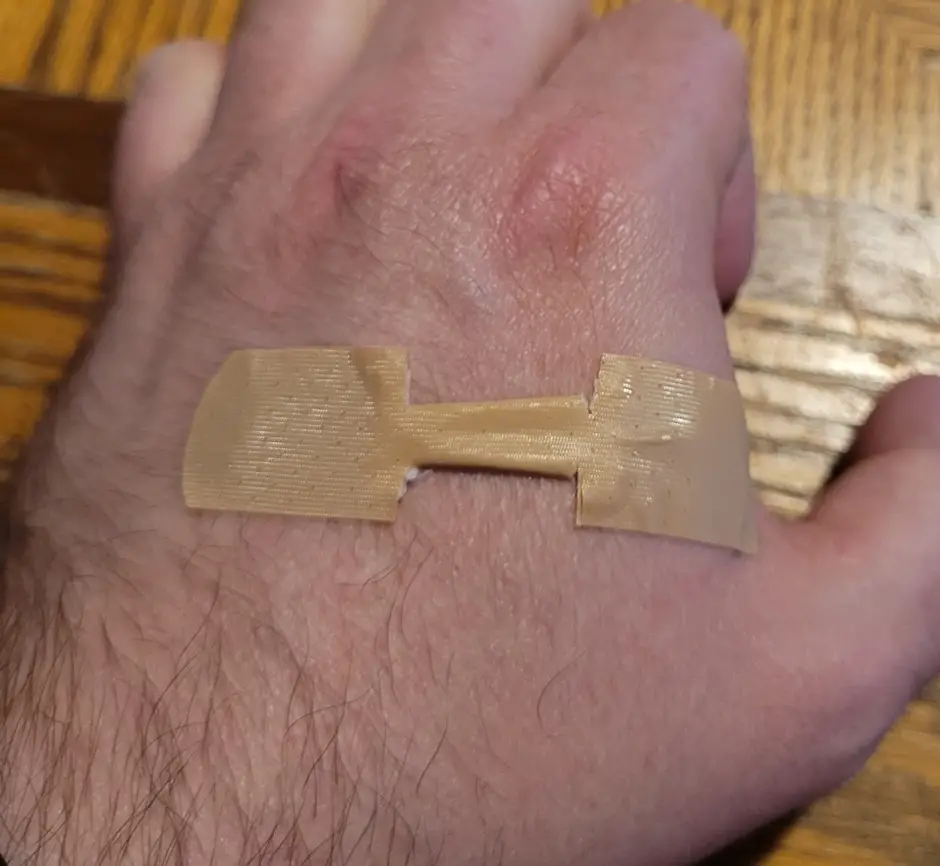
Lastly, fold the two smaller middles sections back onto themselves so that they stick to the back of the bandage. This is so that when you apply the butterfly bandage, the adhesive doesn’t stick to the wound.
Once you have the tabs folded back, you can apply the butterfly bandage over the cut.

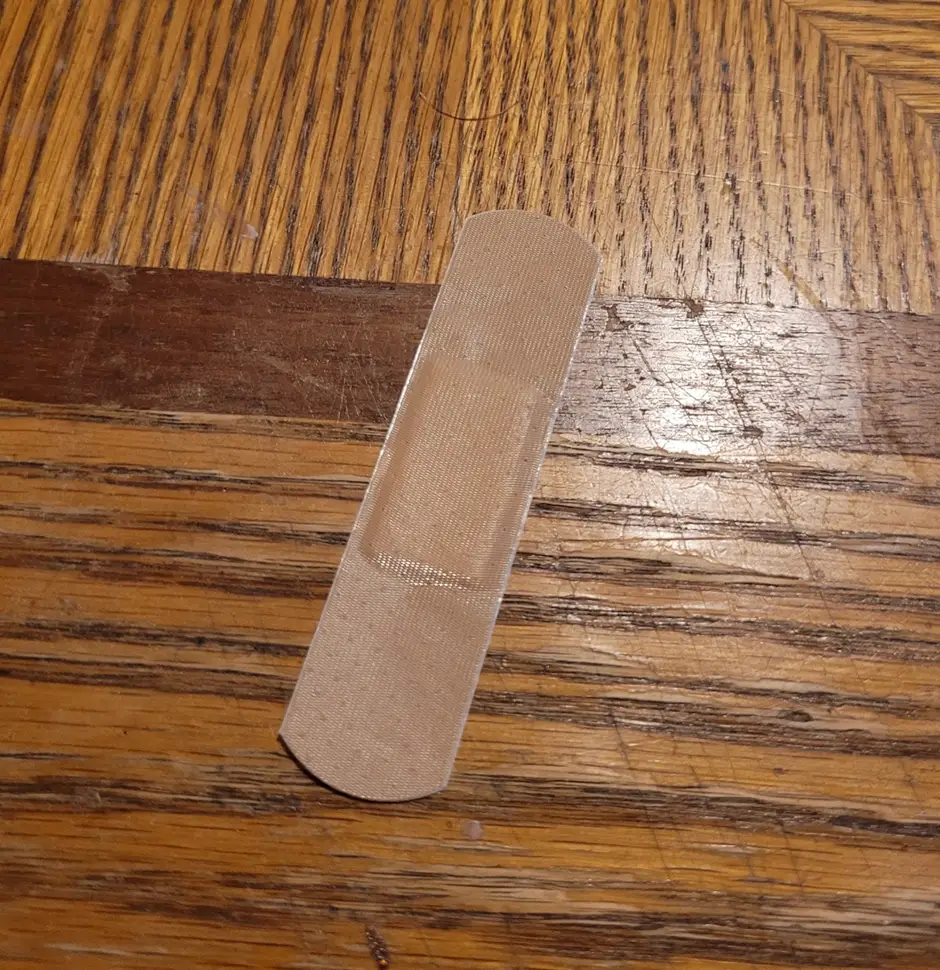
Using a Band Aid
In the absence of adhesive tape, I have used one or more Band Aides to make butterfly stitches. These don’t work nearly as well as the improvised butterfly bandages made from tape. However, in a pinch they will work temporally, until you can get better materials or seek medical attention.
Below are two ways in which I have used Band-aids to make a butterfly bandage.
The first way involves using the exact same procedure for making butterfly bandages with tape.
Fold the Band Aid in half and use a pair of scissors to cut out the two small triangles.
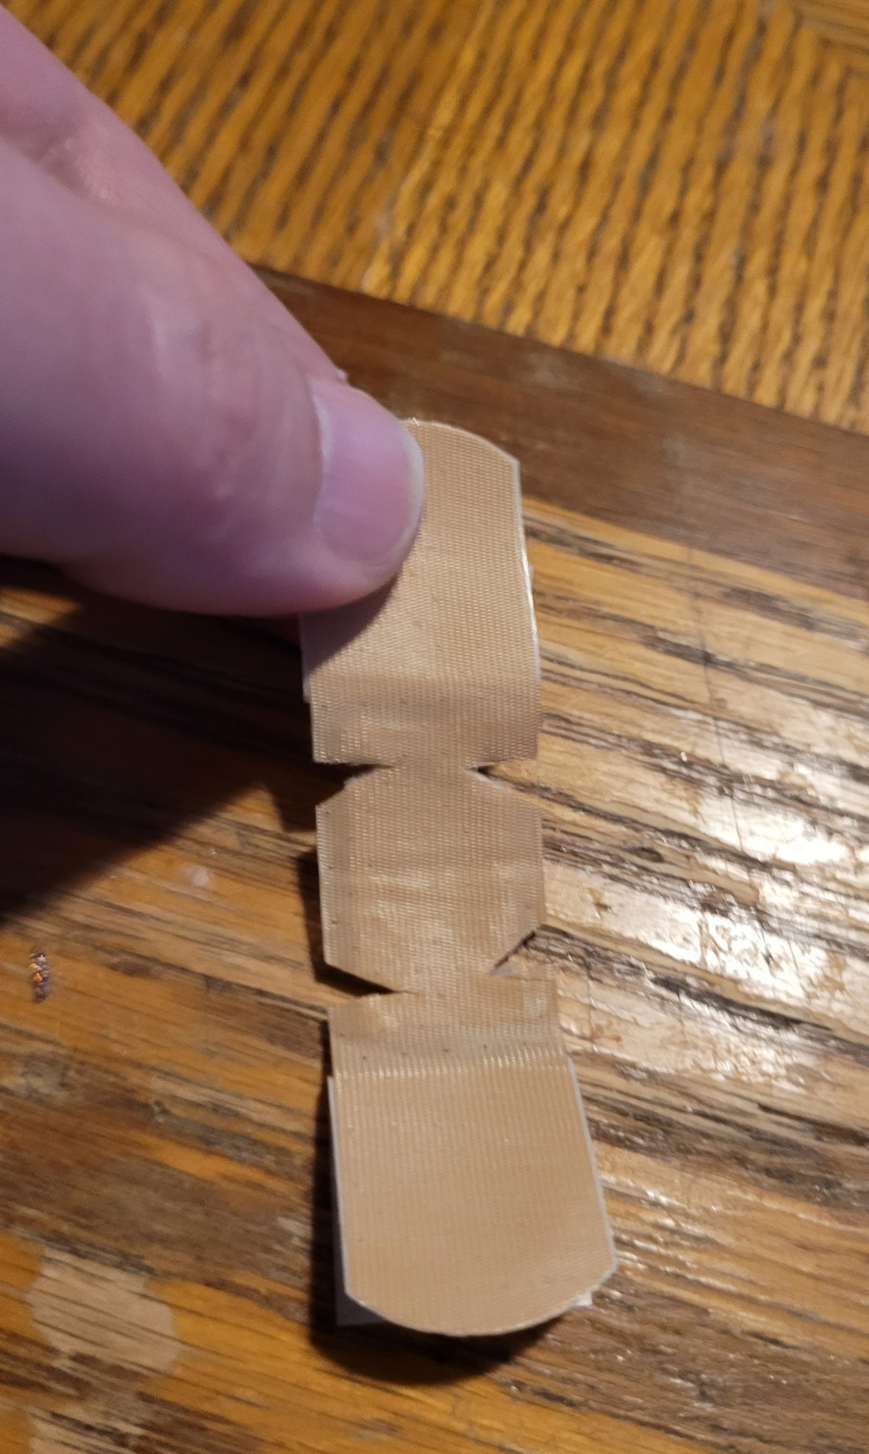
Next, remove the plastic backing and fold the middle tabs under the center of the Band Aid. The improvised butterfly bandage is now ready to be applied.
If you don’t have any scissors or a cutting tool, then you can still make a quasi butterfly bandage by twisting it.
I have only used this method a few times because it doesn’t work that well, but to do it, I first hold onto one side of the Band Aid tightly while twisting the rest of it.
Once the twist starts to hold a bit, I’ll stick one side of the Band Aid to my skin, twist it a few more times, pull it across the cut, and stick the other side of the Band Aid to my skin. It looks something like the picture below:

Like I said, this method doesn’t work that great, but if you need to keep the wound shut temporally so that you can use your hands, its kind of a last-ditch effort.
FAQs
Can butterfly bandages get wet?
The key is to allow them enough time after application to adhere to the skin. After that, they can get wet for a brief time but you don’t want to allow them to get soaking wet.
Are butterfly bandages as good as stitches?
They are as good as stitches in the sense that they are appropriate for wound closure, but they obviously won’t be as secure. A butterfly bandage is more likely to be inadvertently peeled off then a stitch that has been tied in the skin.
How long should you wear butterfly bandages?
Depending on the size of the cut, butterfly bandages are usually kept on the skin for one to two weeks to help the healing process.
Are butterfly stitches painful?
Butterfly stitches themselves do not cause pain. However, the process of closing the wound may be slightly uncomfortable, and the area around it may be sensitive. I have used butterfly stitches and I have gotten stitches in the emergency room; I can say getting stitches is more painful.
Final Thoughts
It’s always best practice to get an injury or wound checked out by medical professionals.
Circumstance or the availability of healthcare can be an issue, so having some butterfly bandages stocked in your first aid supplies – and the knowledge of how to use a butterfly bandage – will help you bridge that gap.
