The Merriam Webster Dictionary defines distillation as “the process of purifying a liquid through evaporation and condensation.”
Many people associate the term distillation with the production of alcohol, which it certainly is a part of. But it has other applications as well when it comes to survival situations or self-reliance skills.
In this article, I’ll be showing you how to make distilled water at home by explaining:
- How water distillation works
- How to turn salt water or rain water into distilled water
- What materials you need for a home distillation kit (stove and no-stove options included)
SKIP AHEAD
Breakdown of Water Distillation
According to the above definition, if we want to purify a liquid, then we need to separate the liquid from other liquids or substances.
So for example, I’m going to talk about a mixture of water and alcohol.
Now, the first thing that is needed is an apparatus for conducting this experiment.
In its most simple form, a distiller is made up of five components.
A container to boil the mixture in, a heat source for boiling the mixture, a tube for transferring the evaporated liquid, a cooling source for condensing the liquid, and a collection container.
In my example, the water and alcohol mixture are put into the first container and then heated. Water has a much higher boiling point than alcohol, so the alcohol will evaporate first and the water evaporates second.
As the mixture is heated, the alcohol will turn into a gas (evaporation) and rise upward. It will then be forced into the transfer tube.
Here, it is cooled by either air or (more commonly) cold water that surrounds the transfer tube. When it cools, it condenses back into a liquid. The liquid then flows into the collection container.
During the process, some water may be transferred over with the alcohol, which is why the process may be repeated several times. When the process is repeated, more of the alcohol is separated from the water and a higher yield of alcohol is achieved.
Distillation and Survival Situations
Other than being consumed, alcohol has its place in aseptic techniques. But in terms of survival situations, distillation is more important in creating potable water.
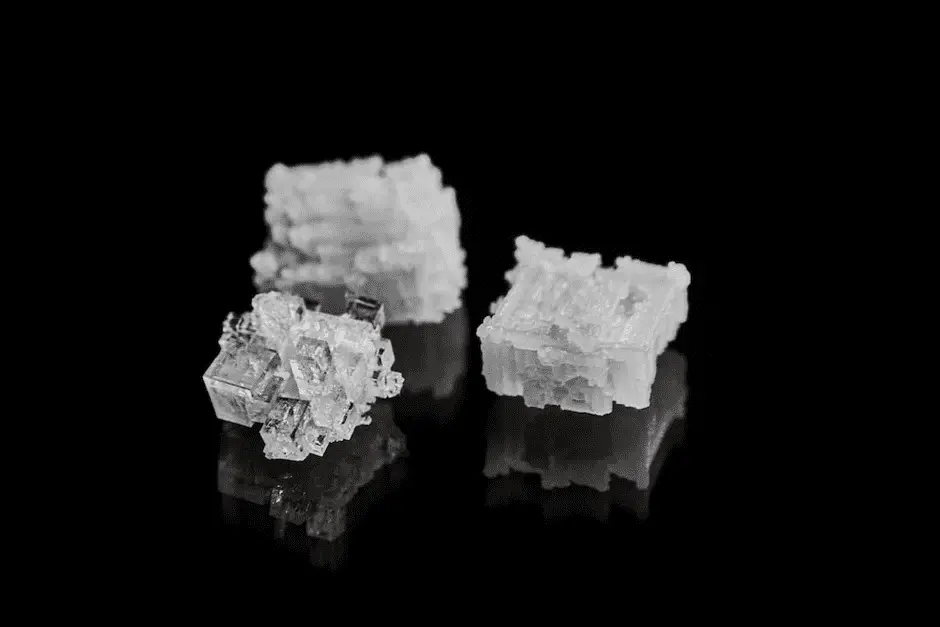
The most popular example is turning saltwater into freshwater. This process is referred to as desalination and is almost the same as described above…with one small difference.
A mixture of saltwater is placed into a container and then heated. As it’s heated, the water evaporates and the water vapor travels upward while leaving the salt behind in the container.
The water vapor travels through the transfer tube, is cooled, condenses, and is collected on the other side, leaving you with much cleaner drinking water.
As simple as this sounds, in a survival situation the materials needed to properly construct a desalination unit may be difficult to come by.
But you do not have to wait for such a situation to arise to make one because they can be useful even if you are not stranded on a deserted island surrounded by saltwater.
How to make a Simple Desalination Unit
To show you how simple it is to distill water at home, I decided to not order or buy any special materials. Instead, I will be making one out of materials that I found around my home.
Boiling Container (Stainless Steel Pot)
The first item that I needed was a container to boil a mixture of water in. Since the container is going to be subjected to high temperatures, a container made from plastic is out of the question.
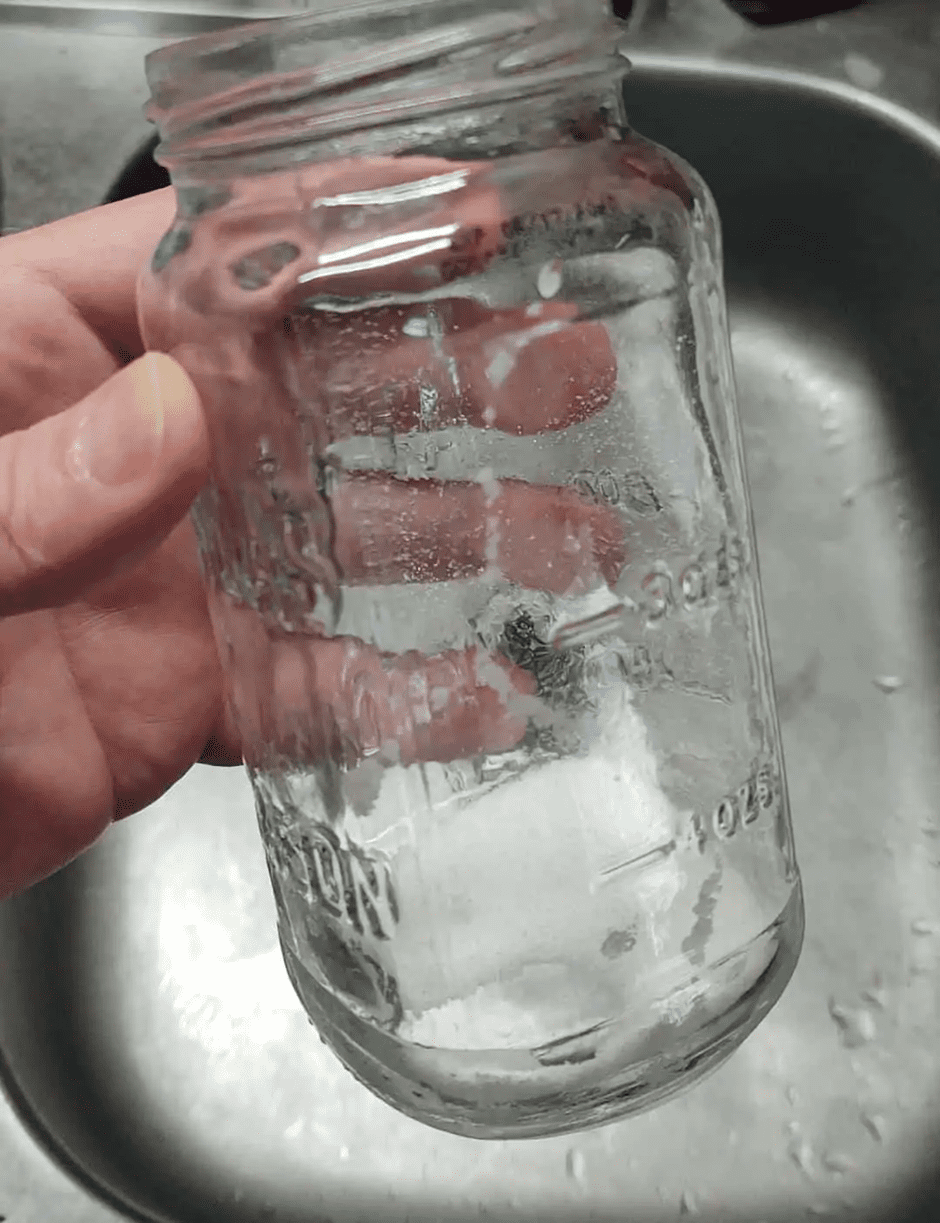
I decided on a glass jar with a lid. Some thinner-walled glass bottles may not be appropriate to use, as they could shatter while being heated.
Now, in a true survival situation, a plastic container can be used to boil water at low temperatures. But as the plastic is heated, harmful chemicals can leach into the water supply. In such a situation, it is up to you to decide if circumstances are dire enough to drink from such a source.
Transfer Tube (Copper Tubing)
Now on to the transfer tube. I found a small length of copper tubing in the garage that should work well for this purpose. Small copper tubing is common if one knows where to look.
Again, I would recommend staying away from general-use plastic tubing for this purpose. The steam that is entering the transfer tube is quite hot and may cause the tubing to leach.
Collection Container (Glass Bottle/Jar)
As far as the collection container goes, almost anything can be used. But, ideally, the collection container will be sealed around the copper tubing to prevent any steam that did not condense from escaping.
I decided to use another glass bottle with a screw-on lid. I then poked a hole in both lids that were just a little bit smaller than the copper tube. When I pushed the tube through the hole, the lid sealed decently around the tube.
Cooling Method (Air/Wet Rag)
The last thing to consider is the cooling method around the copper tubing. Now I have done this before and allowing the tube to cool by air does work, just not efficiently. Cooling by air may produce a mixture of steam and liquid water.
“Contaminated water” (impure water) can be used to cool the tube by simply wrapping a wet rag around the tubbing. However, the rag will have to be wetted numerous times throughout the process because the tubing will heat up over time.
When using untreated water to cool the transfer tube, be sure that none of it gets into the clean water collection container.
Testing it Out
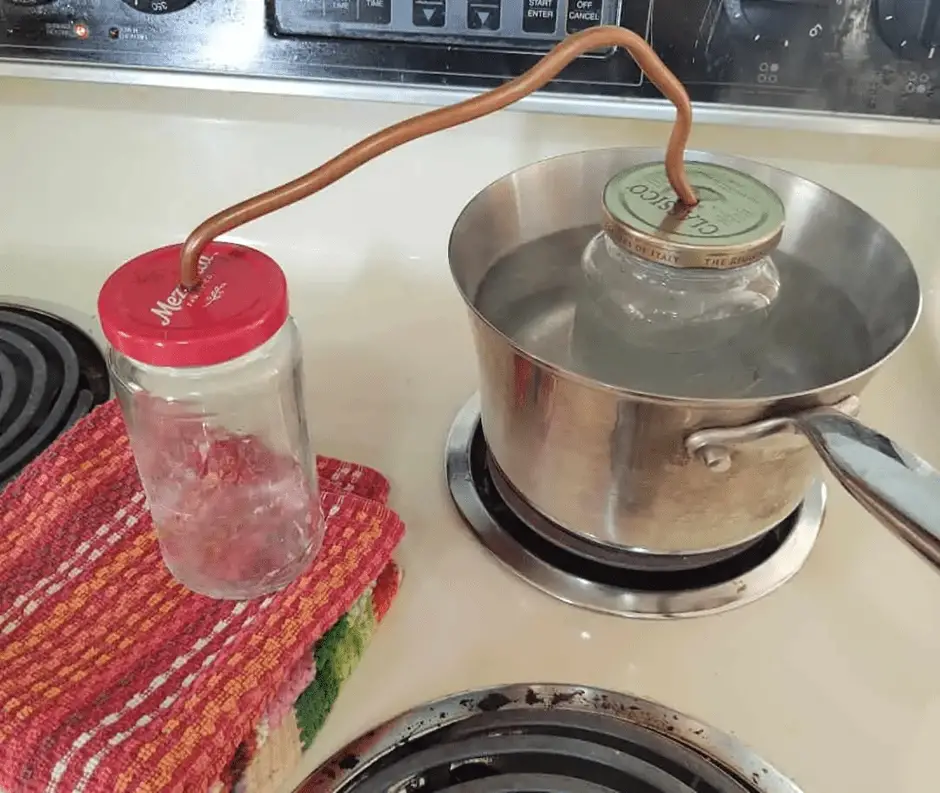
For demonstration purposes, I decided to do this inside on the stove top using a double boiler method.
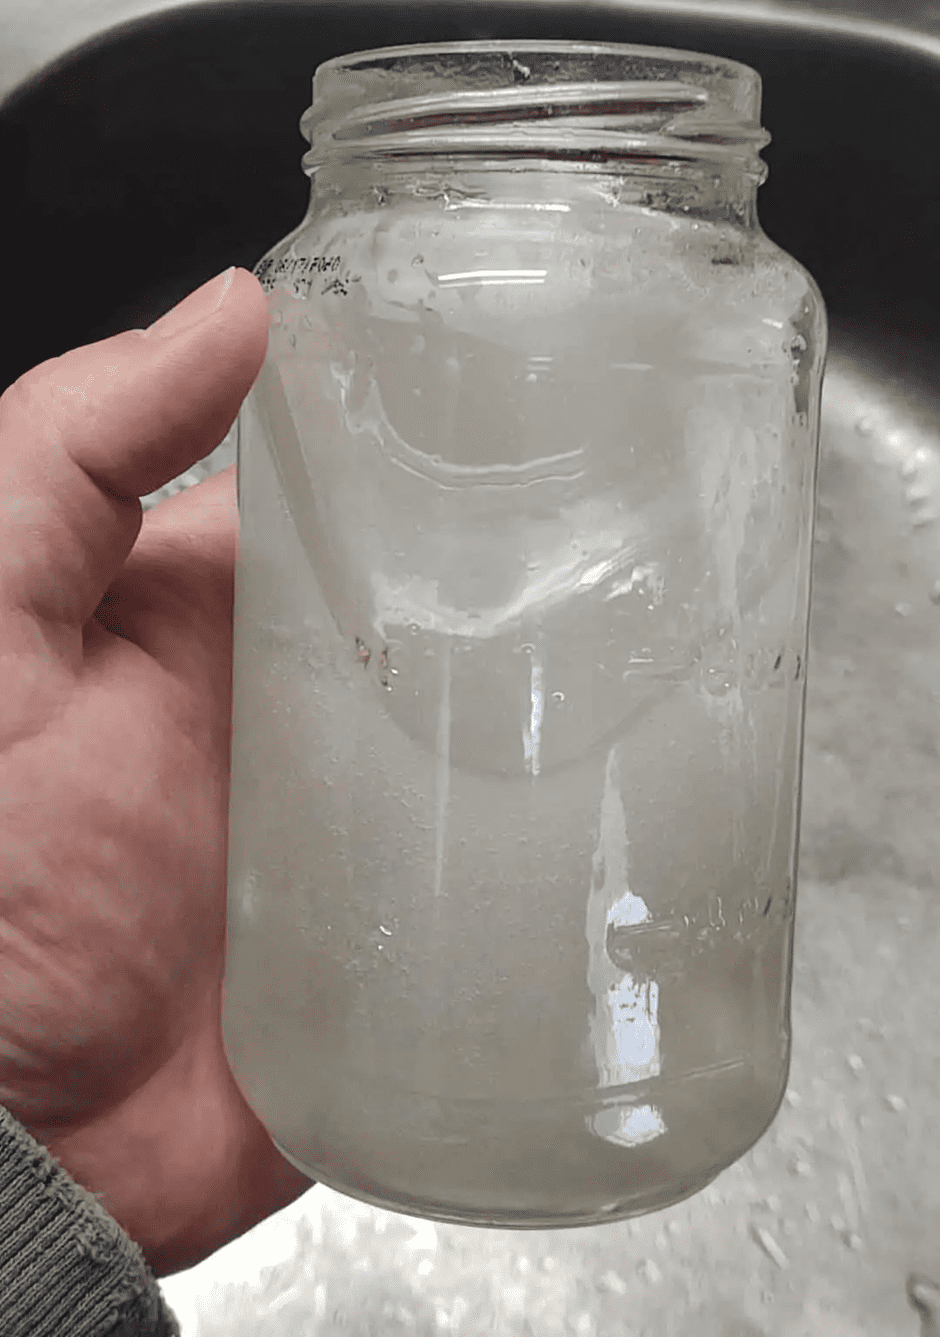
To start, I placed a fair amount of salt into the glass jar. I did not measure the amount of salt, but it is more than enough to turn the water into a milky white color.
Next, I connected the tubing, set everything where I wanted it to go, and began heating on a medium-high heat on my stovetop burner.
I decided to opt-out of cooling the tube with water and instead wanted to see how well air cooling would work.
It took about 20 minutes before I started to see any moisture coming out of the tube on the collection bowl side.
After about 45 minutes, I decided to stop and make some adjustments because the results were about one teaspoon of clean water.
Distillation Process Adjustments
The seal around the copper tubing and the lid were not as tight as I thought, and I was losing quite a bit of steam on the heated bottle side.
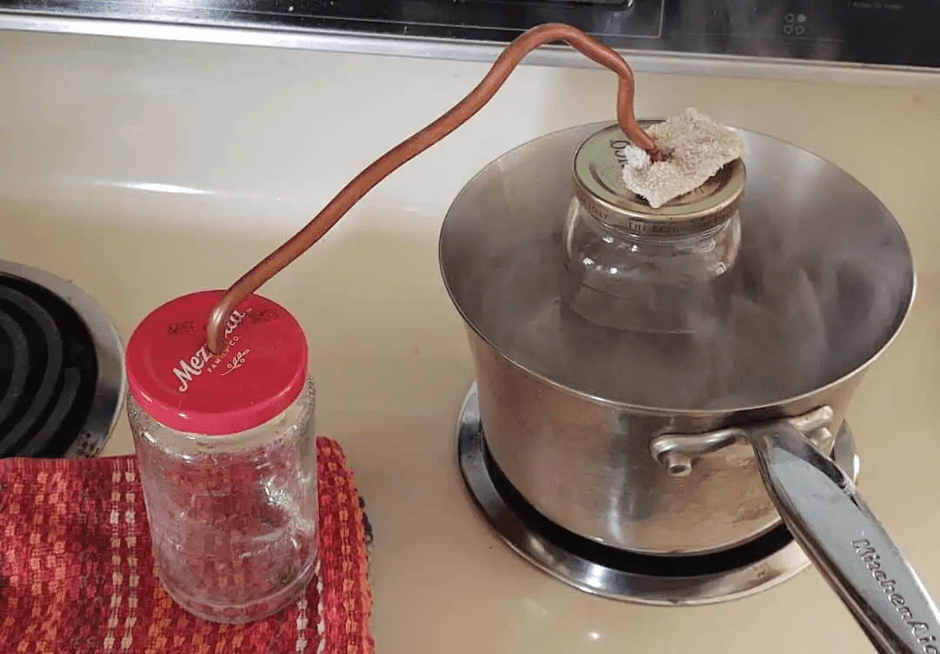
So, I took a small piece of a washcloth and shoved it around the lid and copper tubing.
I also decided to put the jar directly onto the heat source instead of using the double boiler. I DO NOT RECOMMEND DOING THIS.
With a glass jar not designed for this purpose, this is not a good idea because the jar could shatter. But I took the chance for the sake of the article.
After the Adjustments
The contaminated water heated up much quicker and was soon boiling in the jar.
With the piece of washcloth in place, there was zero steam escaping from around the tube. This meant all the steam was now being forced into the copper tube.
Within about five minutes of boiling, there was a more consistent stream of drips into the clean container.

It still took about 30 minutes before I saw roughly a few tablespoons of clean water. This setup is definitely not for processing large volumes of water, at least not quickly.
Making it Better
For this project, I wanted to do it as simply as possible just to show the process of making distilled water at home, and that it can be done with a few simple components.
Next time, however, I will be stepping up my game and making a much more efficient unit. These will be the three things I will be fixing:
- The boiling container
- Adding seals
- Adding a water cooler
My next attempt will include a container that can be applied directly to a heat source, it will be properly sealed, and it will be water-cooled.
Water does a much better job of cooling down the transfer tube and speeding up the condensation process.
Other Methods to Make Naturally Distilled Water
But what about if you do not have the means to make a fire or the materials to make a desalination unit as described above?
Well, in that case, I did want to offer a few additional methods to make distilled water.
Solar Still Method 1
The first method is pretty well known because it has been brought up a lot within the outdoor community.
The only special materials that are required are a sheet of clear plastic and a collection container.
Start by digging a hole a few feet wide by a few feet deep. Line the hole with green vegetation, moist soil, or pour in saltwater.
Next, place a large container in the center of the hole and then cover the hole with a sheet of plastic.
Place a small pebble on the center of the plastic so that the material dips down just over the collection container.
As the hole heats up (greenhouse effect) the saltwater will evaporate and water droplets will begin to collect on the underside of the plastic.
Eventually, it will run down to the center of the plastic and drip into the container inside.
Solar Still Method 2
This method is less work than the previous one, but it will require three containers. Each container needs to be smaller than the previous one.
For demonstration purposes, let’s use a small pot, a 2-liter plastic bottle, and a smaller container like an old soup can.
Fill the soup can with salt water and place it in the center of the pot. Then cut the bottom off the 2-liter bottle and place it over the soup can.
Place the whole setup in a sunny location. As the water in the soup can heats up, it will evaporate and become trapped by the 2-liter bottle. The condensation will collect at the top of the bottle, run down the side, and you will collect water in the large pot.
“Floating Bowl” Method
This is another way to make distilled water at home and it is incredibly easy. As long as you have a cooking pot with a lid and bowl that is smaller than the pot, you can make your own distilled water.
One side note. This method works much better if the pot lid is curved rather than flat and it doesn’t have a pressure release or steam hole in it.
The first thing to do is to pour some tap water, or the water you want to distill into the pot. Don’t fill the pot up, just pour in an inch or so to start with and then place the pot on your stovetop.
Next, take a small glass bowl or any bowl that is smaller than the pot, and put it inside of the pot. You want the bowl to be floating. If it isn’t, go ahead and add some more water.
Now, turn the pot lid upside-down to cover the pot. You want the bowl to be free floating so if the top of the bowl is touching the lid, adjust the water level or the size of your containers accordingly.
It’s now time to start making distilled water.
Turn the stove on to medium heat and wait. As the water heats up, the water vapor will rise and collect on the underside of the inverted lid. The distilled water will then run down the lid and fall into the glass bowl.
A way to speed this process up is to place ice cubes on the top of the lid. The ice cubes help to keep the lid cool, and this will speed up the condensation process. To keep the lid as cool as possible, you might need to replace the melted ice with fresh ice from time to time.
This is one of the easiest methods to obtain distilled water at home.
FAQs
Can you drink distilled water?
Drinking distilled water isn’t necessarily bad for you, but if it is all that you drink, you could actually become slightly dehydrated. This is because water naturally has minerals, like salt, in it. While we can’t drink ocean water due to its high salt levels of salt, distilled water does lack some potentially beneficial minerals.
Is distillation just for saltwater?
Not at all. You can use distillation to purify water from any source you want, whether that be salt water, tap water, if you collect rainwater, or water from a pond. Heck, I’ve even known people that will distill bottled water.
Why would you distill tap water?
Most tap water isn’t pure water and it can contain things like heavy metals, pharmaceuticals, and other volatile toxins. Drinking water with this type of stuff in it is not good for us. Some of these substances and heavy metals can be separated when making distilled water. Distilled filtered water will give the best results.
Wrap Up
With the right materials and a little prep time, you can make your own home distillation kits.
These simple systems not only allow you to make pure water at home, they also give a person the ability to take saltwater and create drinkable freshwater. With a little know how, distilling water really isn’t all that difficult.
Thanks for reading and stay prepared!
