Having a fire is one of my all-time favorite past times. Call me old fashioned, but I mean what could be better than that? How about creating your own usable, storable, free electricity at the same time?
The No products found. does just that. Through a thermoelectric generator, this stove converts the heat from burning biomass (twigs, pinecones, etc.) into electricity that can be used to charge devices directly. Excess power is stored in an internal battery that can later be used when you need it.
In our high-tech age, keeping portable electronic devices charged is just the way of life. In the outdoors, power sources are limited or nonexistent. The importance of keeping certain items, like a communication device, charged in a survival situation becomes quite clear.
SKIP AHEAD
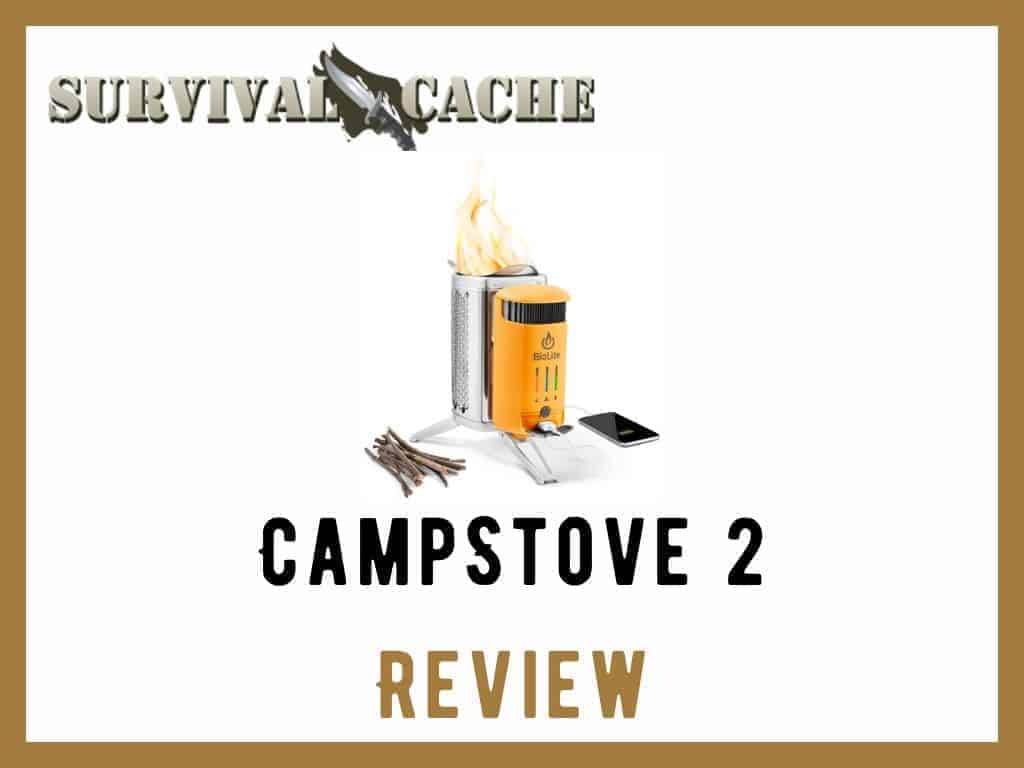
BioLite CampStove 2 Review
For this review I will be seeing how the No products found. stacks up to my expectations of what it promises. But before we get into that, let’s see what this stove has to offer.
Size
This stove weighs in at 2.06 pounds and its dimensions packed away are 5.0” X 7.91”
Fuel
The CampStove 2 is designed to burn only biomass (twigs, pinecones, etc.) or wood pellets. Burning anything else in the stove such as liquid fuels or charcoal is not recommended.
Power
The power module is capable of producing 3W of power and has an internal 2600 mAh battery. A push button on the front of the module controls four different speed settings for the onboard fan.
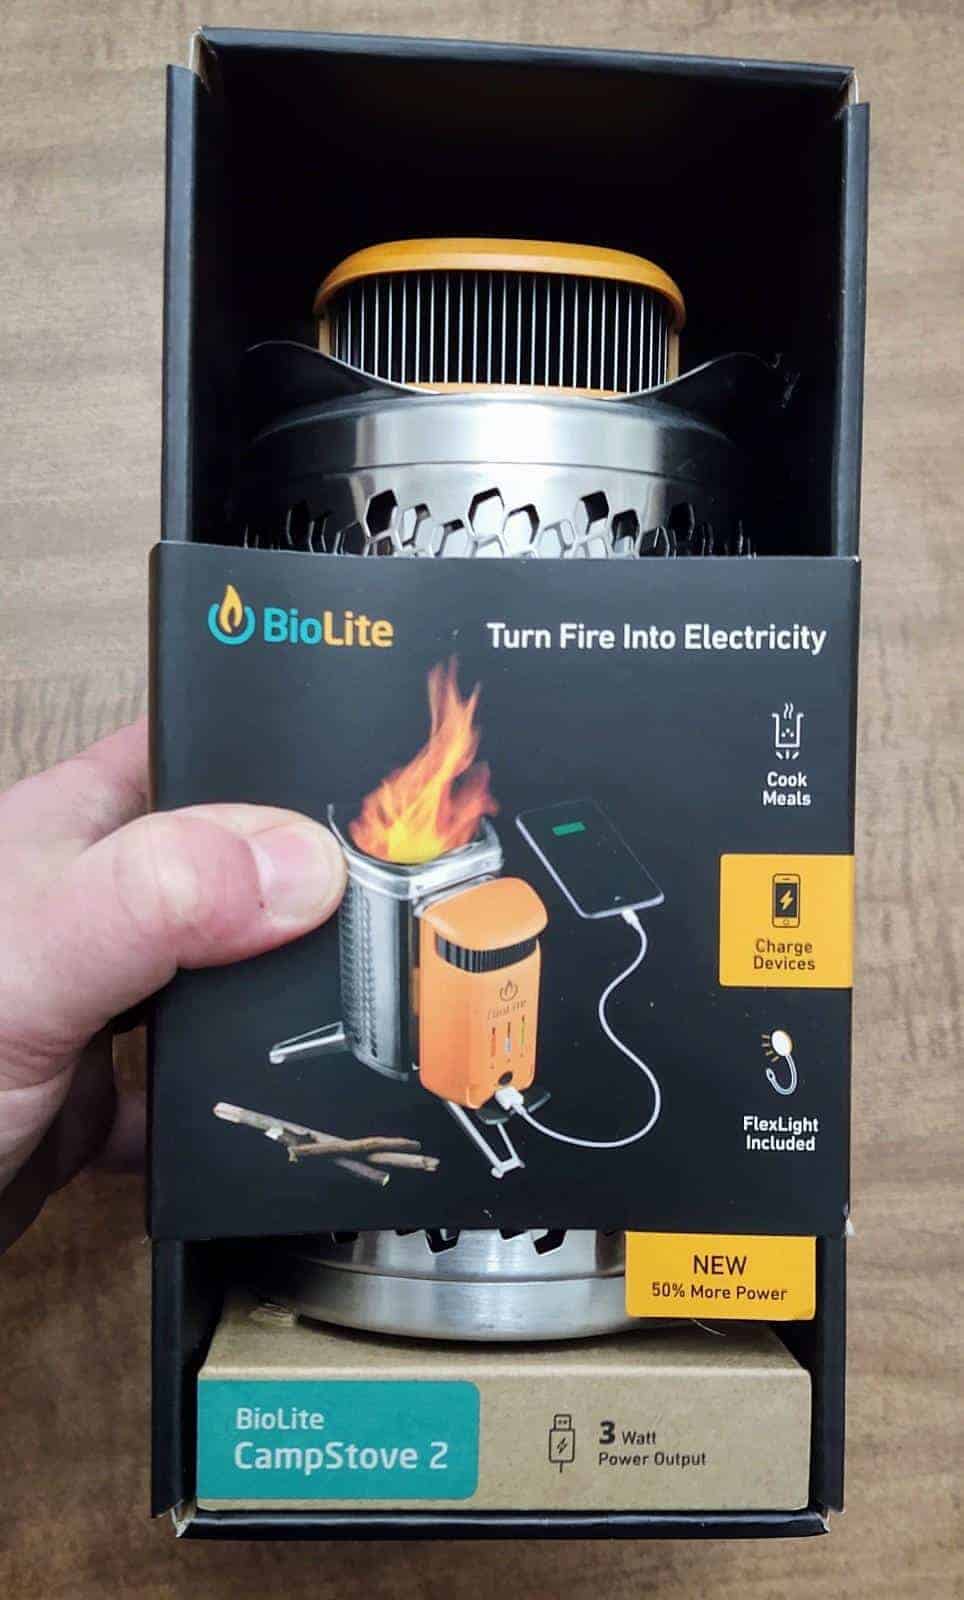
What’s included
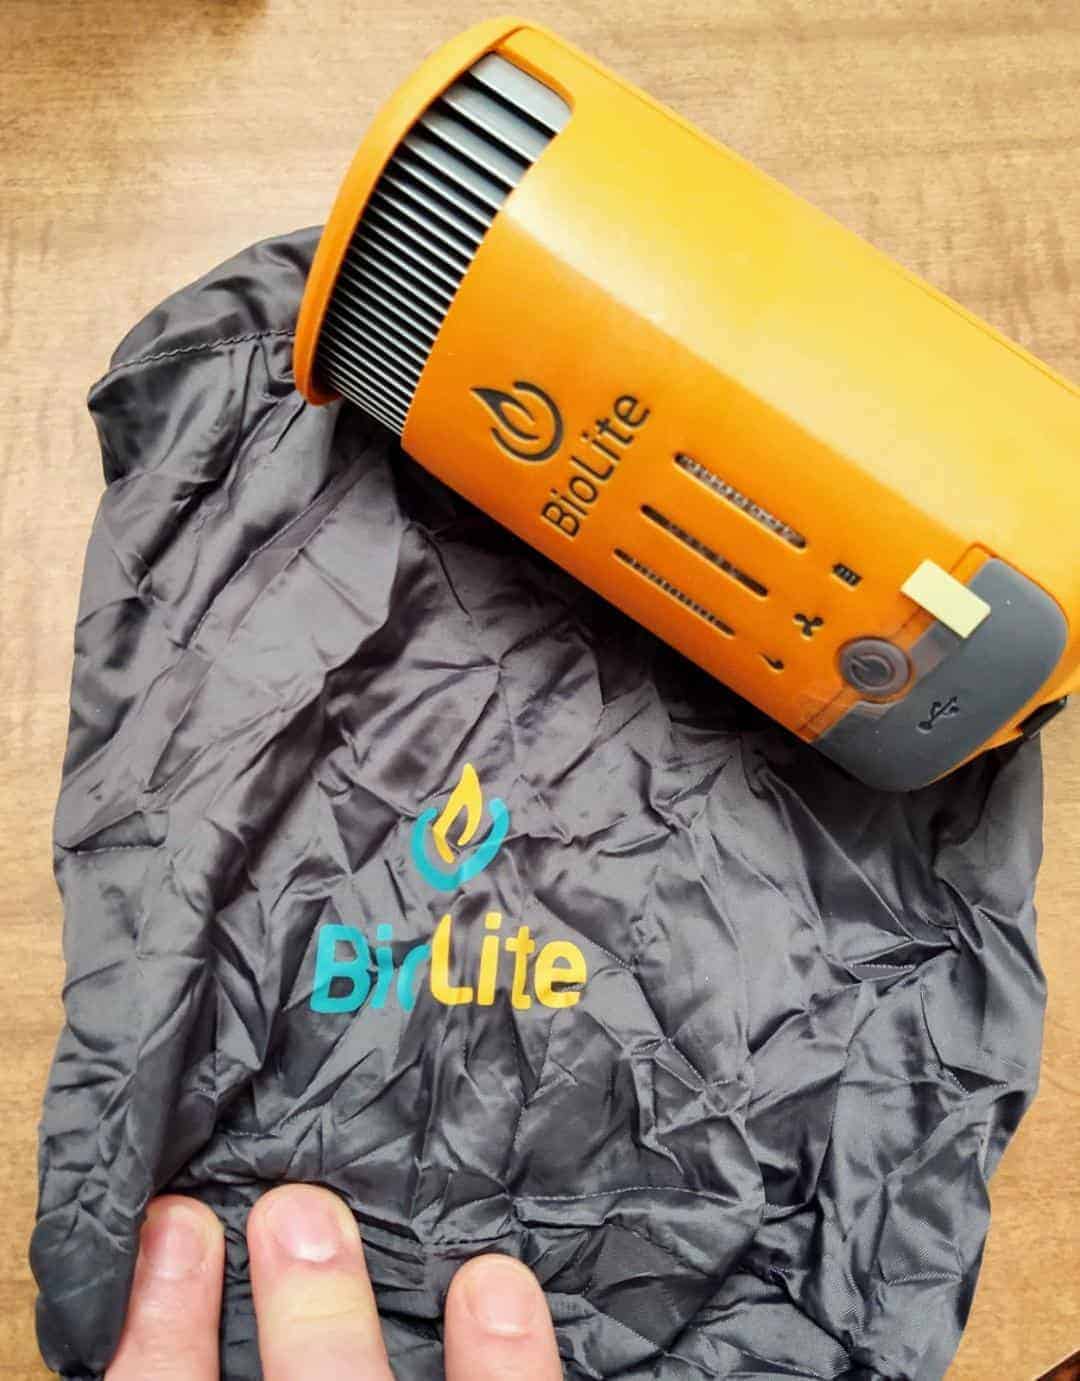
Other than the stove and power module there are a few other items that are included when you order the CampStove 2. You will get a 100 lumen Flexlight, stuff sack, fire starting tinder, USB cord and instructions with a cool little sticker that is the BioLite logo.
First Impressions
When I opened the box for this stove, I was a bit surprised by its size. For some reason or another I thought it would be bigger. Maybe it had to do with the fact that it is also creating energy and I thought the components for that would need more space or it appeared larger in the pictures I had seen. Either way, I was pleasantly surprised that it was smaller.
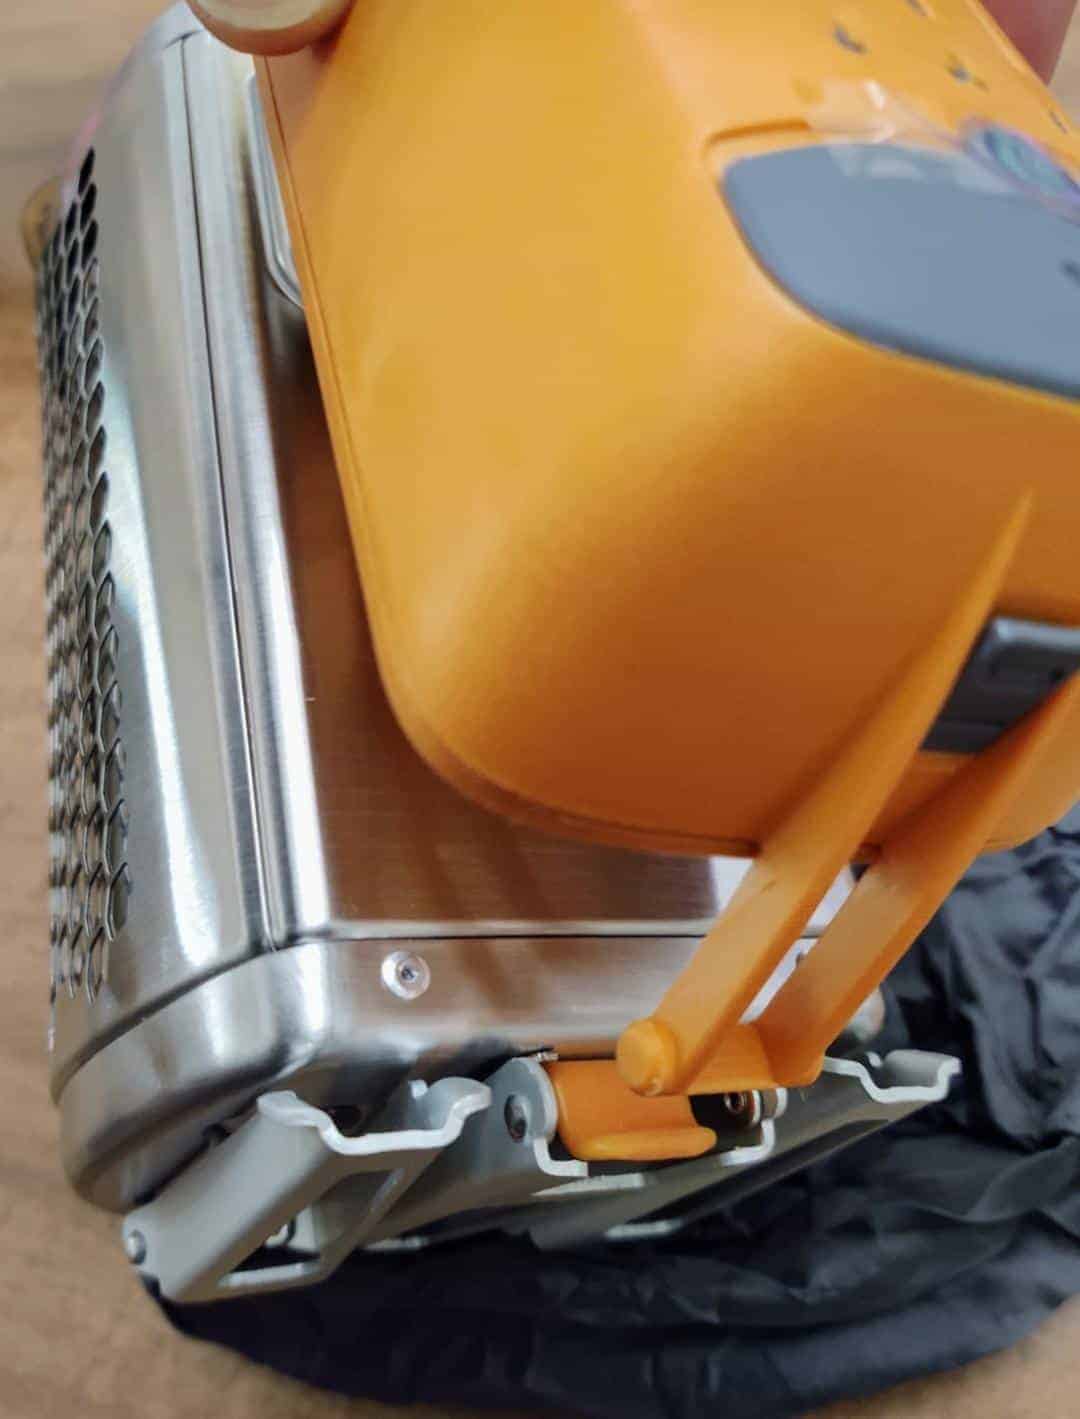
The next thing to note is that the orange power module is not fixed to the stove. They are two separate components that “snap” together. When not in use the power module can be packed inside the stove, making it more compact for transportation.
As I said earlier there are few items included with this stove that are worth mentioning. The first is a 100 lumen Flexlight that plugs directly into the USB port of the power module. A drawstring stuff sack is included for storing and transporting the stove when it is not in use. BioLite also provides a small plastic bag with nine squares of fire tinder to aid in getting a fire going. Lastly, a small USB cord is included but its purpose is for charging the power module through a wall outlet. Thank you BioLite for the extra goodies.
While this stove looks simple, I took a little bit to read through the instructions that were included and also watched the short tutorial video BioLite has on YouTube. They were both helpful and I encourage anyone thinking about purchasing this stove to check out the video.
BioLite Campstove 2 Hands-On Experiences

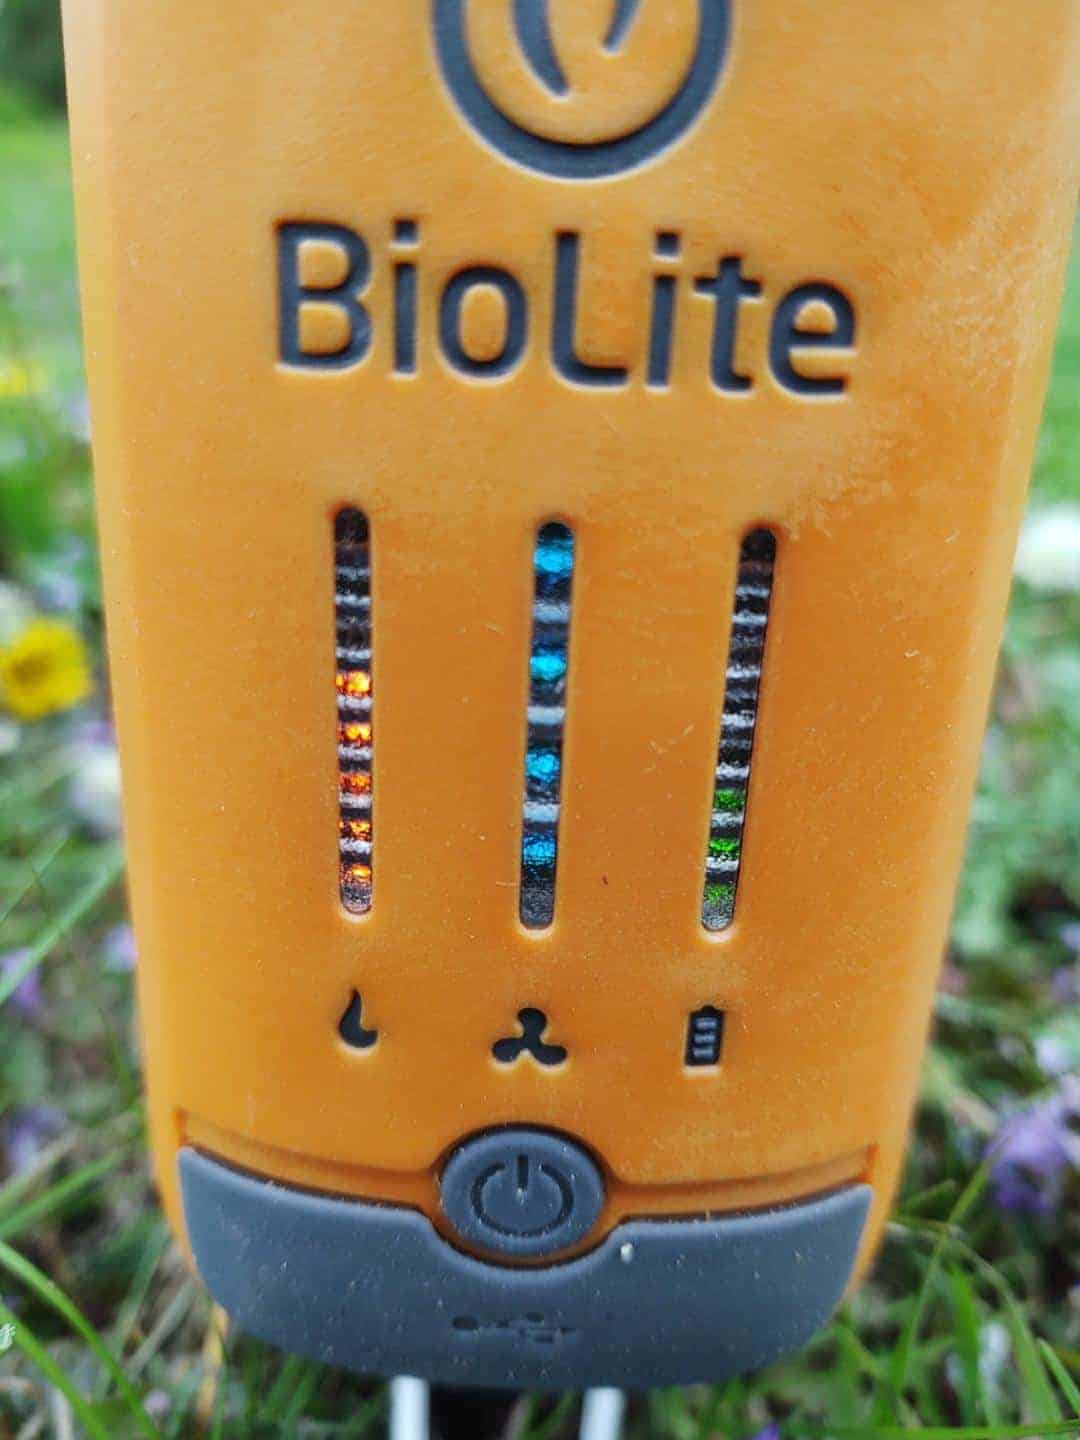
It is recommended that the power module be plugged in and charged before use. I did follow this recommendation, for about ten minutes. I was too eager and impatient to try this stove out and couldn’t wait any longer. However, it was long enough to move the power display light from red to a single green bar.
Setup
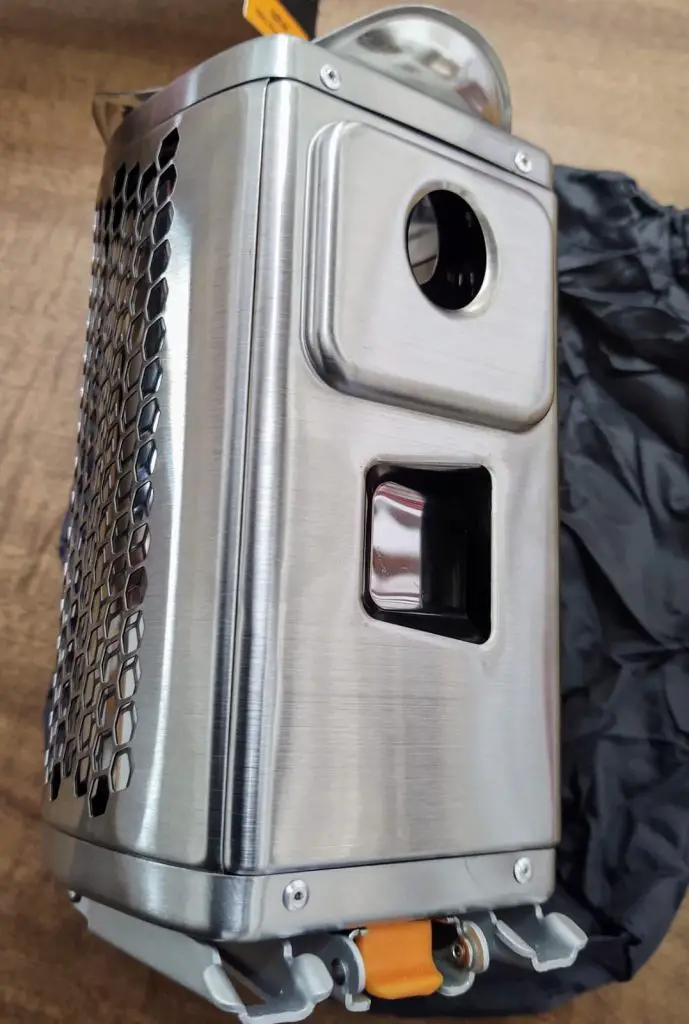
Setting this stove up is incredibly easy. With the stove legs folded in, slide the metal rod (heat sensor) of the power module through the top, round opening of the stove. The lower opening is where the fan injects fresh air into the stove. On the bottom of the power module is an orange piece that “snaps” into a corresponding orange piece on the bottom of the stove. Next, I extended the stove legs. The leg under the power module should be extended first as it locks the two orange pieces into place.
I then found a level piece of ground to set the stove on and went about collecting fuel.
Fuel
It is worth repeating that there are only two types of fuel that should be burned in this stove. Biomass and wood pellets. Liquid fuels and charcoal should not be used.
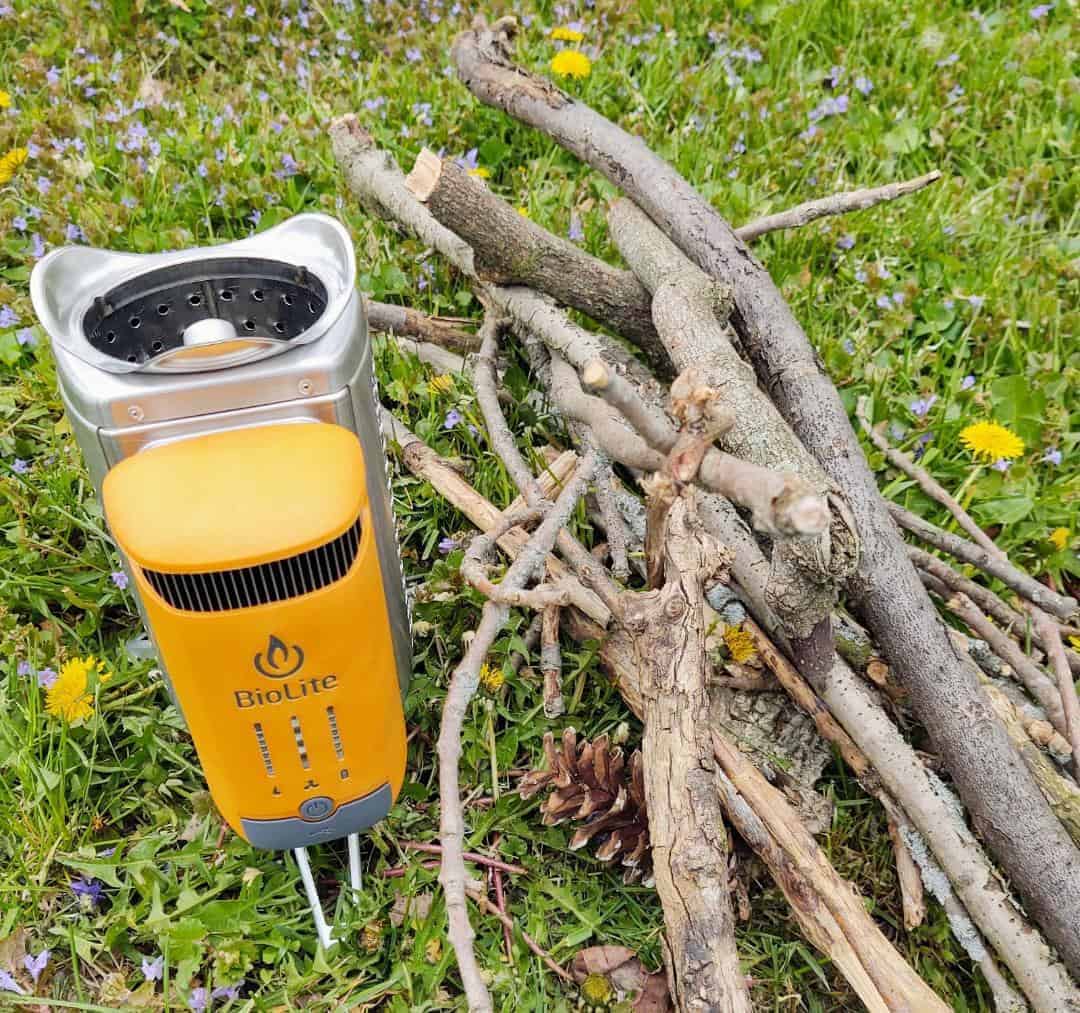
I spent about ten minutes collecting a small armful of wood that was made up of different types and sizes, plus one lonely pinecone. All of it was very dry and ready to be put to good use. Given that similar stoves I have used in the past blast through fuel quickly, I was very curious how long my little pile would last. Read on to see my detailed account.
Start the Fire!
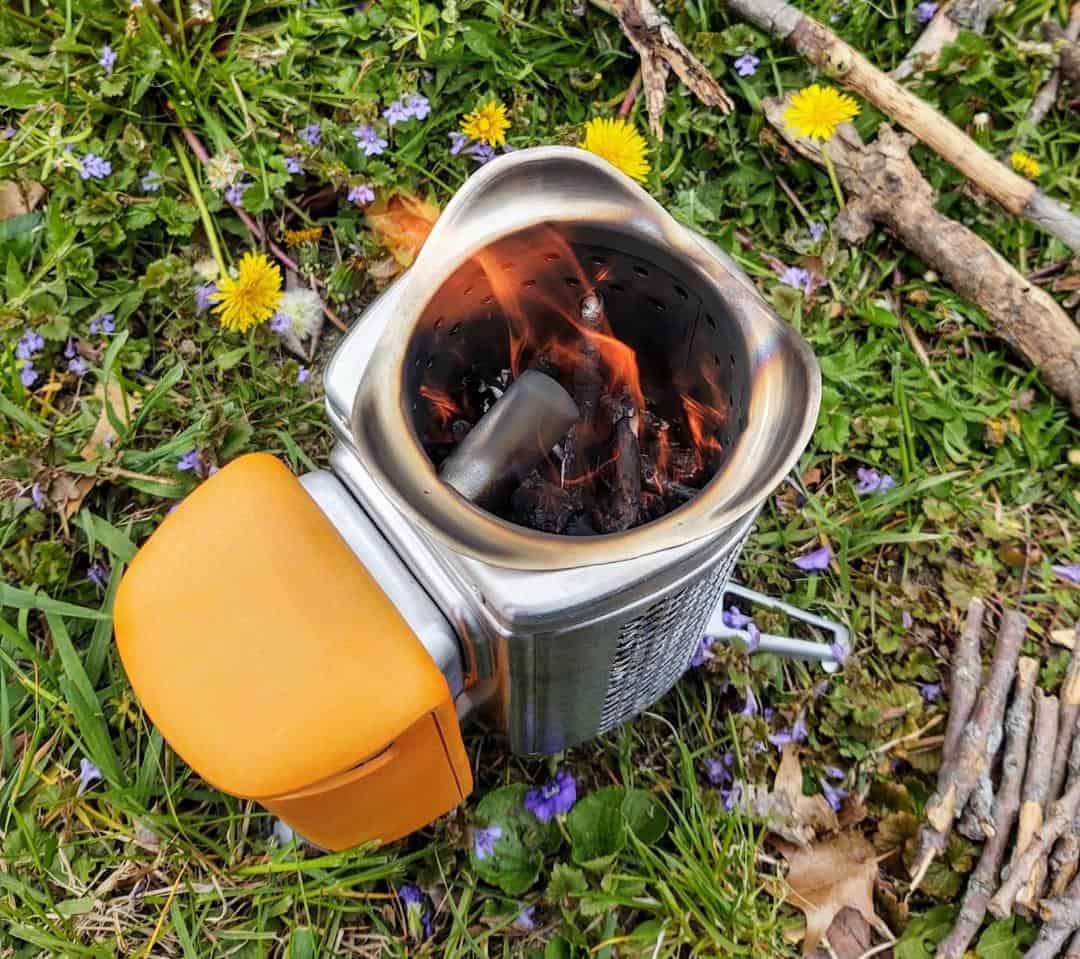
My first challenge was how to light the fire. Due to the location of the heat sensor (metal rod sticking into the burn chamber) it was a bit tricky. I decided to fill the burn chamber halfway up with twigs and added one of the fire starting squares on top. I then used a thin piece of fatwood like a long match to ignite the tinder square. After adding small pieces of wood on top of that, I soon had a fire going.
Once the flames started dancing around the heat sensor it didn’t take long for the fan to automatically kick on. When this happened the flames really started rolling! I could see the secondary combustion by observing the flames coming out of the top air holes and swirling in the center of the stove like a little vortex. I filled the rest of the burn chamber up and surprisingly this first batch of fuel lasted almosteleven minutes.
Timed Burn
From the moment I got the fire going I turned on a timer in order to keep track of a few items I was curious about. Below is a list from start to finish of the notes I took. The first thirty-four minutes I decided to keep the fan speed on its lowest setting. NOTE: These times may vary slightly for you depending on the type of fuel used.
- 2 minutes in the fan kicked on and the power indicator showed one red bar.
- 5 minutes in the red bar turned to green
- 6 minutes in the second green power bar began flashing
- 11 minutes in the flame almost went out and I added my second round of fuel. From this point on I added fuel off and on without noting the time
- 30 minutes in the second green bar was still flashing
- 34 minutes in I had two full green bars and decided to kick the fan speed up one level
- 41 minutes in the heat indicator bar maxed out but wasn’t flashing.
- 46 minutes I had three full green bars of power. At this point I decided to plug my phone directly into the power module. It took roughly four minutes to bring my phone power level up one percent. I unplugged my phone and turned the fan speed to the highest setting.
- 108 minutes I had three full green bars with the fourth bar flashing.
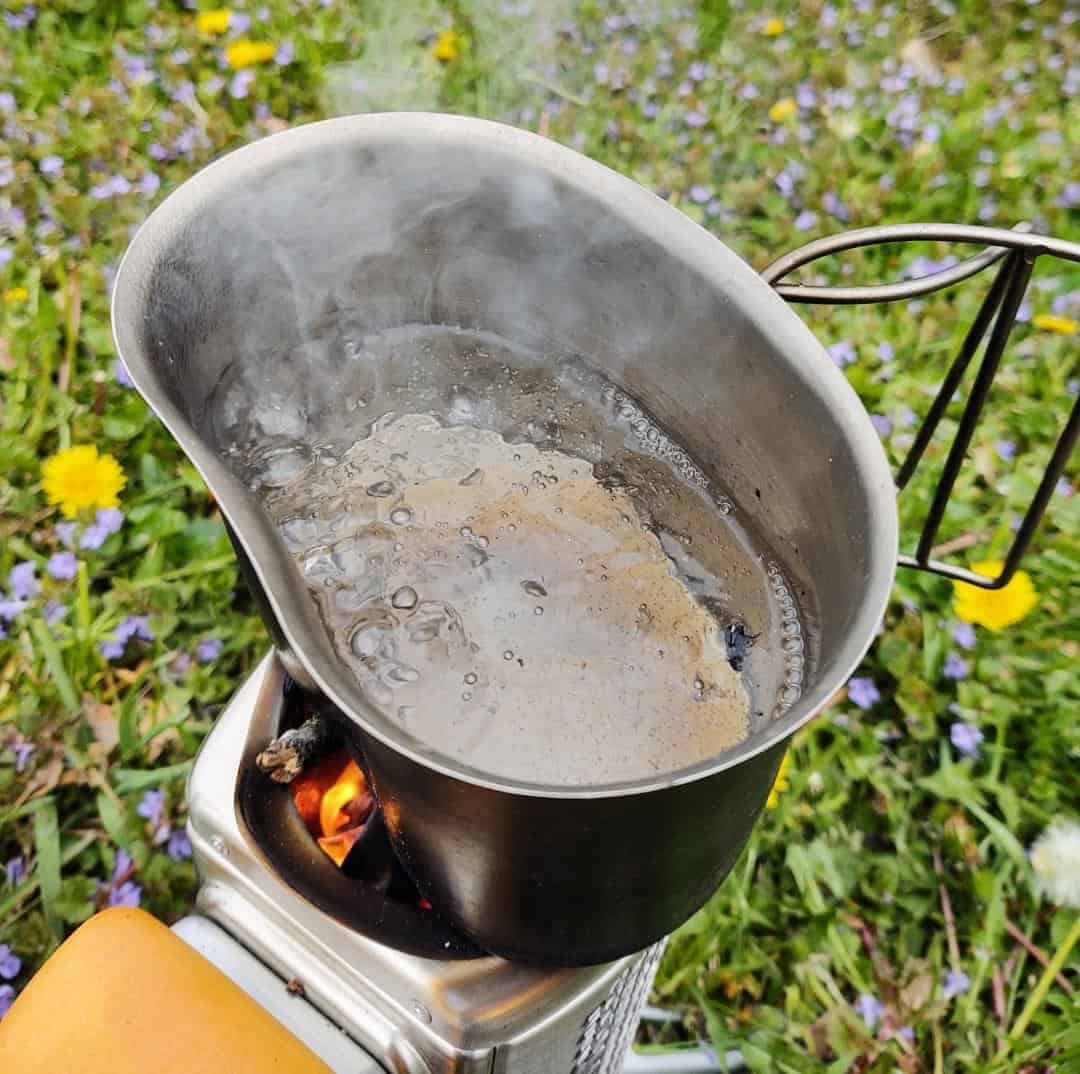
- I wanted to see how long it would take to boil some water. So, I grabbed a GI style stainless steel canteen cup and filled it a little over halfway up with water. I placed the cup on the stove at 122 minutes in and had a rolling boil at 127 minutes. Five minutes to boil a cup of water, I’m happy with that.
- 137 minutes in I decided to stop feeding the fire and let it die out.
- 146 minutes in the fan shut off indicating that the stove was cool enough for the fan to stop running. However, there were still plenty of glowing embers in the bottom. Before dumping the burn chamber out, I waited for the embers to go out completely and I could no longer feel any residual heat.
After The Burn
I dumped the cold ashes out, removed the power module and folded the stove legs up. There are two different ways to pack unit up. The first is to put the power module into the stuff sack and then place it into the burn chamber of the stove. The second is to put the power module into the burn chamber and then put the whole thing into the stuff sack.
But I wasn’t ready to pack this stove away just yet. After I was done with my fire, the battery indicator on the pack showed it had three green bars. So, I took it into the house and plugged it into a wall outlet. It only took about an hour to charge it the rest of the way.
I unplugged the module from the outlet and then hooked up a USB cord in order to charge my phone through the power module. When I first hooked up my phone, the battery display on the power module immediately dropped two green bars. After twenty-three minutes my phone had charged fifteen percent and the display on the power module was down to one flashing green bar.
BioLite CampStove 2 Pros and Cons
Pros
- Sturdy construction
- Tripod legs provides a stable foundation for the stove
- User friendly
- Converts heat into electricity
- Produces a very hot fire that boils water fast
- Very efficient combustion allows for less fuel and a longer burn time
- Adjustable fan speed allows for more temperature control
- Flexlight works great
- Fire tinder that was included works great
Cons
- Expensive as wood stoves go but that price reflects the unit having a thermoelectric generator and a fan
- A little bulky and heavy
- Not impressed with the amount of power produced versus time spent charging the internal battery
- Should the battery and fan fail the stove will no longer function like it is supposed to
My Final Thoughts
Overall, I was pleasantly surprised by this product as one of the top survival stoves I have reviewed. The thing that impressed me the most was how long the fuel lasted. I was able to have a very hot fire for over two hours while only spending ten minutes collecting wood. And I didn’t even burn through the whole pile. So, this stove drastically reduces fuel collection time and increases burn time.
Having a fan with adjustable speed settings was interesting as I have never had a wood stove with that ability. It gave me more control over fuel consumption and temperature, which was pretty cool.
However, in my opinion, the reason to own the No products found. is the desire to recharge devices while away from a power source. After two hours of continuous burn time the battery was at roughly fifty percent. Add on another hour of charging through a wall outlet and you have three hours spent bringing the battery up to full capacity. After twenty-three minutes my phone charged up fifteen percent, but the power module was drained.
If you are looking for an efficient, hot burning stove with a fan I think the CampStove 2 is a great unit. But if you are primarily looking for a way to keep devices charged in the field, I think there are more efficient, affordable choices out there.
In closing, I would like to thank BioLite for the opportunity to test out this innovative product. Alternative energy sources are something to always strive for and I commend them for creating such a compact stove with a thermoelectric generator.
