A bow and arrow is an age-old tool that has been used for hunting, a weapon of war, as a means of personal protection, and for recreational activity.
Much can be said for how little this tool has changed given that it is still a string propelling an arrow, but the materials used, and the designs employed have certainly evolved.
The newest evolution that I have had the pleasure of trying out, is The Ranger Takedown Survival Bow offered by Survival Archery Systems (SAS)
The Ranger is a lightweight, compact survival bow designed to be easily and quickly assembled and broken down. And the best part is that it requires no tools to do so!
Before getting into my review I would like to thank SAS for the opportunity of testing The Ranger out and for their support in providing information about the product.
SKIP AHEAD
Ranger Takedown Bow Specifications
Alright, let’s see what this bow has to offer!
Materials
The riser is made from 6061 T6 aluminum and the limbs are constructed of high-tech composite fibers.
The minimum hardware present on the riser is made from 316 stainless steel.
Dimensions
Fully assembled the bow is 60 inches long and breaks down to 22 inches. This makes the bow incredibly easy to transport.
Weight
Weighing in at 2.6 pounds the bow is quite friendly on the back when carried in in the hand or a daypack.
Poundage
#40, #45, #50, and #55 limbs are available
Draw Length
The maximum draw length comes in at 31 inches.
Ambidextrous
The bow can be used by both right and left-handed shooters by simply changing the orientation of the limbs
Attachments
There are several threaded holes in the riser that can accept a range of attachments, such as an arrow quiver or sights.
What’s Included
The Ranger comes with:
- 1x riser
- 2x limbs
- 1x Dacron 16 strand bowstring with nock
- 2x small Velcro stripes
- 1x medium Velcro strip
- 1x Velcro cinch strap
- 1x owners manual
Arrows are NOT included
Color
At the time of this article, the bow is only available in black.
Country of Origin
The Ranger is made in the U.S.A
First Impression of the Ranger Takedown Survival Bow
This may not interest some folks but the first thing that caught my eye upon receiving the Ranger was the packaging.
The packaging is extremely important to me, especially with a product that has multiple components.
All too often now, I open boxes where items are haphazardly thrown in with very little padding for protection.
This was not the case with SAS. Everything was carefully wrapped with plenty of padding to ensure everything arrived undamaged.
After emptying the contents of the box, I noticed the owner’s manual, which seemed large to me but more on that later.
Next, I pulled the riser and two limbs out and was amazed at the simplicity of the product.
Two limbs are inserted into the riser, add the string and you have a bow!
I have held bows in the past that frankly feel somewhat frail and I was always concerned about breaking them. But I probably spent twenty minutes turning the riser over and over in my hands because it felt absolutely solid. I do not think durability will be an issue with this bow.
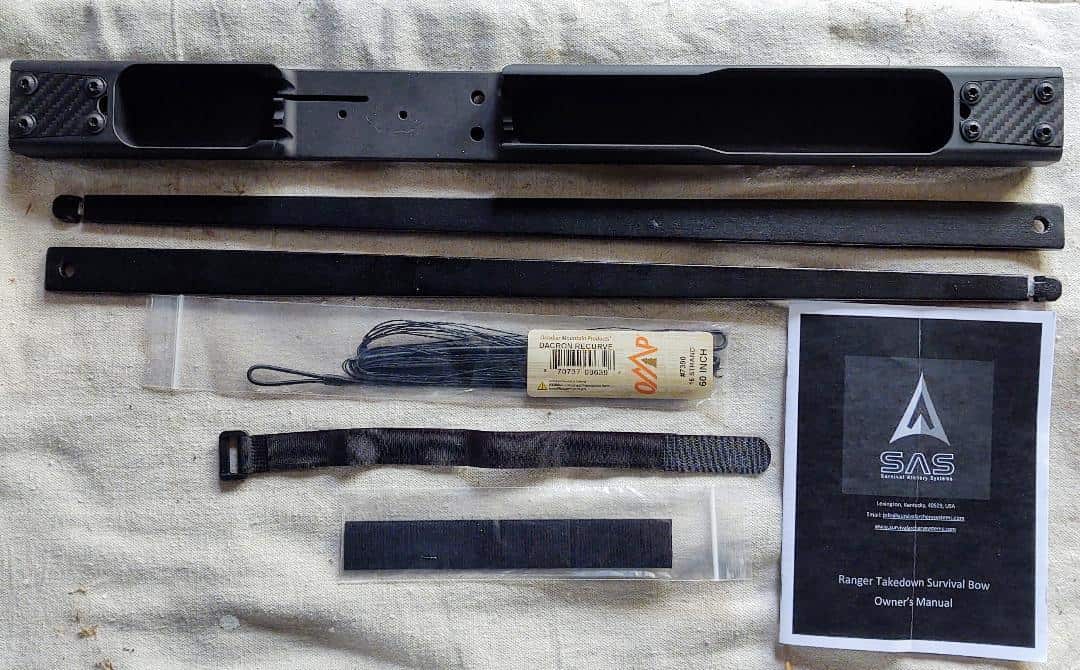
What’s Included, A Closer Look
Here is what you can expect to receive when purchasing The Ranger.
- 1x riser
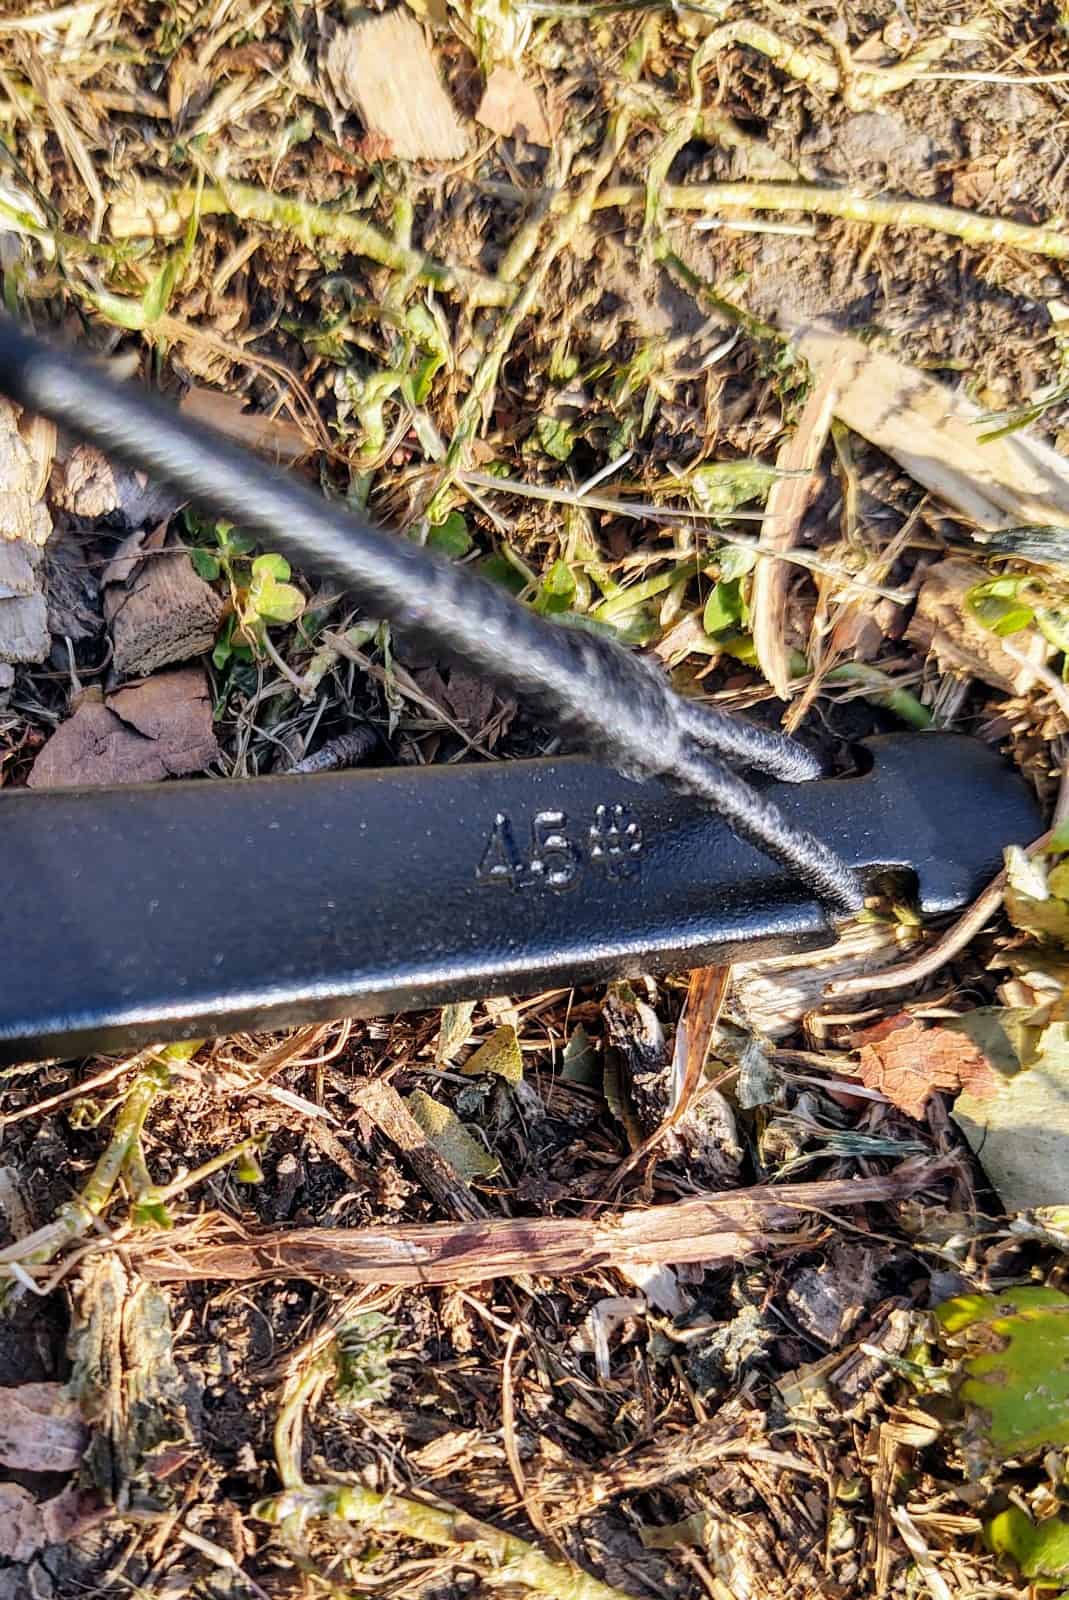
- 2x limbs. Each limb is marked on the end with the number of poundage. This is a great feature for keeping multiple sets of limbs organized especially when only one riser is being used.
- 1x Dracon 16 strand string and nock. It should be noted that the nock is loose in the bag so take care not to lose it when removing the string. It is also important to know that the grooves in the limbs are specifically cut out to accept the bowstring that is provided. Other bowstrings may not work.
- 2x small Velcro strips that are intended for setting up the arrow shelf
- 1x medium-size Velcro piece to also be used around the arrow shelf
- 1x Velcro strap with a plastic buckle for cinching everything down and keeping it secured during transport.
Lastly, I would like to mention again that the bow does not come with takedown arrows, but they can be purchased directly through the SAS website.
Before Shooting
As exciting as getting a new bow is (trust me as I wanted nothing more than to immediately take the bow out back and start slinging arrows through the air) I highly recommend reading through the owner’s manual from front to back.
As I mentioned earlier, the manual was larger than I expected. But that is because a lot of thought and information was put into it and it is an extremely helpful resource.
After reading the manual it was time to set the bow up, which took roughly ten minutes. However, most of that time was devoted to being a perfectionist in the placement of the Velcro for the arrow shelf.
Setting Up The Ranger Takedown Survival Bow
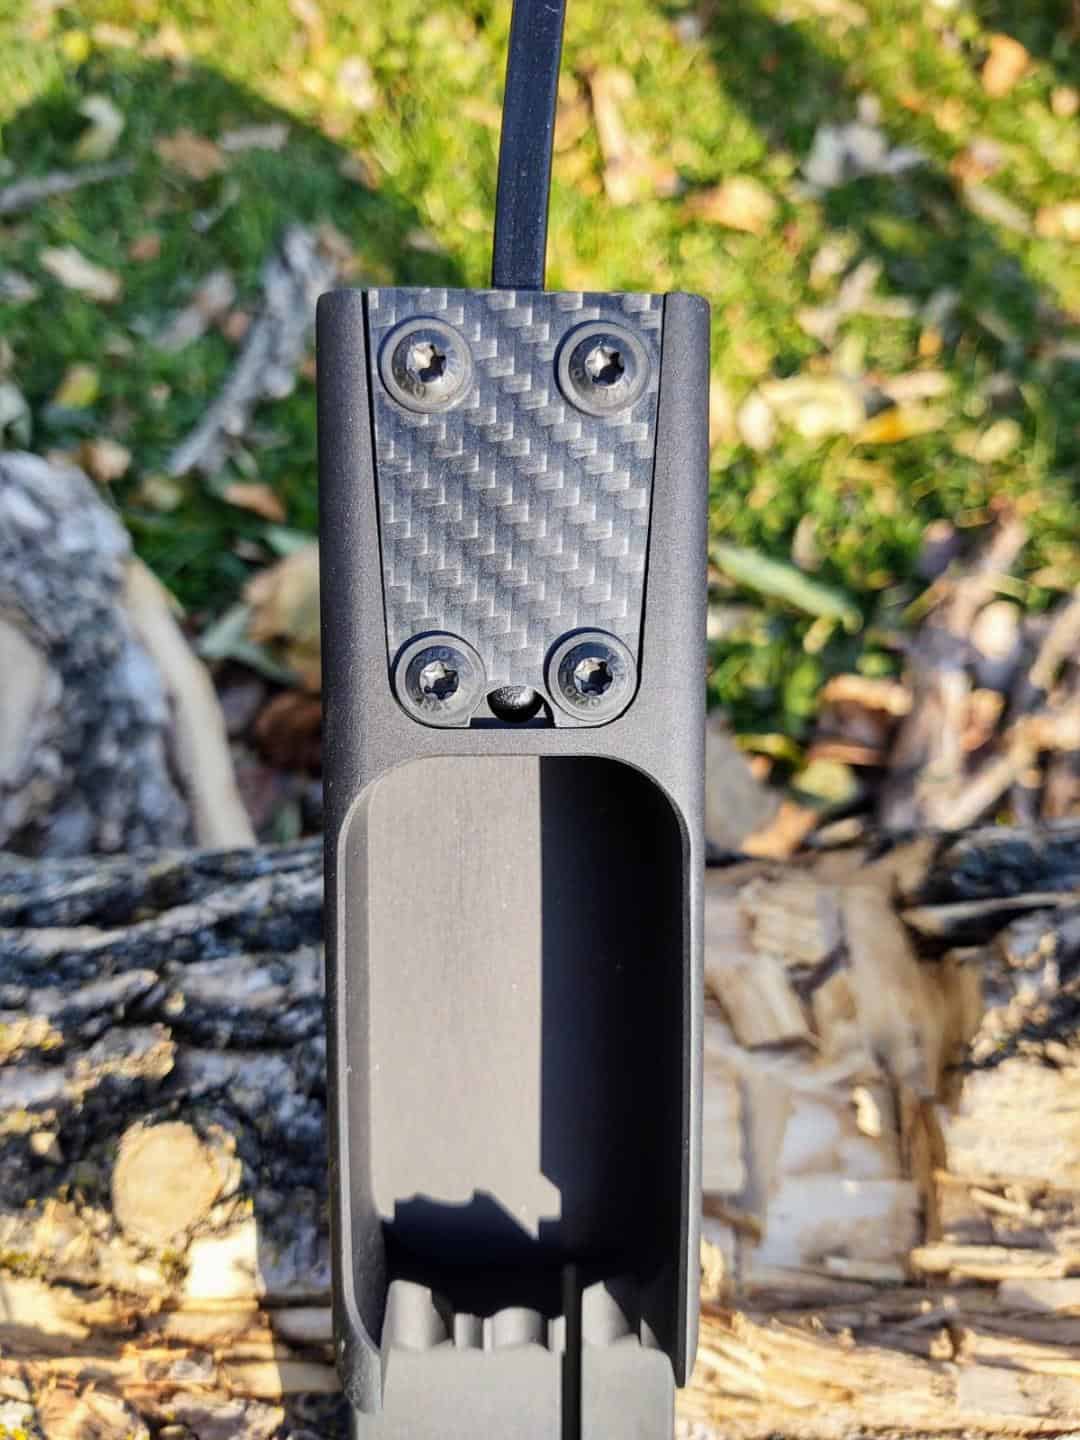
After the Velcro was in place, assembling the rest of The Ranger was incredibly simple. I placed one limb into the riser, making sure it was seated all the way down by looking through the window.

Then I placed the bowstring around the limb that was inserted and placed the tip of this limb on the ground against my foot so that the limb stayed in place.
Lastly, I inserted the second limb, made sure it was properly seated, and finished attaching the bowstring.
Once I became familiar with the bow the time to set it up and take it down was drastically reduced, which I will go into more detail about later in the testing section.
Takedown Arrows
The takedown arrows offered by SAS are extremely easy to put together.
They come in two pieces, the lower portion that has the head of the arrow, and the upper piece with the fletching and nock.
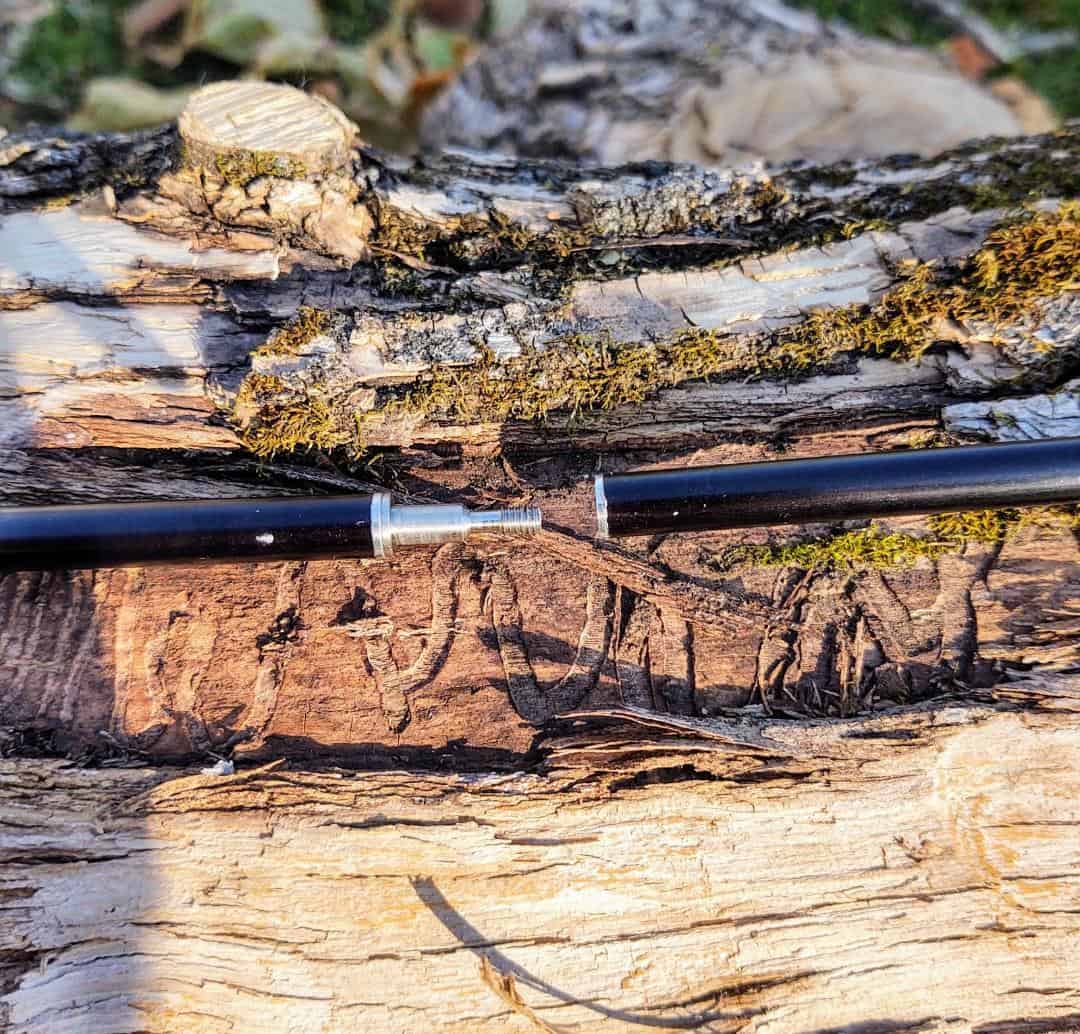
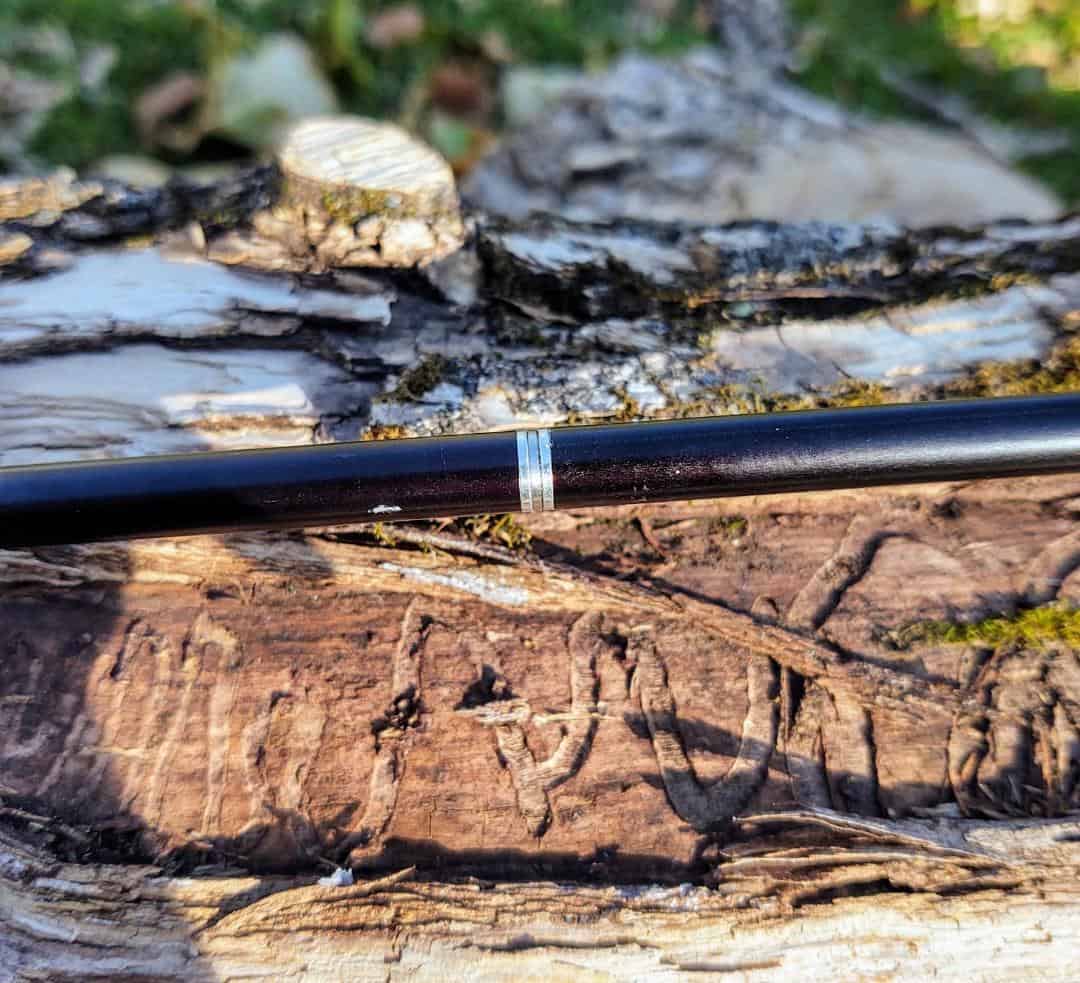
In the middle of the arrow is a metal insert. On one side there is a male end and on the other is a female end. Simply place these two ends together, tighten, and you have a full-length arrow.
Testing The Ranger Survival Bow
Comfort
The hand placement on the Ranger is different than other bows that have contoured designs, making for a more ergonomic grip.
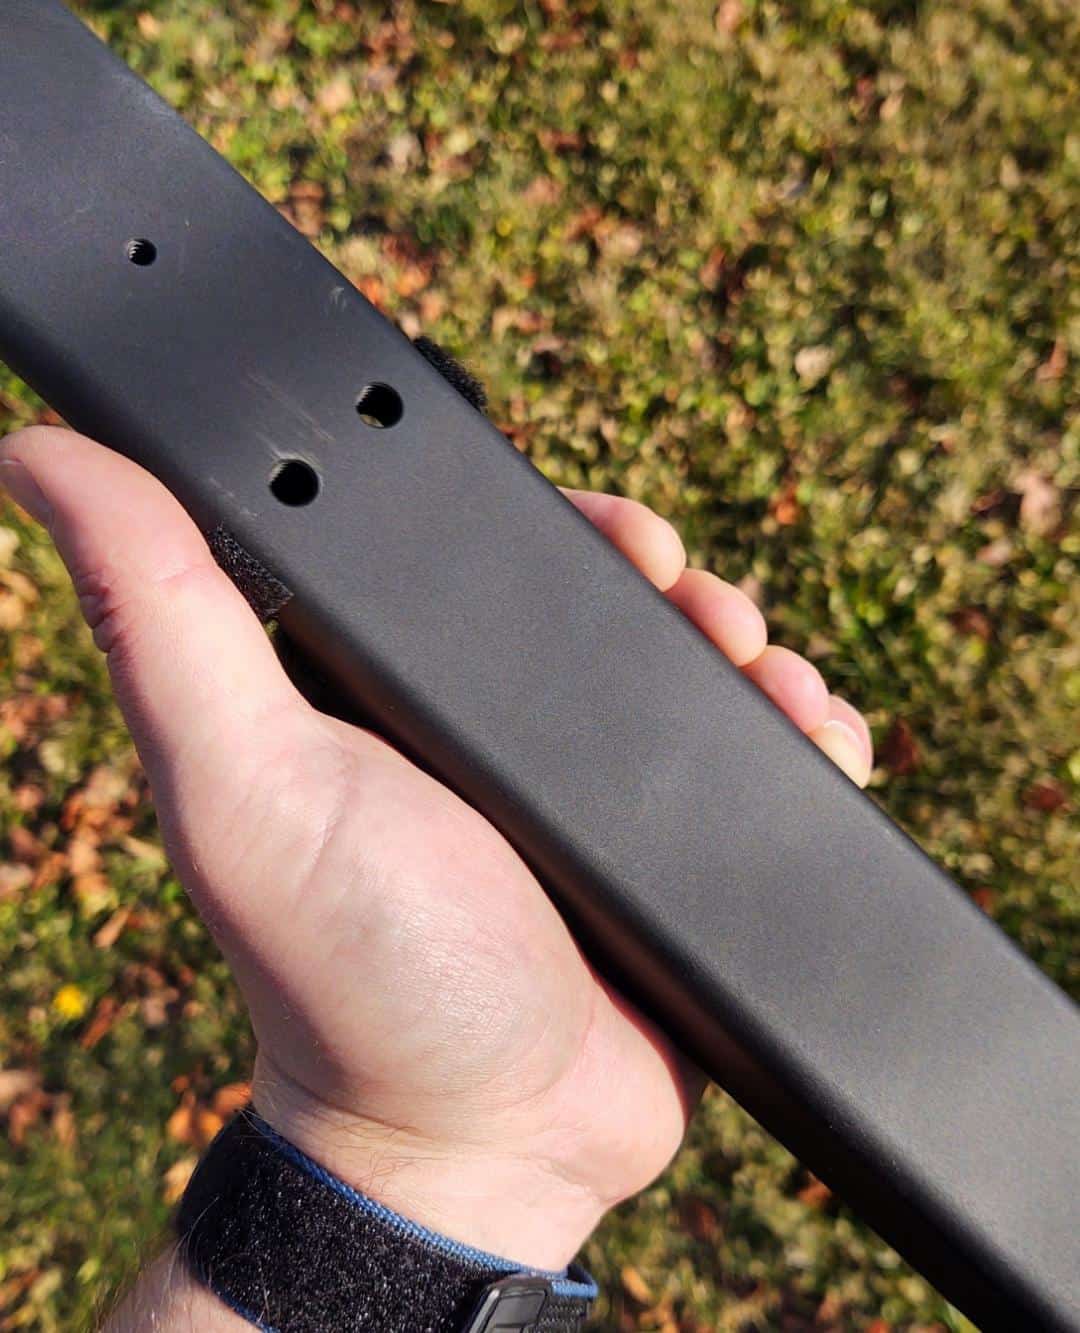
The riser on the Ranger is a piece of bare rectangular metal. Just by looking at it, I did not think it was going to be comfortable to hold but oddly enough it fit very well in my hand.
The rounded frame provides just enough surface area that the edges did not dig into my hand while carrying or even when I was drawing the bow.
The large frame also provides a lot of stability in the hand, creating more comfort when holding the bowstring back under tension and for more accurate shot placement.
Target Practice!
Okay, so most people probably want to know how the Ranger shoots, and please remember that this does depend a lot on the shooter.
As you may be able to tell, I am already starting to make excuses for my shot placement!
The limbs on the Ranger I tested are in 45# so I chose to practice my shooting at ten yards and twenty yards.
I did not install an arrow rest but instead shot off my hand and the smoothness of drawing the bowstring and releasing an arrow was fantastic!
I took approximately ten practice shots before deciding to snap a few photos. The first one is the ten-yard grouping. The second one is the twenty-yard grouping.

Here is the ten-yard grouping 
Here is the twenty-yard grouping.
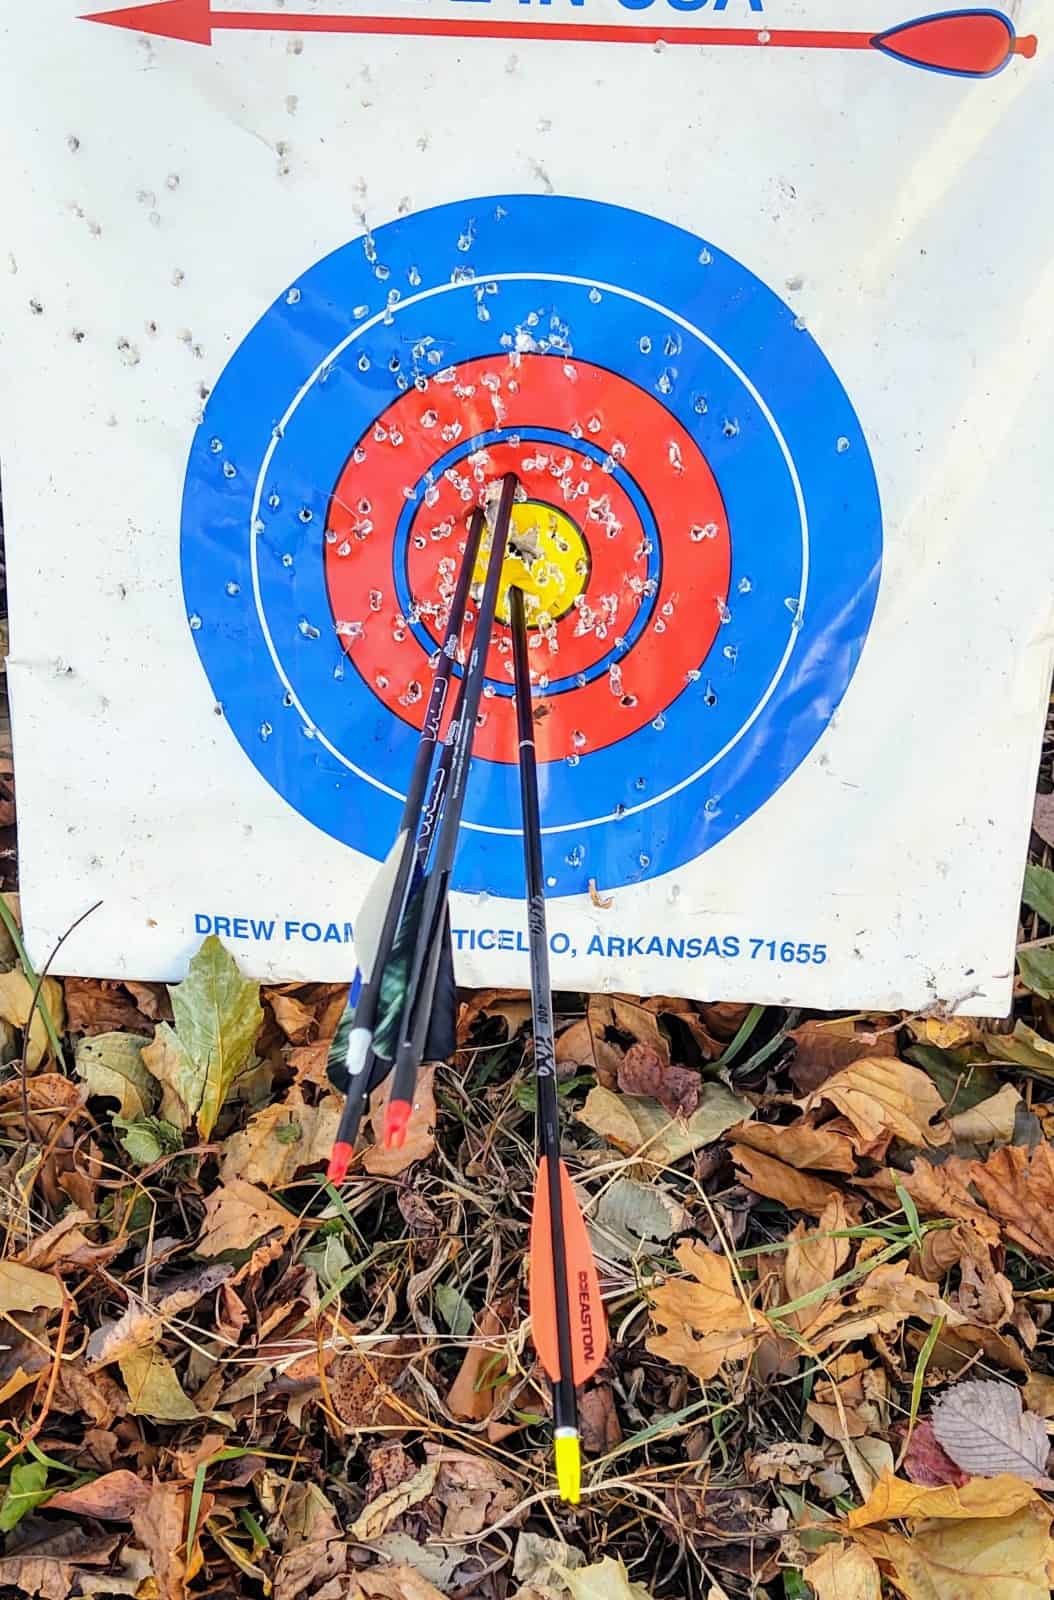

The above pictures were not all of the shots that I took and not every arrow hit dead center.
But considering that this was day one of me shooting the Ranger, I do not think they were too bad!
However, the out-laying shots are not the fault of the Ranger but of me becoming comfortable with a new tool and developing muscle memory.
In the short time I have shot this bow I am confident that those groupings will only become better.
The rather large seeming riser of the Ranger was incredibly comfortable and when I pulled the string back, I was intensely at ease in both my grip on the bow and the arrow alignment with the target. I was also duly impressed with how quiet the operation of the Ranger was.
I have shot longbows, crossbows, and compound bows with all sorts of attachments.
There is something so satisfying about archery when shooting a setup that is nothing more than a bow, a string, an arrow, and you hit your target.
I think that is ultimately what the Ranger offers. Simplicity and effectiveness.
Time Test
Seeing how quickly the bow could be assembled and disassembled is not necessarily an important factor but it was something I was certainly curious about.
With the bow completely wrapped up and put away in my pack I slung the bag over my shoulder and started my stopwatch.
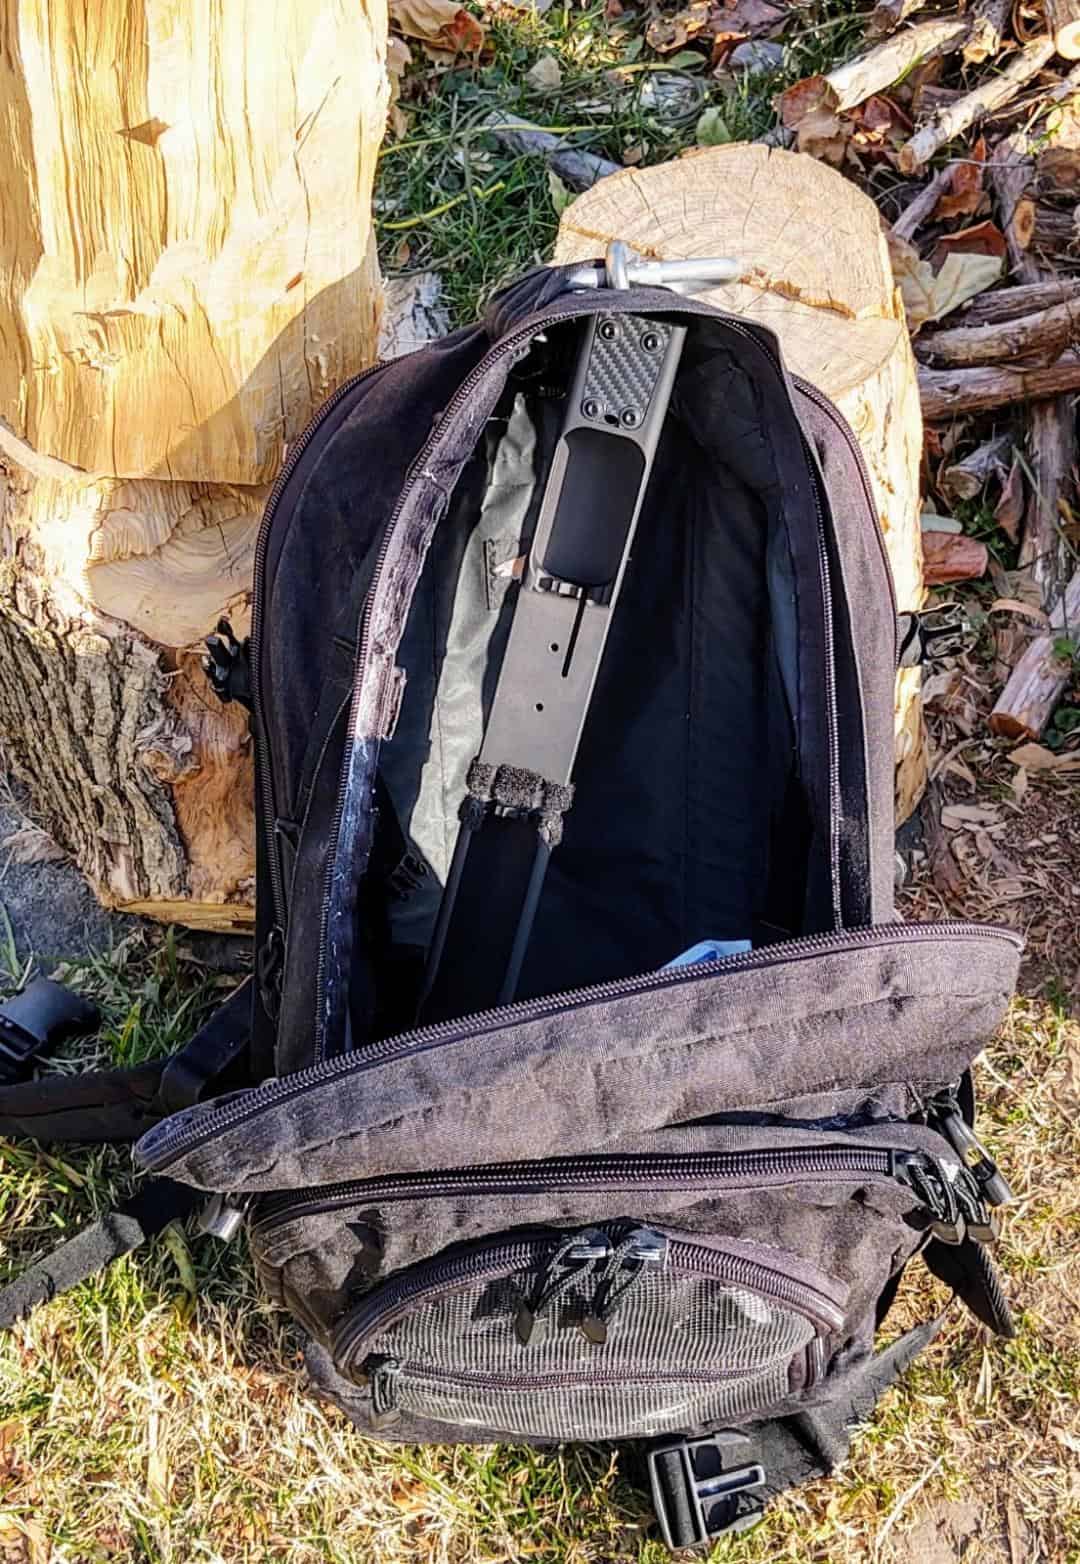
I removed the bag, unstrapped the Velcro, dumped out the takedown arrows, inserted the limbs, attached the string, and put together an arrow in under one minute.


Roughly the same time frame was marked for disassembling and packing away the bow.
Say what you will about the need for this test, but I think it is pretty impressive that this can be done with a bow of this size and design without any tools.
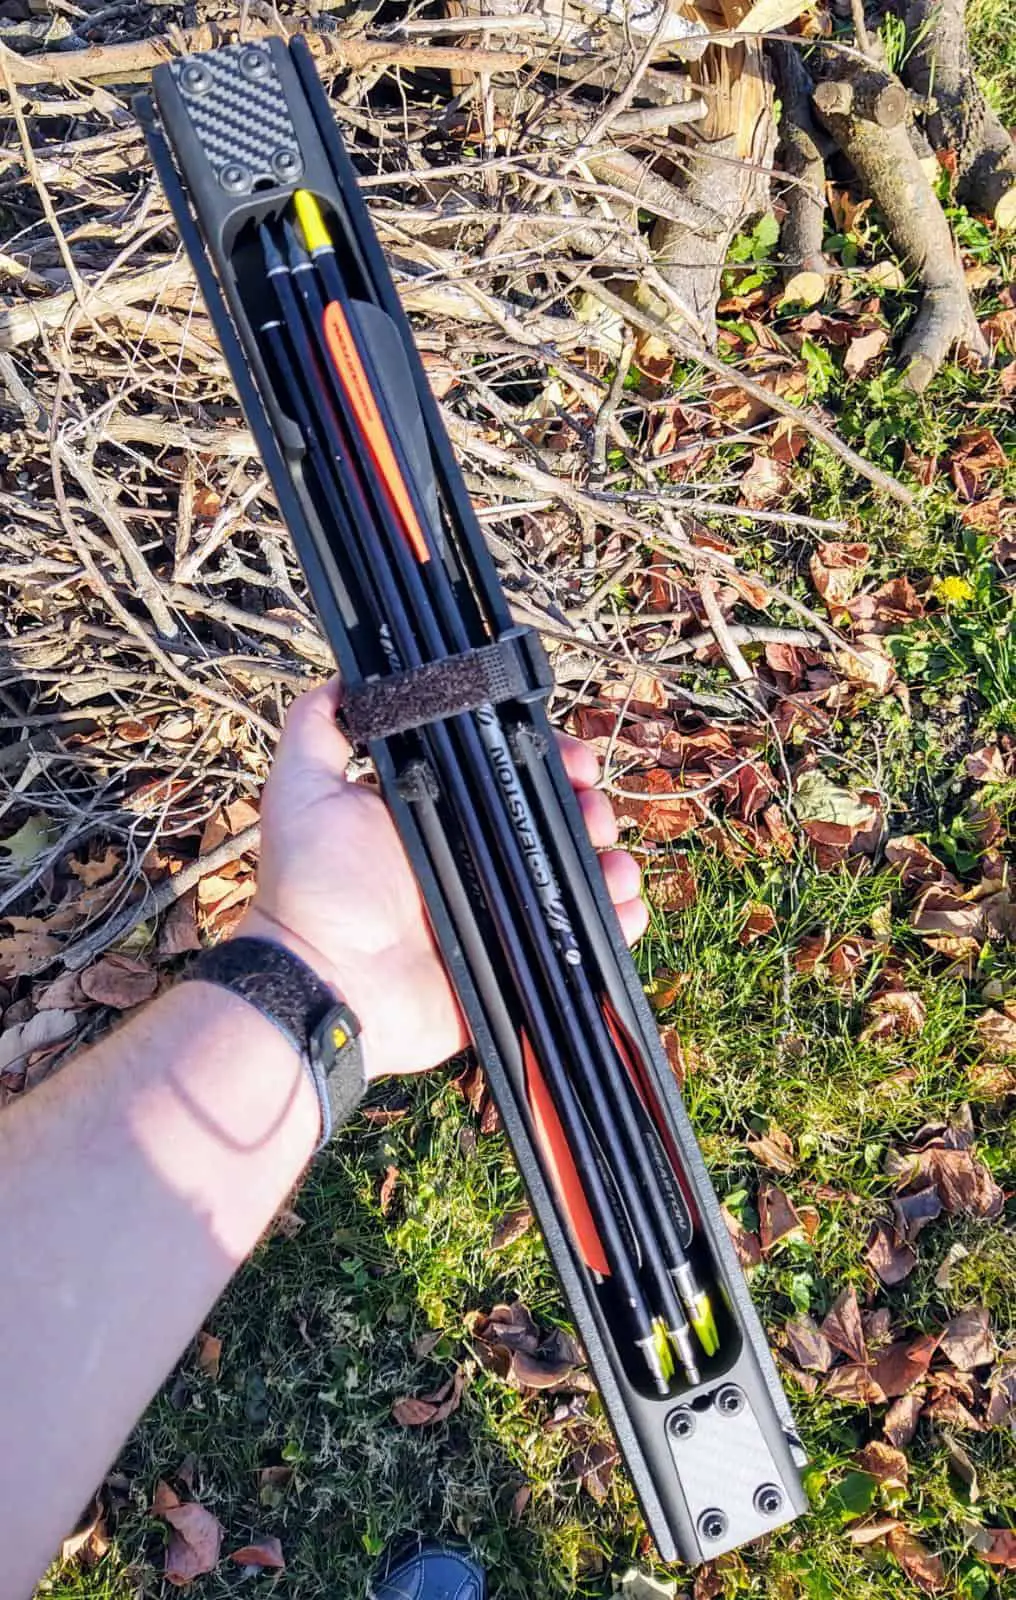
My Favorite Feature!
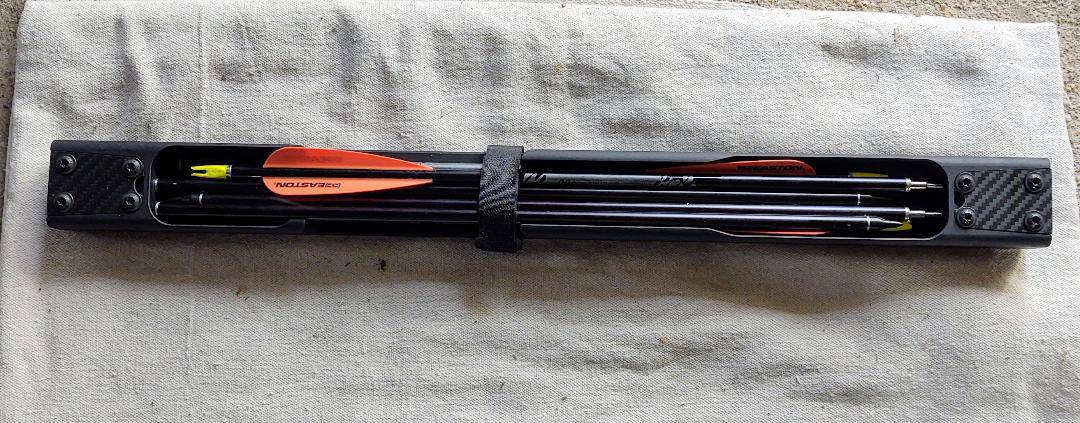
Other than the Ranger packing down to 22″ in length and three takedown arrows being able to be stored in the riser, which is pretty cool, my favorite feature is the interchangeable limbs.
The Ranger that I currently have has 45# limbs.
But at some point, if I want to increase to 55#, all I need to do is order the limbs and insert them into the riser I already have.
This is a great feature because I can swap out different sets of limbs depending on what I want to use the bow for, and the same riser can be used for different members of a family.
So, let’s say I want to shoot 55# but my wife wants to shoot #45. I do not have to purchase two separate bows, only the different limbs. This makes the Ranger very economical for a family or group of shooters.
At A Glance
Below is a quick reference table of the Ranger. All specifications were taken from the SAS site.
| Weight | 2.6 pounds |
| Assembled length | 60” |
| Disassembled length | 22” |
| Limb options | 40#,45#,50#,55# |
| Max draw length | 31″ |
| Brace height | 7.5″-8.5″ |
| Center-cut | 0.2″ from center |
| Riser length | 22″ |
| Ambidextrous | Right or left-handed |
| Riser material | 6061 T6 aluminum |
| Limb material | High tech composite fiber |
| Hardware | 316 stainless steel |
| Bowstring | B50 Dacron 16 strand |
| What is included | Riser, limbs, string, nock, Velcro padding, Velcro strap, owners-manual |
| Arrows | Not included |
Pros
- Lightweight and extremely compact
- 22″ riser means the bow can be packed away in most outdoor day packs
- Silent in operation and when being carried
- Requires no tools to assemble or disassemble
- Threads are available in the riser that allows for attachments, like sights or a quiver
- Three takedown arrows fit inside the riser
- Incredible quality at an affordable price
- One riser can be used with different sets of limbs
Cons
- I rarely say this, but at the time of writing this article I do not have any negative comments about the Ranger…yeah it’s that good.
Verdict
Though simple in appearance, SAS did a fantastic job of designing this takedown bow.
The Ranger is easily carried or packed when broken down, can be assembled in under a minute, requires no tools, three arrows fit inside the riser, and as far as bows go it is quite affordable. I mean how much better can it get?
Do I like the Ranger?
Yes, I do.
Do I recommend the Ranger?
Yes, I do. This is one sweet setup of a bow that would make a great addition to anyone’s outdoor toolbox.
Thanks for reading and keep shooting straight!
What are your thoughts on takedown bows? Sound off in the comment section below and let us know!

