For those of us that still consider revolvers to be serious tools for everyday use (there are still a few of us, believe it or not), the Smith & Wesson revolver platform is a brilliant tool. Though Smith & Wesson introduced what we now recognize as a modern revolver in the last year of the 19th century with the Model of 1899 – the first “K” frame – the design has really not changed 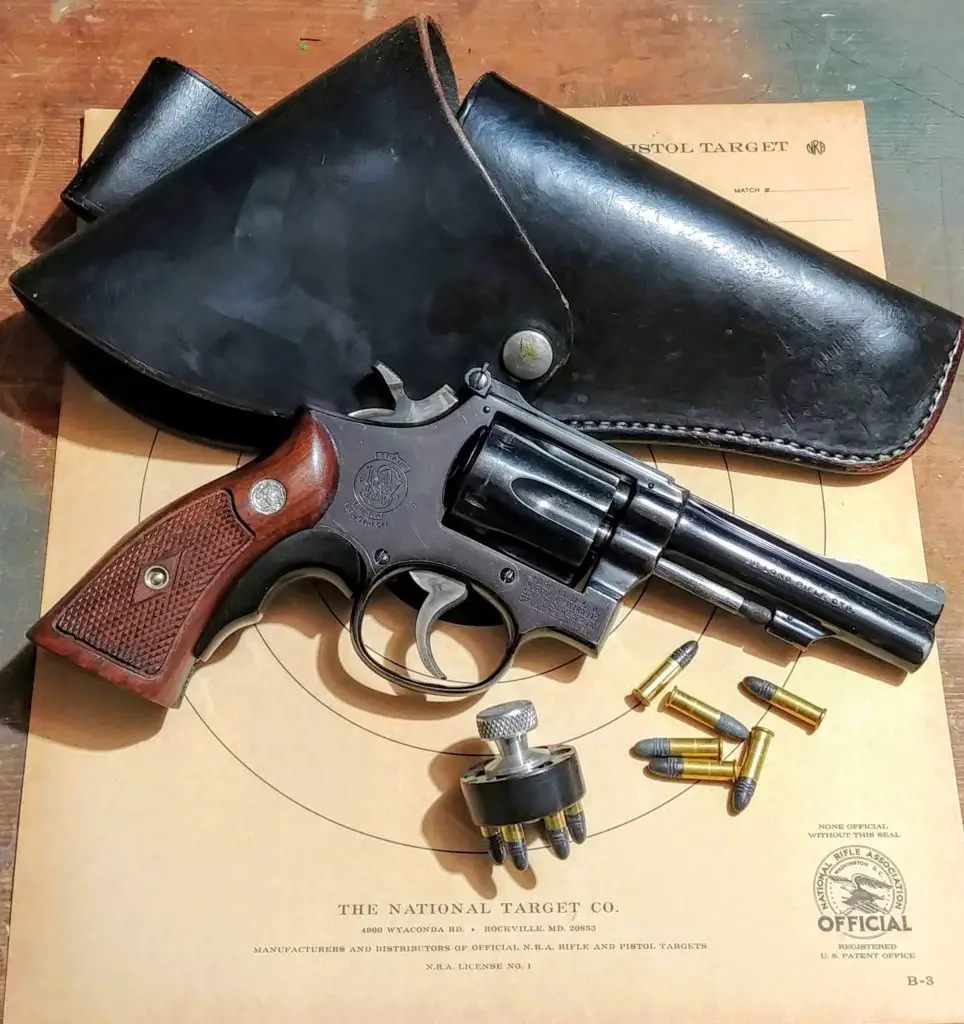
However, the simplicity innate with a century-and-a-quarter old revolver design means that any buffoonish troglodyte with a screwdriver and a Dremel tool can break into a Smith & Wesson revolver and wreak havoc in the name of improving the action – an action that is universally known for its smooth operation. In just a few minutes, a shadetree gunsmith could achieve a grim pile of steel particles, a couple coil spring clippings – and a dangerously lightened trigger pull.
Unfortunately, our subject revolver – a .22 LR S&W Model 18-3 manufactured in 1969 – had been cracked open by an enthusiastic-but-sadly-dim previous owner and subsequently developed multiple issues. Both the double-action and single-action trigger pulls had been doctored, with very light – meaning unsafe! – operation. I am not in possession of a trigger pull gauge, but this revolver had, by far, the lightest trigger pulls of any of the S&W wheelguns 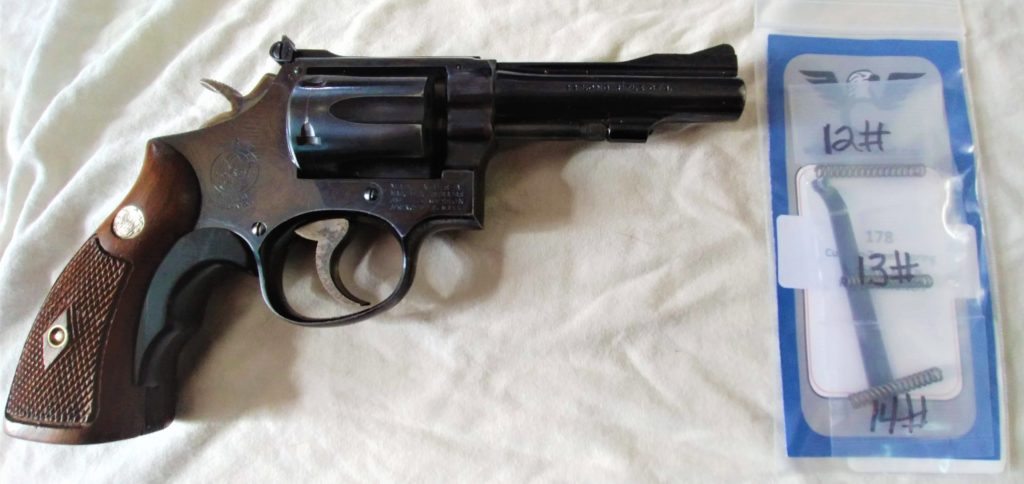
Here’s a video I took demonstrating hammer push-off with my Model 18.
Many manufacturers – Wolff, Brownells, Apex, Bang, Wilson Combat (and probably others) make tune-up spring kits for Smith & Wesson revolvers. Wolff had always been my go-to, but I wanted to mix things up and try a new system. I’d previously used Wilson Combat 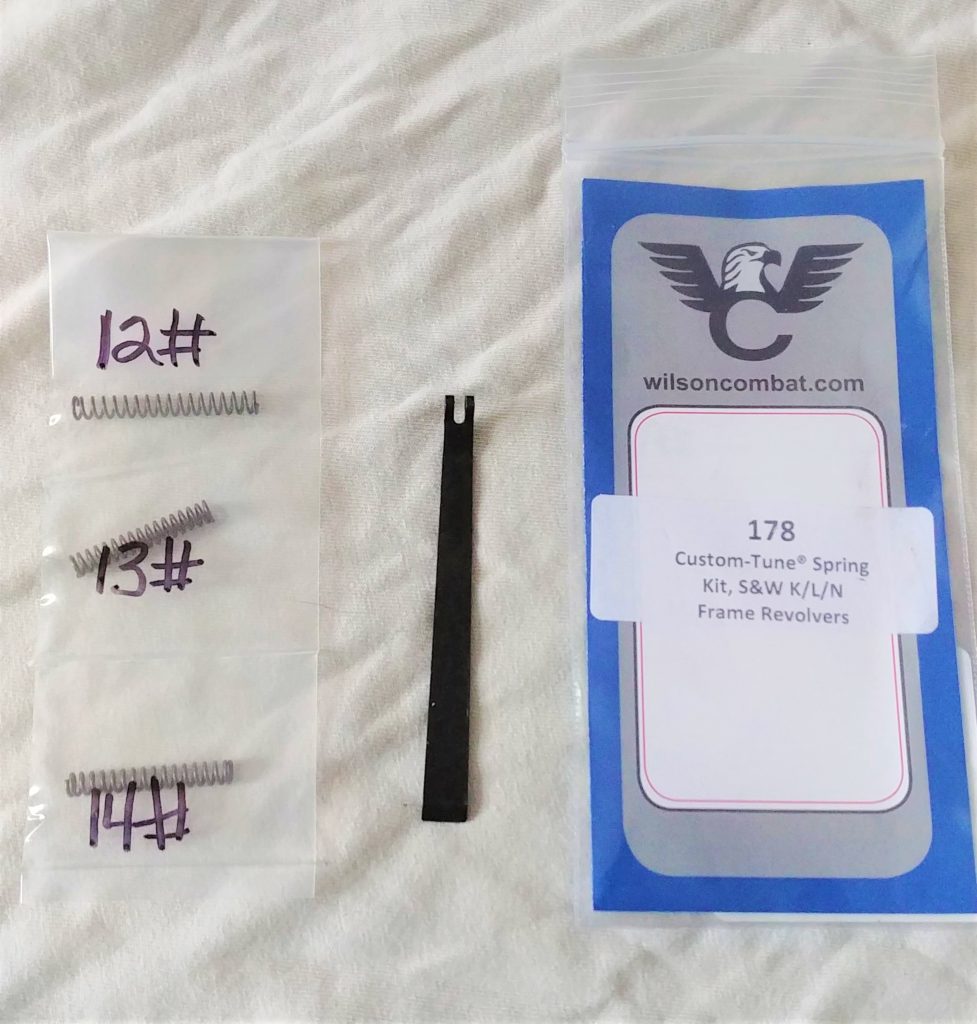
SKIP AHEAD
I’m not a Gunsmith, but I play one on YouTube
I have been shooting and working on Smith & Wesson revolvers for more than 20 years, so the following parts replacement is second nature to me. However, if you should desire trying to change your own parts to help dial in your Smith & Wesson wheelgun, there are several YouTube videos that skillfully show how to pull the sideplate and disassemble these revolvers. I found this video to be decent, though I never, ever pry against the frame or any other parts to disassemble; to remove the sideplate, I always use the plastic handle end of a screwdriver and rap the grip frame sharply. This pops the sideplate off the gun easily and avoids deforming or burring the finely machined innards of the pistol.
Working on a firearm with your own two hands is, in my opinion, one of life’s finer pleasures. However, if you deem the skill level required to be beyond what you possess, bring your pistol to a gunsmith. What I’m describing below with the new springs is straight parts replacement that any ‘smith worth his salt should be able to accomplish in very short order. This straight remove & replace job took me just about 15 minutes, even with a bit of spring testing and swapping.
Replacing the Springs
As stated before, the Wilson Combat spring kit provides a replacement mainspring and several replacement trigger return springs. These are the two major springs that live in a Smith revolver, and like any spring, they need to be replaced every few thousand 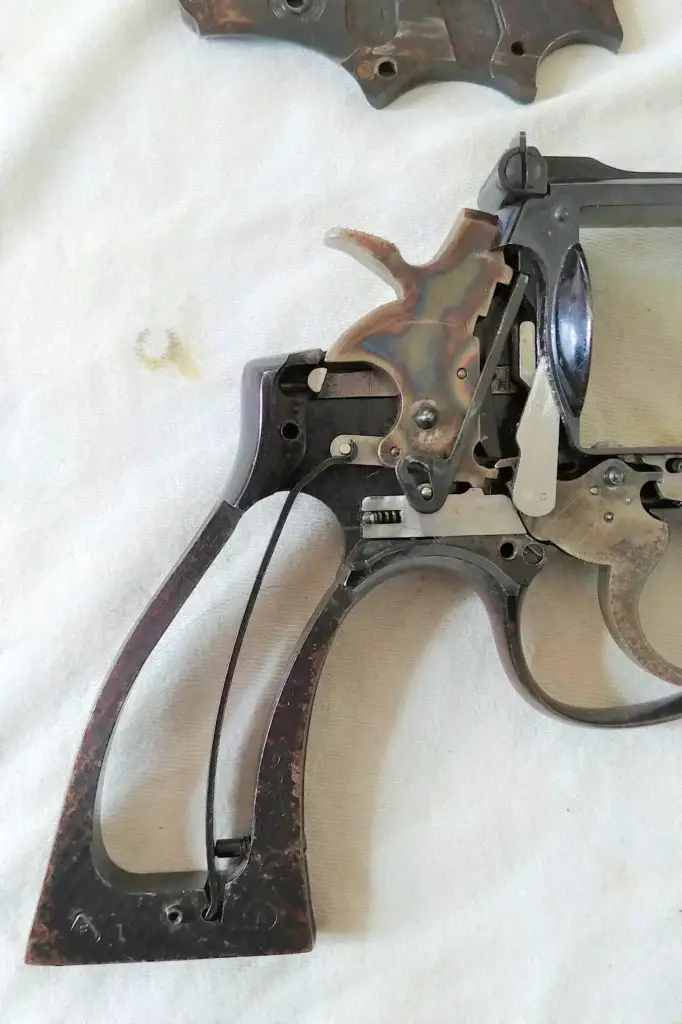
In a Smith & Wesson K, L, or N-frame revolver, the flat mainspring lives in the grip frame. The mainspring is held into the frame via a tension screw, and interacts with the hammer at the upper end. The mainspring’s tension provides power to the hammer to set off ammunition, but also generates stacking force that adds weight to the trigger pull. Therefore, working the mainspring is usually the easiest way to provide a lighter, smoother trigger pull on a S&W revolver. This means that some enterprising rotary tool owners have been found guilty of heating and bending or grinding meat off the mainspring in lieu of spending the paltry few dollars for a reduced power mainspring. This sorry excuse for gunsmithing usually results in a severely weakened mainspring that breaks/deflects when needed most or is incapable of reliably setting off ammunition. Spend the money, get the correct part.
Also read: Survival Gear Review: Kraft Holsters
The OEM mainspring in my Model 18 hadn’t been fooled with that I could tell, but due to the revolver’s vintage and modicum of wear, I decided to play it safe and replace with the new Wilson Combat piece. The new blued spring steel mainspring had a slightly different 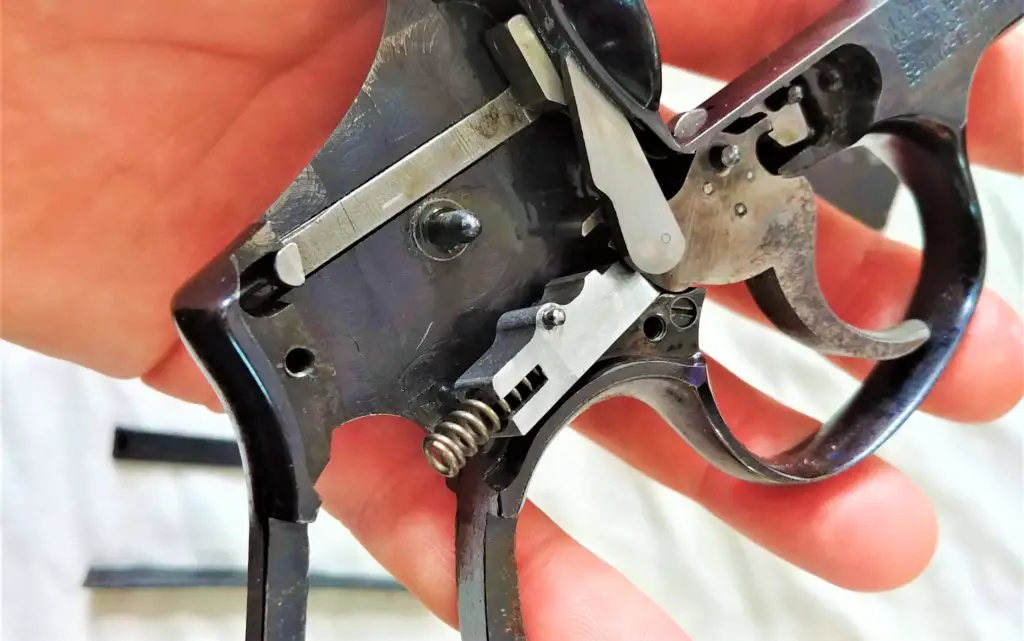
The trigger rebound spring is substantially more frustrating to get to and replace than the mainspring, so it may yet remain untouched in your revolver. However, it’s not THAT hard to replace, so you may dig into the innards and find that the spring has had a couple coils clipped off in the tireless search for lessened double-action trigger pull weight. The trigger rebound spring provides the impetus for the trigger to return to its forward position after being pulled, so it makes sense that the trigger pull could be lessened by reducing spring force – usually accomplished by the uneducated via clipping coils off the spring. While this can indeed work (providing too many coils aren’t cut), it’s far from the correct way to accomplish this mission, especially when new springs are available
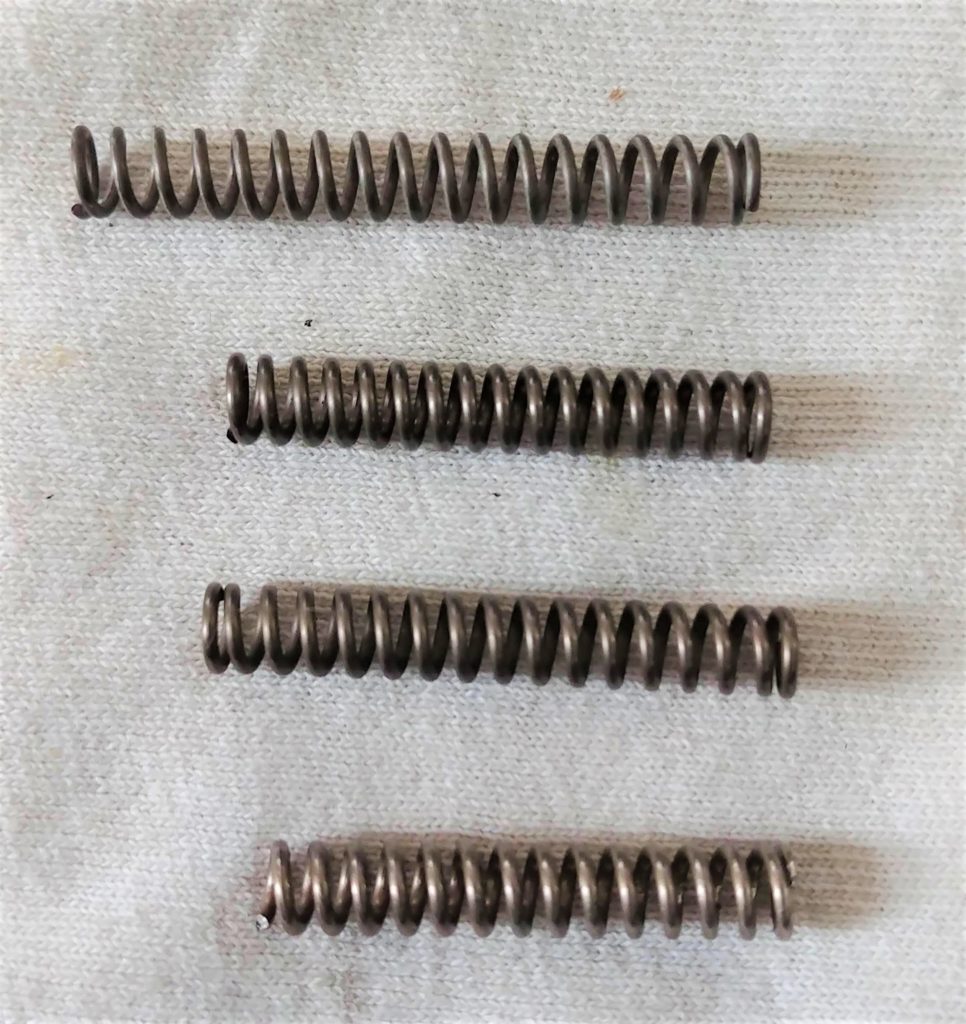
Original clipped rebound spring at bottom; replacement Wilson Combat springs above.
in differing weights that allow the pull to be tuned to the user’s liking. However, lighter weight rebound springs can have a tradeoff – the trigger may return to its forward position sluggishly, impeding reliability and fast follow-up shots; definitely not Jerry Mikulek approved.
The Wilson Combat kit provided three different rebound spring weights – namely 12-, 13-, and 14-pound weights. The higher the weight, the stiffer the resistance to the double-action trigger pull, and the more positive and energetic the trigger reset. Knowing the original factory spring weight is right around 17 pounds, I started with the middle weight 13-pound spring. While the new DA pull played nicer than the original spring’s clipped coils could manage, it was still a touch too light. I swapped out for the 14 pound pull spring and found it quite satisfactory – very smooth with no grittiness or weight stacking, with a snappy trigger return. Perfect.
Getting Past the Easy Part
Once the final screws were tightened and the revolver was function checked, a quick run to the sandpit confirmed a nice crisp DA trigger pull, with 100% positive ignition over several different manufacturers of ammo. The “reduced power” mainspring had me cringing just a bit in concept – nobody likes to think guns they rely upon have light hammer strikes – but when the reliability proved to be absolute I was happy. The easy part of the project – spring swapping – was complete and a winner. On to the advanced portion of our project.
Addressing the hammer push-off was a whole new kettle of fish. With a hammer push-off situation, the areas where the hammer and trigger engage each other have metal missing. This missing metal can have disappeared through sheer wear, tear, and use – or, it can become evicted by some goober with a bastard file not having the slightest inkling on how to cut sears.
Related: Survival Gear Review: Ruger Alaskan
When an accomplished gunsmith polishes S&W revolver single action sears in the search for a stellar, glass-rod-breaking trigger pull, usually Arkansas stones are utilized to square up the engagement surfaces. When two sharp, square edges are attained on the respective hammer and trigger sears, the trigger breaks cleanly and crispy, since the two surfaces can disengage from each other evenly and immediately. If the engagement points are rounded, uneven, or beveled, the hammer disengages from the trigger in a sliding, wishy-washy sort of way that will leave you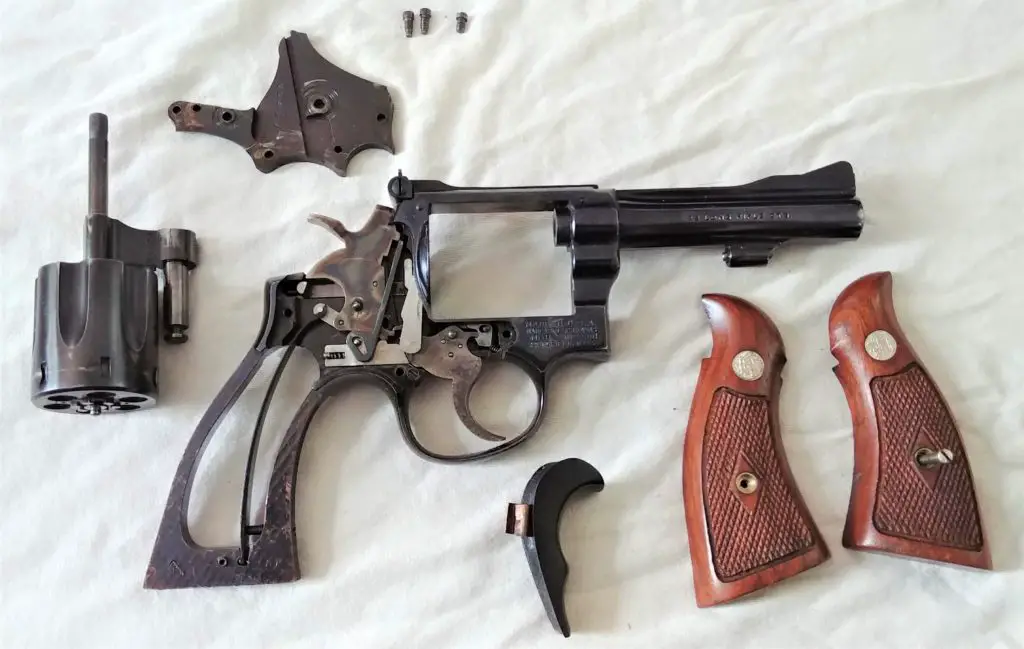
The options on the table for me were: new hammer and trigger and the subsequent cost and time sourcing and probably fitting these parts, or taking an evening and attempting to clean up the existing parts. Since it didn’t cost anything and I had nothing to lose, I chose option B.
The hammer and trigger were pulled out of the Model 18 – again – and set up in my bench vice to keep them at a comfortable working angle for me. Gingerly, I used polishing stones to slowly square up the mating surfaces. A lot of trial and error is involved here, since I only wanted to remove enough metal to get the job done. I would make a few slow passes with the stones, then carefully install them in the gun to check for adequate engagement.
A couple hours of tedious work passed, and I eventually found that the existing parts likely couldn’t be made fresh and new(ish) again. I gave it a go, but in the end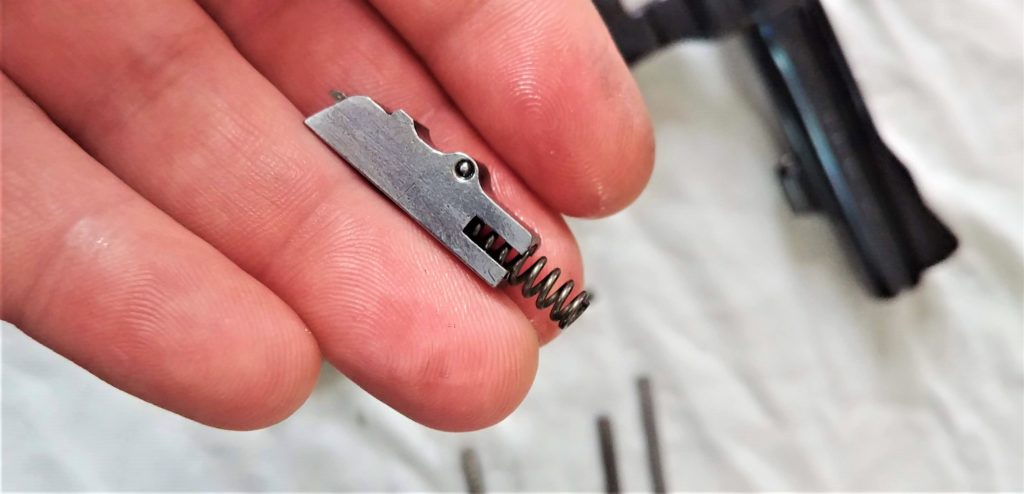
Fortunately, I have a Smith & Wesson Model 17 – also referred to as the K-22 Outdoorsman – which is the heavy-barreled, 6” brethren to my 4” barrelled Model 18. The two guns were both of late 60’s vintage and both based on Smith & Wesson’s K-frame, so parts would be a direct swap-out. Before I started polishing the hammer and trigger of the 18, I did attempt to play with the puzzle pieces to see if I could interchange just one of the components gun-to-gun and have things work fine. Alas, though I tried the hammer from the Model 17 with the Model 18 trigger, and the 18 hammer with the 17 trigger, every combination still resulted in hammer push-off, confirming to me that both of the original Model 18 pieces were FUBAR. So in the long run, I decided that the 18 would be used much more frequently than the 17, and just popped the K-22 hammer and trigger in my 18 to produce a nice safe revolver.
On the fortunate side (for me at least), I know people that have some S&W parts available, including a new trigger and possibly a new-but-rare rimfire hammer so that I can get my 17 up and running properly again. If not, Numrich Arms currently has replacement parts in stock that I can exchange directly for money, so that is an option for when I feel like shooting the K-22 again. But until them, my beloved Smith & Wesson Model 18 is back up to speed with a lovely, smooth and most importantly safe operation.
Don’t Try This At Home, Kids…
As stated in the introduction, the Smith & Wesson revolver is a stellar piece of machinery that offers smooth operation, reliability, and (usually) very fine accuracy to the end user. But beware the Bubba that may have come before you when buying used – especially vintage – S&W wheelguns. And if you want to try your hand at Smith smithing, start small, and learn the proper disassembly of the gun first. Then go for swapping the mainspring and trigger rebound spring; these two springs being swapped for tuned aftermarket parts will usually get you where you’re looking to go. But if you start getting the fingers twitching towards the Dremel and the wire cutters, use good, common sense and bring your pistol to a seasoned, respected gunsmith to have the job done properly. You’ll have a properly functioning and safe firearm that will keep you properly functioning and safe when it’s needed to be there for you.
Thoughts? Concerns? Questions? Sound off in the comments below!
