Years ago, the drill-and-tap method was the only reliable way to mount a rifle scope. The top receiver of the rifle was drilled to match the hole pattern on the rifle scope mounts. These holes were then tapped with the proper threads for the mounting screws.
This was a secure and reliable method that is still in use today. However, mounting riflescopes has become much easier with the advent of Weaver and Picatinny rail mounting systems.
A Picatinny rail mount for a rifle scope is also known as the MIL-STD 1913 rail or a STANAG 2234 rail.
The Picatinny rail system is a military specification based on a Weaver scope mount that provides a standardized method of attaching optics and other accessories to a firearm. The Picatinny rail mounting system is today’s most popular accessory mounting system used on firearms.
Developing the Picatinny rail system standardized mounting systems across the military platforms. Optics were affected, as were iron sights, light systems, laser aiming modules, night visions, and others who benefitted from this standard mounting system. The Picatinny rail system quickly found its way into the civilian market, and most shooters never looked back.
SKIP AHEAD
Picatinny Vs. Weaver
The Picatinny rail system was built on the older Weaver commercial rail system for mounting scopes on rifles. The basic development of the upgraded mount system was done at the Picatinny Arsenal in New Jersey. Designers at the Picatinny Arsenal compared the measurements and designs of approximately 20 Weaver scope mounts available on the open market.
Using the measurements from these commercially available scope mounts, the team at the Picatinny Arsenal developed a scope mounting system based on the averages of the measurements. The specification was eventually published as MIL_STD 1913 in 1995.
The Weaver Rail
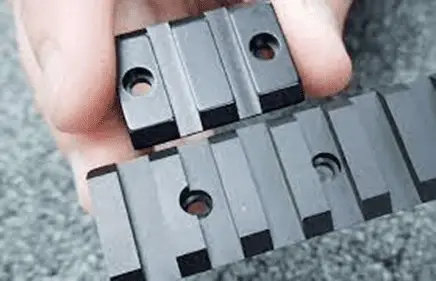
The Weaver rail system was designed around a low, wide dovetail. The Picatinny system is more angular and gives the rail cross-section more girth to better support heavier rail-mounted accessories and optics.
The size and shapes of the slots machined into the rail section are also slightly larger with flat bottom slots. Older Weaver accessories may fit into a modern Picatinny rail system, but the opposite mounts designed for a Picatinny rail will not fit a Weaver-style rail.
Since 2012, most manufacturers have begun using Picatinny rail mount systems that adhere to the U.S. Military standard.
One advantage of the Picatinny system is its ability to securely mount an accessory with a single spring-loaded retaining pin to the Picatinny rail. This system provides a solid rest and secure hold on the accessory when properly tightened.
Mounting Your New Rifle Scope to Your Rifle
How you mount your new rifle scope on a Picatinny rail on your rifle depends greatly on your shooting style and expectations. There is a big difference between mounting a rifle’s scope on an AR-15 platform and an expensive bolt action sporting rifle.
Before you begin mounting your new scope, there are a few things to consider about your scope mounts, rings, and the scope you have chosen. Making a few decisions before you start and ensuring that you have the right size parts is critical to a smooth scope mount project.
These tips can help remove some of the frustration accompanying a scope-mounting project.
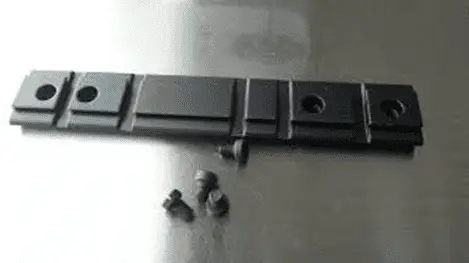
Choose your Ring and Base Design
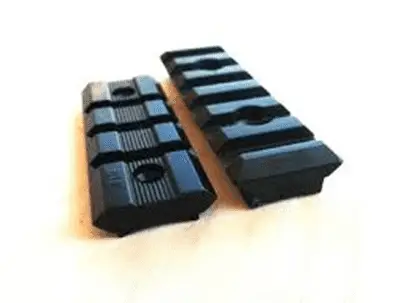
Before you can mount your scope, you need the scope mount base and rings to fit your scope. Some various styles and designs give you a lot of flexibility in where and how you mount your scope to your rifle. Picking the right scope mount base and rings is important in ensuring your scope gives you the best possible service on your rifle. The most popular styles of scope mount rings and bases include:
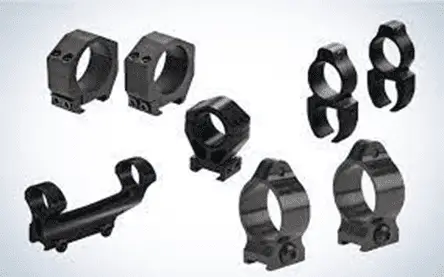
- One-piece scope mounts and rings.
- Standard two-piece ring sets with integrated Picatinny mounts.
- Cantilever integrated rings and mounts
- Quick detach base mount systems
If you select your scope base mount and rings properly, any of these styles and types of rings and mounts offer secure and precise mounting for your new scope. Each offers its own set of advantages and disadvantages that should be considered carefully before making your final decision.
Get the Right Sized Rings
Scope manufacturers use a variety of different tube sizes for their scopes. The most popular sizes include 30mm, one inch, and 34 mm scope tube diameters. The correct size rings are important when you mount a rifle scope.
A few scopes may have odd-sized tubes. Double-check your mounting hardware to ensure that the ring diameters match your scope’s tube diameter.

Select High-Quality Rings and Mounts
Don’t skimp on your rings and mount bases. You have put a lot of work and thought into selecting your rifle. You may have spent as much on the scope as you spent on the firearm. Why would you put the cheapest piece of metal you can find between the scope and your rifle’s receiver?
Your scope rings and mounts should be made of the best materials. The machining should be to the same sorts of tolerances as the parts of your scope and your file. If you want the best possible performance from your rifle and scope, the parts that hold them together are the key.
Prepare Properly to Mount Your Scope
When getting ready to mount your new scope, your work location is the last thing most shooters stop to consider. Properly mounting and aligning a new scope is a relatively precise operation and should not be a daunting task. The place you choose to do your work can greatly influence how well the project outcome meets your expectations.
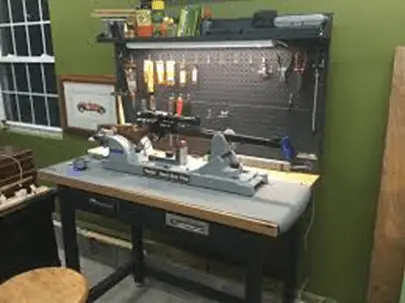
Generally speaking, you should consider a few things as you choose your work space when preparing to mount a new scope on your rifle:
- The workspace should be large enough to hold the rifle securely and allow you room to spread out tools and parts without interference.
- Good lighting is important.
- The workspace should be flat and level.
All in all, I have seen successful scope installations done on garage workbenches and dining room tables. You can make these places fit your needs, but having a dedicated workbench somewhere comfortable is a much better choice.
The Mounting Process
Once you have your rifle, scope, mounts, and a good place to work, you are ready to begin your project. There are still a few things to do before you start putting screws in holes. Some basic and fundamental things should accompany every gun-related project you perform.
Work Safe
Before you do anything else, unload your rifle and ensure it is in a safe condition. We strongly suggest that all ammunition be stored in a separate room from your gunsmithing workspace. Keeping lie ammunition segregated from working firearms is the best way to prevent accidents.

We also recommend that you use personal safety equipment at all times. In particular, eye protection is a must when working on firearms. A good pair of safety glasses can be the difference between long years of active shooting and a dangerous accident.
Gather All Your Tools First
Before you open the box that holds your new scope mounts, gather all the necessary tools and equipment suggested by the scope mount manufacturer.
Having everything you need close at hand will reduce frustration and lessen the temptation to use an inappropriate tool. The wrong tool at the wrong time can lead to damage that can frustrate even the best gunsmith. In general, we suggest that you have on hand the following tools.
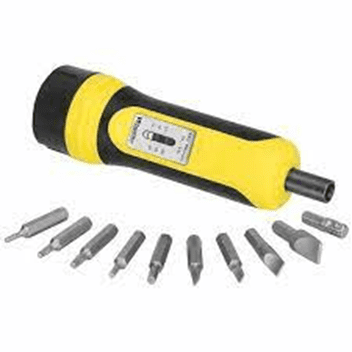
- A torque wrench and a complete set of bits for the wrench.
- A scope leveling kit, including bubble levels or a scope level. Your leveling kit may also include the equipment to lap your rings for an even more precise mount.
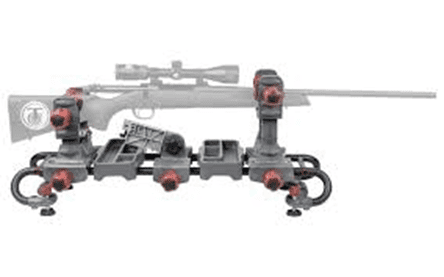
- A gun vice or sled is imperative. Your rifle must be properly secured. Your rifle must be straight and level to ensure that your scope is mounted precisely. A gun vice is a good choice for this.
- A good set of gunsmith-type screwdrivers and bits. The exact screwdriver or bit for the fasteners accompanying your ring mounts and scope eliminates problems when you mount a rifle scope.
Never underestimate the importance of the right tool for the job. A poor tool choice almost always results in damage to your project that leaves you with a feeling of a job poorly done. Investing in a good set of tools that match the jobs you perform can leave you with a professional installation and a feeling of pride in your work.
Putting it All Together – Mounting the Scope
With all the pre-work and decisions made, it is time to start mounting your new scope on the Picatinny rail on your rifle. Remember to work methodically and carefully. The time you take in the installation will pay off in the future in accuracy and precision.
Step 1: Prepare your Rifle – Straight and Level is the Key
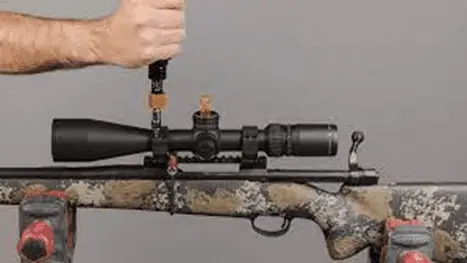
With all the prep work done, the first step is to clamp your rifle into some suitable device that will hold it straight and level as you install the mounts. It is important to ensure that your rifle is horizontal and perpendicular on its axis.
Clamp your rifle into your vice or sled just tight enough to keep the rifle in position. Use the bubble levels in your kit to level the rifle lengthwise. Using a magnetic bubble level on the Picatinny rail on the receiver is the best way to get things straight. Once you are level on the long axis, use the bubble level to ensure that the receiver is perpendicular to the ground.

Tighten the clamps to keep the rifle from moving and then check the levels once again just to make sure nothing moved.
Step 2: Position the Mounts and Rings
Carefully place the mounts and rings in their approximate position. Set the scope in the lower half of the rings. Now is the time to position the scope for the proper eye relief. Once you have the scope in the right position for the correct eye relief distance, ensure that the scope rings sit properly on the scope tube.

The rings should be centered on the scope tube on the east side of the windage and the elevation box in the scope center. This position should give you a bit of wiggle room backward and forwards to adjust the eye relief distance to the perfect setting.
Step 3: Install the Top Rigns Halves
Gingerly install the top halves of the rings. Different manufacturers use different numbers and placements of screws to hold the rings together. Follow the manufacturer’s specifications on torquing and tightening the rings.
Before you tighten the rings completely, use a bubble level to ensure that the scope is perpendicular to the rifle. If you don’t make this adjustment, the reticle may be tilted in one direction or the other.
Step 4: Tighten the Picatinny Rail Mounts to the Rail Section
With everything in place and the scope secured to the scope rings, you should tighten the mounts to the Picatinny rail. If you use a one-piece mount, follow the manufacturer’s torque specs to secure the base to the Picatinny rail. Ring screws on most scopes and mounts should be tightened with a torque wrench.
If your mount has two rings mounted separately, carefully tighten the mounting screws or levers on the base of each ring. If the mount uses screws, use a torque wrench to tighten the mounting screws properly.
Tighten the base screws as well at this time. You can now check the final eye relief and placement of the scope.
Step 5: If All Is Well, Complete the Installation
If you are satisfied with the eye relief and the alignment of the scope and reticle, it is time to put the final touches on your scope installation. Check everything twice before adding the thread lock to the mounts. Be sure to check the eye relief by shouldering the rifle to your normal shooting position.
If you use quick detach mounts, ensure that the levers are adjusted to the manufacturer’s recommended settings and torque. If you don’t perform this check, the scope and mounts may shift while shooting or in transport.
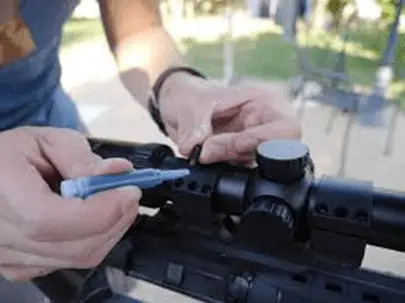
Clamp your rifle back into the vice or sled and remove one screw at a time from the rings and mounts. Apply the recommended blue Loctite to the screw and return it to its place. Make sure that you use your torque wrench to set the screws to the proper torque setting.
Work systematically around the scope rings and mounts until the threads are locked and torqued back into position. Give the blue Loctite solution a few minutes to dry and set up properly.
Step 6: Off To The Range to Zero Your Scope
All that is left is to head to the range to do the final zero on your new scope, but that is another article.
Picatinny Rail Mounts – Getting Things Straight and Level
Mounting a rifle scope on a Picatinny rail system is easy for most shooters. . The elimination of drilling and tapping mounting holes have taken most of the trepidation out of the process.
The right tools and a careful approach to the setups will almost always result in a scope mounted correctly.
